Введение
The Ninja NJ600 blender has an LED light display to help the user operate it. This guide will show how to replace one of these lights.
Выберете то, что вам нужно
-
-
Remove the five screws (13mm long, 6mm head diameter) using a Phillips #2 screwdriver.
-
-
-
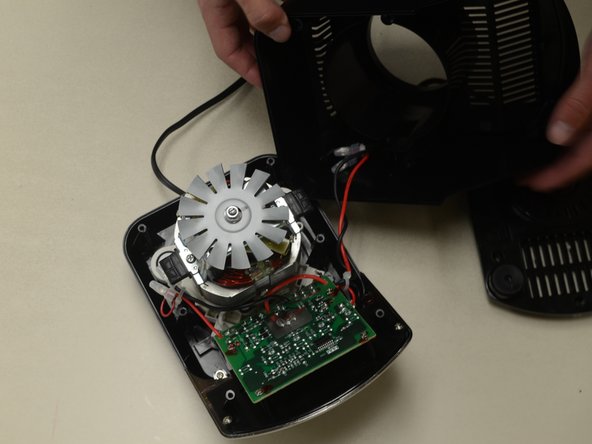
Without removing any screws, you can pull the 2nd layer free from the base. Do this now and set it down gently next to the base.
-
The power cord runs through a hole in the side of this layer. Squeeze the cord and pull it through the hole to separate the layer from the cord.
-
-
-
Using the Phillips #2 screwdriver, remove these six screws (13mm long, 6mm head diameter). Then carefully remove this layer, and rest it next to the blender base.
-
-
-
-
Remove these four screws (10mm long, 5mm head diameter) using a Phillips #2 screwdriver.
-
-
-
Using a pair of scissors or wire cutters, cut the zip tie holding these wires.
-
This will give the circuit board more range of motion.
-
-
-
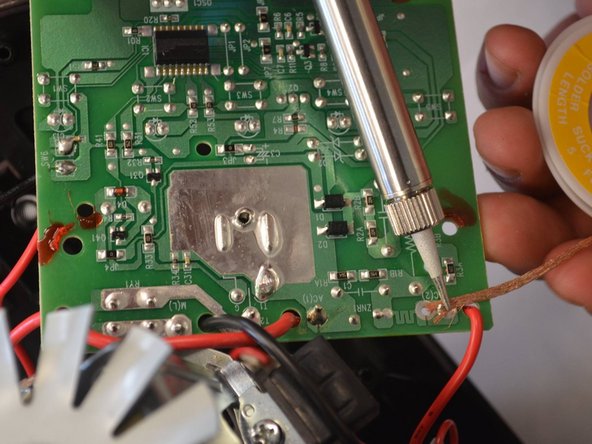
Desolder the five wires from the solder pads shown.
-
If you do not know how to do this, iFixit has a guide describing the process.
-
-
-
After the wires have cooled enough to touch, carefully slide the circuit board free of the wires.
-
NOTE: keep track of which pad each wire was soldered to. This is important for your blender to function.
-
-
-
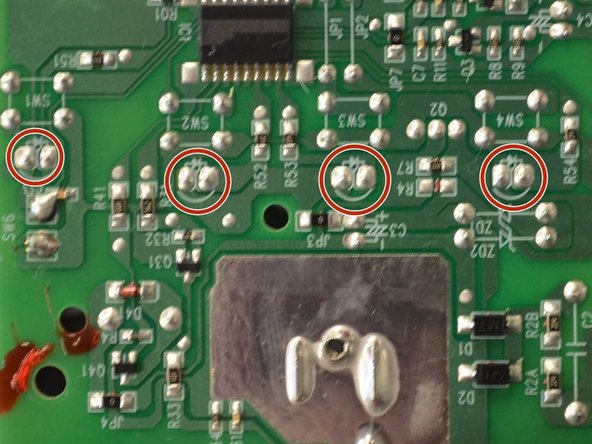
Locate the LED you wish to desolder.
-
On the bottom of the board, each LED is designated with a small triangle with a line at one tip.
-
-
-
Desolder the two LED leads, and remove the LED from the board.
-
NOTE: the LED is a diode, and requires proper orientation when installed.
-


To reassemble your device, follow these instructions in reverse order.
To reassemble your device, follow these instructions in reverse order.
Команда

Cal Poly, Team 24-2, Lancaster Spring 2015 Участник Cal Poly, Team 24-2, Lancaster Spring 2015
CPSU-LANCASTER-S15S24G2
4 членов
Автор 6 руководств