Перейти к основному содержанию

Nintendo 3DS Stylus Housing Replacement

Выберете то, что вам нужно

  1. Nintendo 3DS Stylus Housing Replacement, Back Cover: шаг 1, изображение 1 из 1
    • Unscrew the four Phillips #00 screws along the top of the back cover.

    • The screws are held in place by locking washers, and will not come out of the back cover.

    • The comments section is full of unlucky souls who will tell you that the screws here through step 4 will strip incredibly easily. Press down fairly hard, and go slow.

  2. Nintendo 3DS Stylus Housing Replacement: шаг 2, изображение 1 из 2 Nintendo 3DS Stylus Housing Replacement: шаг 2, изображение 2 из 2
    • Hold the device in one hand and turn it over.

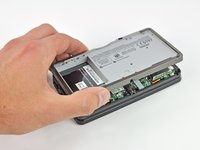
    • Grab the top edge of the back cover with your opposite hand so that the cover does not fall back into place.

    • Flip the 3DS over again so that the back cover is facing up.

    • Pull the back cover up and away from the rest of the device to remove it.

  3. Nintendo 3DS Stylus Housing Replacement, Battery: шаг 3, изображение 1 из 3 Nintendo 3DS Stylus Housing Replacement, Battery: шаг 3, изображение 2 из 3 Nintendo 3DS Stylus Housing Replacement, Battery: шаг 3, изображение 3 из 3
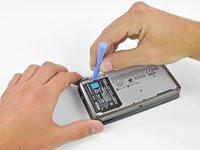
    • Insert a plastic opening tool into the notch in the lower case above the battery.

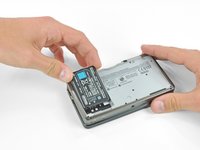
    • Pry the battery up with the plastic opening tool.

    • Grab the top edge of the battery and lift it out of the lower case.

  4. Nintendo 3DS Stylus Housing Replacement, Lower Case: шаг 4, изображение 1 из 1
    • Remove the nine 6.3 mm black Phillips screws from the lower case.

    • These screws will strip very easily unless you use the correct size bit. Apply pressure to the screws while turning to avoid stripping them.

    • Remove the 2.4 mm silver Phillips screw above the game cartridge slot.

  5. Nintendo 3DS Stylus Housing Replacement: шаг 5, изображение 1 из 3 Nintendo 3DS Stylus Housing Replacement: шаг 5, изображение 2 из 3 Nintendo 3DS Stylus Housing Replacement: шаг 5, изображение 3 из 3
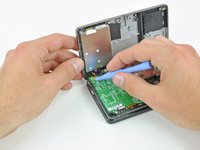
    • Lift the bottom edge of the lower case off the rest of the 3DS.

    • There are still two ribbon cables connecting the mother board to the case, so be sure not to pull the lower case all the way off.

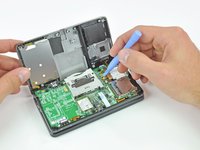
    • Use a plastic opening tool to pry the shoulder button ribbon cables off their sockets on the motherboard.

    • Remove the lower case from the device.

  6. Nintendo 3DS Stylus Housing Replacement, Stylus Housing: шаг 6, изображение 1 из 1
    • Remove the stylus from the lower case.

  7. Nintendo 3DS Stylus Housing Replacement: шаг 7, изображение 1 из 3 Nintendo 3DS Stylus Housing Replacement: шаг 7, изображение 2 из 3 Nintendo 3DS Stylus Housing Replacement: шаг 7, изображение 3 из 3
    • Remove the four 2.4 mm Phillips screws that secure the stylus housing to the lower case.

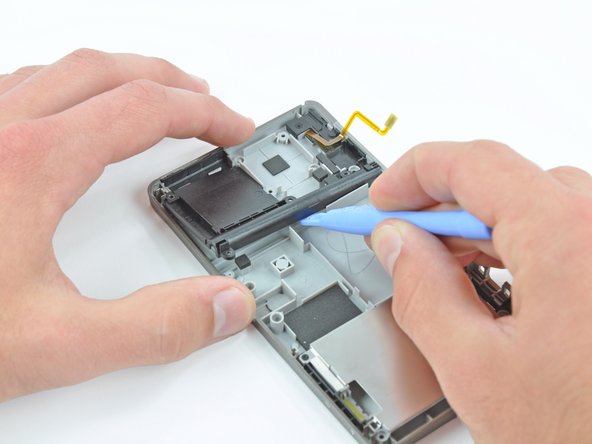
    • Use a plastic opening tool to pry the stylus housing up from the lower case.

    • Grab the stylus housing and remove it from the lower case.

Заключение

To reassemble your device, follow these instructions in reverse order.

Еще один человек закончил это руководство.

David Hodson

Участник с: 04/13/10

150 493 Репутация

Автор 127 руководств

0 Комментариев

Добавить комментарий

Просмотр статистики:

За последние 24часов: 0

За последние 7 дней: 8

За последние 30 дней: 31

За всё время: 7,177