Введение
Stripped screws are a nightmare for any repair enthusiast. Try as you might, some screws just do not want to come out. Frustration takes over and before you know it, that once "+" shape has turned into a "O". Never fear; we've got your back. This guide will walk you through how to use a rotary tool to remove a stripped screw by cutting a small slit in the screw head, allowing you to remove the screw with a flathead screwdriver.
Techniques:
Always wear safety goggles when using a rotary tool to prevent injury from debris or sparks.
Выберете то, что вам нужно
Видеообзор
-
-
Your screw is stripped, and your screwdriver is no longer sufficient. Before busting out the heavy hitters, try the following:
-
Use different screwdrivers. First try slightly smaller or larger head sizes, then a flat head screwdriver, to see if you can get it to catch on some part of the stripped screw.
-
If either of these techniques are fruitful, congrats! Your screw is free.
 Спросите у FixBot
-
-
-
Stretch a rubber band over the stripped screw.
-
Insert a properly-sized screwdriver, and give it a turn.
-
-
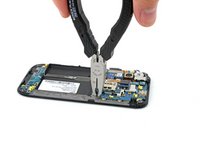
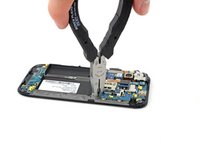
Инструмент, используемый на этом этапе:Screw Extracting Pliers$23.95
-
If the screw head is accessible, try a pair of screw extracting pliers. If you can get a good grip, turn the pliers and the screw should turn along with it!
-
Once the screw is loosened a bit, you can probably back it out the rest of the way using a screwdriver.
-
-
-
-
Still stuck? Try adding a dab of superglue to the top of the screw.
-
Set your driver into the screw head, and allow the glue to dry.
-
Using a firm grip and downward pressure, give the driver a twist to remove the screw.
-
-
-
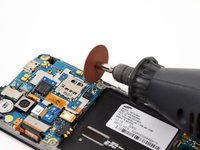
Attach a thin cutting disk to your rotary tool. Before you cut anything, make sure the disk is secured well.
-
-
-
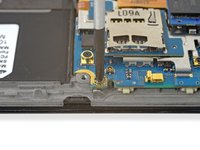
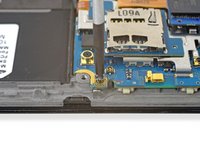
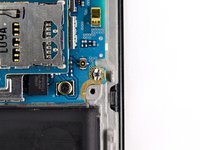
Use a flathead screwdriver to remove the screw from the device.
-
The size of the driver will depend on the size of the screw, but use the largest size that will fit in your cut.
-


Check out the video in the intro for some additional tips on dealing with stripped screws. Always use a high-quality screwdriver. Low-quality screwdriver material will cause damage to screws.
Отменить: Я не выполнил это руководство.
285 человек успешно провели ремонт по этому руководству.

67 Комментарии к руководству
I usually use the soldering iron, resting on the screw head dilation of the materials or any glue on the thread, but if the damage the screw head is large only with the idea of same rotary tool.
The soldering iron trick works great on screws that have Loctite! I have a red dot sight for my target pistol. I needed to remove a tiny hex head set screw. I almost broke the allen wrench and it still wouldn't budge. I applied heat to the allen wrench near the head of the screw and let it sit for half minute or so. The heat broke the loctite and the screw came right out! Thanks for reminding me and for posting this for everyone's knowledge.
"To reassemble your device, follow these instructions in reverse order."
Yeah, that makes perfect sense... If you put the saw in reverse it glues all the buts of iron back onto the screw :-)
But other than that, this could be useful in some situations. Be careful,of the iron filings on your electronics!
Haha, good catch! We've fixed the conclusion. Apologies to all who tried so very hard to follow these instructions in reverse.
There's always the ultimate tool if it won't go out, the drill.
Of course you'll have to make new threads if you drill out a screw. However, as a "weapon of last resort", the drill always works.