Перейти к основному содержанию

Nintendo DS Lite Lower LCD Replacement

Выберете то, что вам нужно

  1. Nintendo DS Lite Lower LCD Replacement, Battery: шаг 1, изображение 1 из 2 Nintendo DS Lite Lower LCD Replacement, Battery: шаг 1, изображение 2 из 2
    • Unscrew the Phillips screw securing the battery cover to the lower case.

    • The screw remains captive to the battery cover.

    • Pry the battery cover upward with a spudger or fingernail, and lift out of the lower case.

  2. Nintendo DS Lite Lower LCD Replacement: шаг 2, изображение 1 из 1
    • Wedge the edge of a spudger in between the side of the battery and the lower case housing and pry upward to dislodge the battery.

    • Remove the battery from the DS Lite.

  3. Nintendo DS Lite Lower LCD Replacement, Lower Case: шаг 3, изображение 1 из 2 Nintendo DS Lite Lower LCD Replacement, Lower Case: шаг 3, изображение 2 из 2
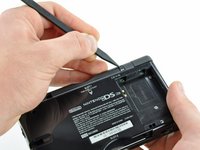
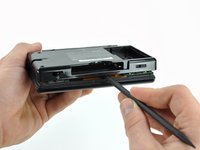
    • Use the tip of a spudger to pry both rubber feet off the DS Lite.

  4. Nintendo DS Lite Lower LCD Replacement: шаг 4, изображение 1 из 1
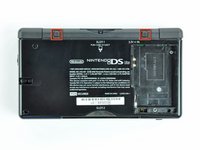
    • Remove the following screws securing the lower case to the body of the DS Lite:

    • Two 4.3 mm gold Phillips screws

    • One 3.9 mm black Tri-Wing screw

    • One 3.3 mm silver Phillips screw

    • Three 5.5 mm silver Tri-Wing screws

  5. Nintendo DS Lite Lower LCD Replacement: шаг 5, изображение 1 из 3 Nintendo DS Lite Lower LCD Replacement: шаг 5, изображение 2 из 3 Nintendo DS Lite Lower LCD Replacement: шаг 5, изображение 3 из 3
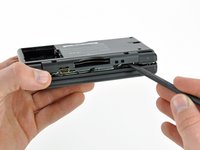
    • Remove the cover from the Game Pak slot before continuing.

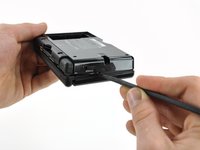
    • Insert the edge of a spudger in between the lower and upper case near the top right corner of the DS Lite.

    • Carefully run the spudger along the right edge of the DS Lite, creating an opening in the process.

    • Continue running the spudger along the backside of the DS Lite until the majority of the lower case has been separated from the upper case.

  6. Nintendo DS Lite Lower LCD Replacement: шаг 6, изображение 1 из 1
    • Lift the lower case away from the rest of the DS Lite.

    • Pull carefully. Some units are sealed with adhesive, and pulling too hard can damage the power switch.

    • When re-assembling, make sure that power switch and volume sliders are properly aligned with the switches on the motherboard.

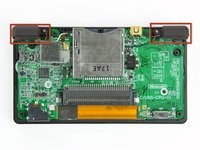
  7. Nintendo DS Lite Lower LCD Replacement, Trigger Buttons: шаг 7, изображение 1 из 2 Nintendo DS Lite Lower LCD Replacement, Trigger Buttons: шаг 7, изображение 2 из 2
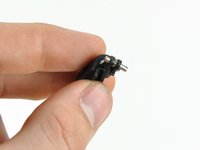
    • Lift both trigger buttons out of the DS Lite.

    • The trigger buttons are held in very loosely by small metal pegs and springs. Don't lose track of these pieces.

    • The second picture shows the correct configuration of the trigger assembly for reassembly purposes.

  8. Nintendo DS Lite Lower LCD Replacement, Wi-Fi Board: шаг 8, изображение 1 из 1
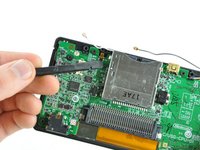
    • Use the flat edge of a spudger to pry the Wi-Fi antenna connector straight up from its socket on the Wi-Fi board.

  9. Nintendo DS Lite Lower LCD Replacement: шаг 9, изображение 1 из 1
    • Use the flat edge of a spudger to pry the Wi-Fi board connector straight up from its socket on the motherboard.

  10. Nintendo DS Lite Lower LCD Replacement: шаг 10, изображение 1 из 1
    • Use the flat edge of a spudger to separate the right edge of the Wi-Fi board from the motherboard.

    • The Wi-Fi board is secured to the motherboard with a layer of adhesive.

    • Remove the Wi-Fi board from the DS Lite.

  11. Nintendo DS Lite Lower LCD Replacement, Motherboard: шаг 11, изображение 1 из 1
    • Use the flat edge of a spudger to pry the microphone connector straight up from its socket on the motherboard.

  12. Nintendo DS Lite Lower LCD Replacement: шаг 12, изображение 1 из 3 Nintendo DS Lite Lower LCD Replacement: шаг 12, изображение 2 из 3 Nintendo DS Lite Lower LCD Replacement: шаг 12, изображение 3 из 3
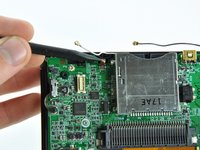
    • In the following steps you must pull the antenna cable between the DS Lite game cartridge reader and motherboard. Pull slowly and stop when you feel resistance to avoid damaging the cable or motherboard.

    • Position the antenna cable with its connector facing up and away from the motherboard using a spudger to hold it down lightly in the gap between chips on the motherboard.

    • Slowly and carefully pull the antenna cable until the cable connector is under the DS Lite game cartridge reader.

    • Continue pulling the cable until the cable connector comes out from under the game cartridge reader on the right side.

    • When reassembling and attempting to feed the antenna cable back under the game cartridge reader, the cable may kink or become difficult to feed through. If so, try feeding a piece of thread through first; then, tie the thread to one end of the cable connector and pull it through, guiding it past any obstructions.

  13. Nintendo DS Lite Lower LCD Replacement: шаг 13, изображение 1 из 2 Nintendo DS Lite Lower LCD Replacement: шаг 13, изображение 2 из 2
    • Use your fingernail or the edge of a spudger to carefully flip up the touchscreen ribbon cable retaining flap.

    • Make sure you are flipping up the retaining flap, not the socket itself.

    • Use the tip of a spudger to pull the touchscreen ribbon cable straight out of its socket.

  14. Nintendo DS Lite Lower LCD Replacement: шаг 14, изображение 1 из 1
    • Remove the two 3.4 mm Phillips screws securing the motherboard to the upper case.

  15. Nintendo DS Lite Lower LCD Replacement: шаг 15, изображение 1 из 1
    • Open the display enough to use your finger to push the front edge of the motherboard up and away from the upper case.

    • Do not try to remove the motherboard, as it is still connected to the upper display via the upper LCD ribbon cable.

  16. Nintendo DS Lite Lower LCD Replacement: шаг 16, изображение 1 из 2 Nintendo DS Lite Lower LCD Replacement: шаг 16, изображение 2 из 2
    • Use your fingernail or the flat edge of a spudger to carefully flip up the upper LCD ribbon cable retaining flap.

    • Make sure you are flipping up the retaining flap, not the socket itself.

    • Pull the motherboard away from the DS Lite to separate the upper LCD ribbon cable from its socket on the motherboard.

    • Remove the motherboard from the DS Lite.

    • Now you may open the retaining flap for the lower LCD screen in the same way and separate the lower LCD screen from the motherboard.

  17. Nintendo DS Lite Lower LCD Replacement, Lower LCD Assembly: шаг 17, изображение 1 из 2 Nintendo DS Lite Lower LCD Replacement, Lower LCD Assembly: шаг 17, изображение 2 из 2
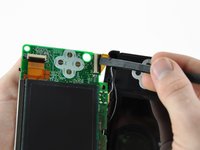
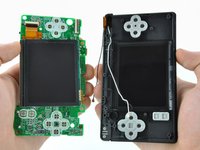
    • Use your fingernail or the edge of a plastic opening tool to carefully flip up the lower LCD ribbon cable retaining flap.

    • Make sure you are flipping up the retaining flap, not the socket itself.

    • Pull the lower LCD assembly straight away to separate the lower LCD ribbon cable from its socket on the motherboard.

    • Remove the lower LCD assembly from the motherboard.

    • When reinstalling lower LCD, ensure it has insulation on the back to prevent a short circuit with the motherboard.

  18. Nintendo DS Lite Lower LCD Replacement, Lower LCD: шаг 18, изображение 1 из 2 Nintendo DS Lite Lower LCD Replacement, Lower LCD: шаг 18, изображение 2 из 2
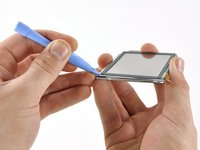
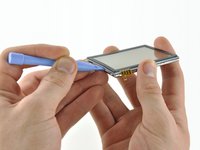
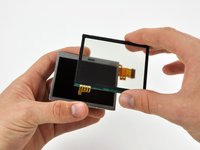
    • Insert a plastic opening tool between the touchscreen and top right corner of the display.

    • Slide the opening tool down the right side of the display to free the edge of the touchscreen.

  19. Nintendo DS Lite Lower LCD Replacement: шаг 19, изображение 1 из 2 Nintendo DS Lite Lower LCD Replacement: шаг 19, изображение 2 из 2
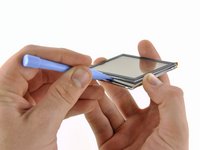
    • Continue sliding the plastic opening tool along the bottom and up the left edges of the LCD to separate the touchscreen from the LCD.

  20. Nintendo DS Lite Lower LCD Replacement: шаг 20, изображение 1 из 2 Nintendo DS Lite Lower LCD Replacement: шаг 20, изображение 2 из 2
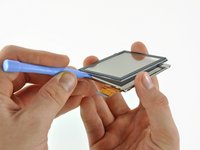
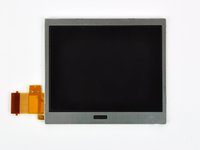
    • Lift the touchscreen away from the LCD.

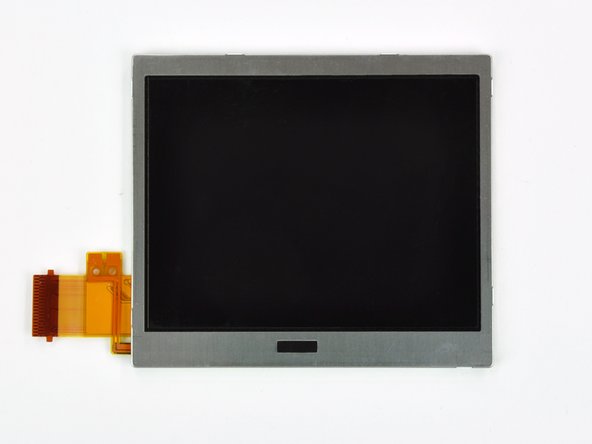
    • LCD remains.

    • When replacing the LCD, ensure it has insulation on the back to prevent a short circuit with the motherboard. Electrical tape works fine.

Заключение

To reassemble your device, follow these instructions in reverse order.

38 участников успешно повторили данное руководство.

Matthew Newsom

Участник с: 01/05/10

39 452 Репутация

Автор 67 руководств

Один комментарий

This guide recommends a Y1 Tri point scredriver. I bought one to try this repair and it's marginally too big :(
It does begin to bite the screw, then slips and fails. I daren't keep trying for fear of rounding the screws off, so
I'm going to try again with a Y0 and see how that goes.

Thomas Wood - Ответить

Добавить комментарий

Просмотр статистики:

За последние 24часов: 17

За последние 7 дней: 121

За последние 30 дней: 682

За всё время: 37,651