Введение
Having Wi-Fi connectivity issues? Use this guide to replace your Wii's Wi-Fi board.
Выберете то, что вам нужно
-
-
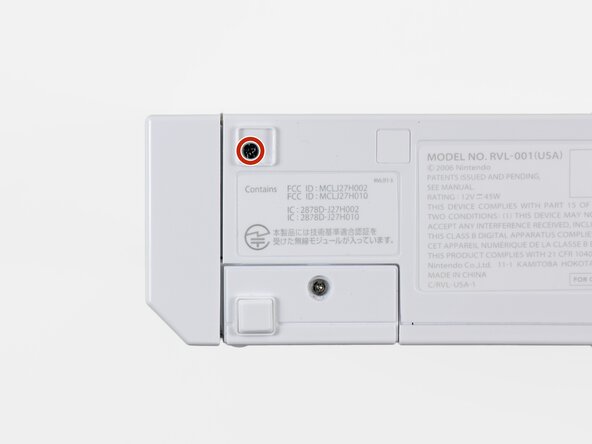
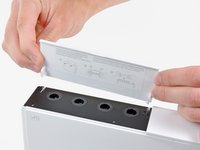
Use a metal spudger to remove the white plastic screw covers stuck to the lower case near the front of the Wii.
 Спросите у FixBot
-
-
-
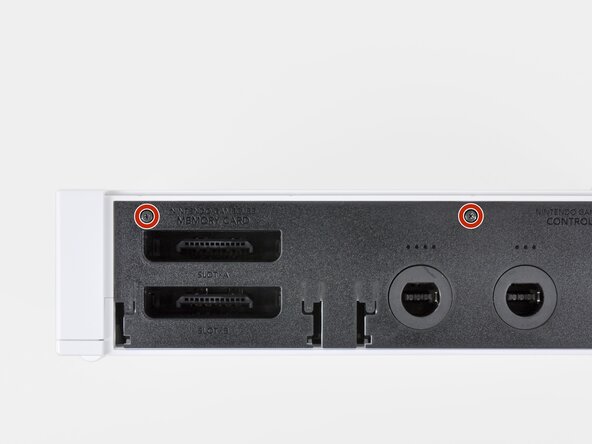
Remove the two 8.3 mm Tri-Point screws hidden under the covers you just removed.
-
-
-
Remove the single 5.9 mm Phillips screw under the controller port door nearest the faceplate.
-
-
-
Use a metal spudger to remove the rubber foot stuck to the side of the Wii near the DVD drive opening.
-
-
-
Remove the single 5.9 mm Phillips screw hidden under the foot you just removed.
-
-
Инструмент, используемый на этом этапе:Tweezers$4.99
-
-
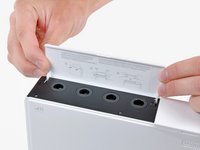
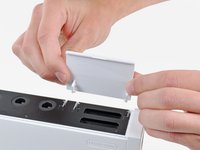
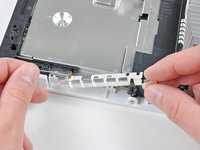
Open the controller port cover until it is perpendicular to the black controller port bezel.
-
Pull the controller port cover straight up to release it from the outer case.
-
-
-
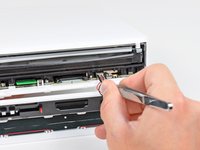
Remove the two remaining 4.1 mm Phillips screws along the top edge of the black plastic controller port bezel.
-
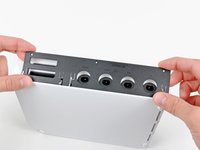
Lift the bezel from the long edge furthest away from the controller ports and remove it from the Wii.
-
-
-
Remove the two 5 mm Phillips screws above the controller ports.
-
-
-
Use a metal spudger to remove the three highlighted screw covers stuck to the side of the Wii.
-
-
-
Remove the following screws:
-
Two 5 mm Phillips screws
-
One 8.2 mm Tri-Point screw
-
-
-
Use a metal spudger to remove the two rubber feet stuck to the bottom face of the Wii near the rear ports.
-
-
Инструмент, используемый на этом этапе:iFixit Precision 4 mm Screwdriver Bit$2.99
-
Remove the two 8.2 mm Tri-Point screws hidden under the feet you just removed.
-
-
-
-
Remove the small Phillips screw securing the battery door to the bottom panel.
-
Pull the battery door out of the Wii.
-
-
-
Remove the 8.2 mm Tri-Point screw that was hidden beneath the battery door.
-
-
-
Remove the two 8.2 mm Tri-Point screws securing the DVD drive shield near the controller ports.
-
-
-
Remove the four 9 mm Phillips screws securing the DVD drive to the bottom panel.
-
-
-
Lift the side of the DVD drive opposite the controller ports enough to access the cables on its bottom face.
-
Carefully pull the DVD drive power cable out from under the plastic shroud near the heat sink.
-
-
-
Pull the DVD drive power cable away from its socket on the DVD drive.
-
-
-
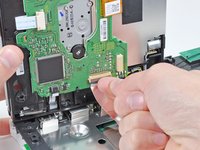
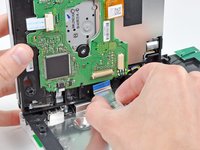
Use your fingernail to flip up the retaining flap on the DVD drive ribbon cable socket.
-
Pull the DVD drive ribbon cable out of its socket.
-
Remove the DVD drive from the Wii.
-
-
Инструмент, используемый на этом этапе:Tweezers$4.99
-
Use a pair of tweezers to lift the fan connector up and out of its socket on the logic board.
-
-
-
Remove the two 10 mm Phillips screws securing the fan to the fan shroud.
-
Remove the fan from the Wii.
-
-
-
Use the tip of a spudger or another fine-pointed tool to carefully pry one of the black plastic retaining fingers attached to the fan shroud away from the Wi-Fi antenna board.
-
Lift the Wi-Fi antenna out of the fan shroud.
-
-
-
Remove the single 10 mm Phillips screw securing the second Wi-Fi antenna to the top of the fan shroud.
-
-
-
Remove the two pieces of tape securing the second Wi-Fi antenna cable to the plastic bracket near the heat sink.
-
-
-
Carefully de-route both antennas from the frame of the Wii and lay them aside.
-
-
-
Remove the three 10 mm Phillips screws securing the fan shroud to the Wii.
-
Lift the fan shroud off the heat sink and remove it from the Wii.
-
-
-
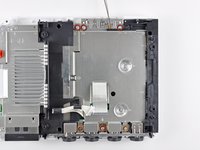
Remove the following six screws securing the EMI fingers to the bottom panel:
-
Four 7 mm Phillips screws
-
Two 11.3 mm Phillips screws
-
Remove both sets of EMI fingers from the Wii.
-
-
-
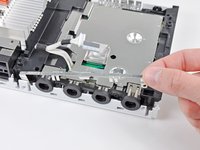
Remove the following three screws:
-
One 7 mm Phillips screw
-
Two 10 mm Phillips screws
-
Lift the bracket out of the Wii.
-
-
-
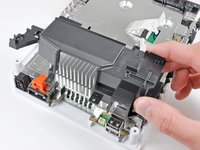
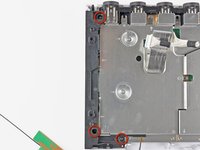
Remove the three 10 mm Phillips screws securing the black bracket to the bottom panel near the front of the Wii.
-
Slightly lift the bracket and use your other hand to pull the retaining clip away from where the Wi-Fi antennas enter the motherboard sheild.
-
Remove the bracket from the Wii.
-
-
-
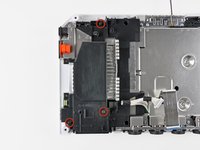
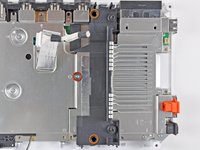
Remove the nine remaining 7 mm Phillips screws securing the motherboard cover to the bottom panel.
-
-
-
Carefully lift the motherboard cover off the motherboard, minding any cables that may get caught.
-
-
-
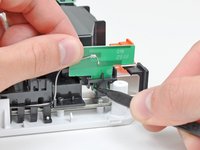
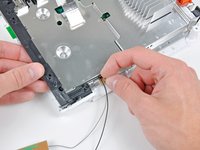
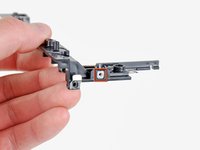
Lift the side of the Wi-Fi board furthest away from the heat sink and lift it out of its socket on the motherboard, being careful not to put too much sideways force on the connector.
-
-
-
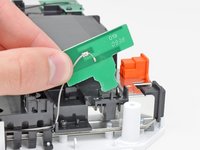
Use the flat end of a spudger to pry both antenna connectors off their sockets on the Wi-Fi board.
-


To reassemble your device, follow these instructions in reverse order.
Отменить: Я не выполнил это руководство.
10 человек успешно провели ремонт по этому руководству.

5 Комментарии к руководству
I really love the great step by step manuals.
The final photo appears to be the Bluetooth board and NOT the WiFi board (which matches the board seen on the Bluetooth replacement how-to: Nintendo Wii Bluetooth Board Replacement). The ifixit purchase page for the correct image for the WiFi board can be seen here: Nintendo Wii Wi-Fi Board
The Bluetooth card and the wifi card have the same the look amd even the model numbers match except fonthe the last digit. The wifi card will be
Model:JH27H003 = wifi card
Model:JH27H002 = Bluetooth.
I have both cards in front of me taken out of my broken nintendo wii as I write this. And incase anyone is unsure you can measure them to confirm. Wifi card is 1 1/2 in and the bluetooth is 1 inch. Hope this helps anyone that might have difficulties with them like i did till I dod a brief Google search.
***NOTE: Im just giving an examples of the ones that I pulled from mine there are other ones that Nintendo used so be sure to make sure that you pull it out and see the outline of where the Wi-Fi adapter was it's the exact size it should be on the outline
very nice but how do you know if this board is not working? I have 5 wii systems with many remotes and they all do the same thing. remote control shows hand for two seconds then goes blank. kman10kman@gmail.com
Have 4 wii systems all doing the same thing looks like sync is connecting but hand disappears after a few seconds is the wifi board going bad or is it something else?