Перейти к основному содержанию

Этот документ имеет более свежие изменения. Перейти к последней непроверенной версии.

Olympus D590 LCD screen Replacement

Выберете то, что вам нужно

  1. Olympus D590 LCD screen Replacement, Face Plate: шаг 1, изображение 1 из 1
    • Remove five baseplate screws using a Phillips #00 screwdriver.

  2. Olympus D590 LCD screen Replacement: шаг 2, изображение 1 из 1
    • Press and slide the battery cover retainer clip to the left. Use tweezers to lift the battery cover away.

  3. Olympus D590 LCD screen Replacement: шаг 3, изображение 1 из 1
    • Remove the single screw from the battery housing using a Phillips #00 screwdriver.

  4. Olympus D590 LCD screen Replacement: шаг 4, изображение 1 из 1
    • Using tweezers, lift the rubber plate to expose the ports.

  5. Olympus D590 LCD screen Replacement: шаг 5, изображение 1 из 1
    • Remove two screws from the ports using a Phillips #00 screwdriver.

  6. Olympus D590 LCD screen Replacement: шаг 6, изображение 1 из 1
    • Use a spudger to pry the faceplate away from the rest of the camera.

  7. Olympus D590 LCD screen Replacement: шаг 7, изображение 1 из 1
    • To avoid disconnection of the connector line to the motherboard, use caution when pulling faceplate away from camera case.

    • Damage to the connector line will prevent the on/off power switch's operational function.

  8. Olympus D590 LCD screen Replacement, Backplate: шаг 8, изображение 1 из 1
    • Using a Phillips #00 screwdriver, remove three screws fastened to the camera backplate edge.

  9. Olympus D590 LCD screen Replacement: шаг 9, изображение 1 из 1
    • Using a Phillips #00 screwdriver, remove the two camera flash screws secured to either side of bulb housing component.

  10. Olympus D590 LCD screen Replacement: шаг 10, изображение 1 из 1
    • Using an iFixit opening tool, pry the backplate from the camera internal housing component.

  11. Olympus D590 LCD screen Replacement: шаг 11, изображение 1 из 1
    • Pull the backplate away from the camera internal housing component.

  12. Olympus D590 LCD screen Replacement, LCD screen: шаг 12, изображение 1 из 1
    • Unscrew the screw shown in the picture from LCD screen.

  13. Olympus D590 LCD screen Replacement: шаг 13, изображение 1 из 2 Olympus D590 LCD screen Replacement: шаг 13, изображение 2 из 2
    • Remove the side pannel by sliding it off the body of the camera.

    • Lift the camera no more than 3cm to make sure all screws have been taken off.

  14. Olympus D590 LCD screen Replacement: шаг 14, изображение 1 из 2 Olympus D590 LCD screen Replacement: шаг 14, изображение 2 из 2
    • Flip camera so you are looking at the front.

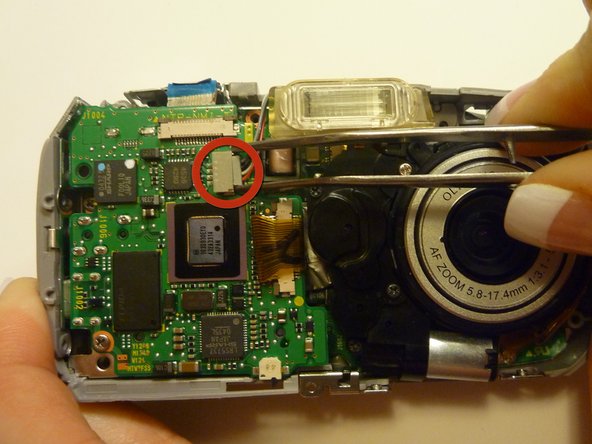
    • Remove gray and blue wiring with tweasers by gently wiggling and pulling.

    • Be careful not to rip the wiring tape with the tweezers.

  15. Olympus D590 LCD screen Replacement: шаг 15, изображение 1 из 2 Olympus D590 LCD screen Replacement: шаг 15, изображение 2 из 2
    • Locate the tape securing the wiring with the gray end piece located on top of the camera.

    • Gently lift up on the tape till all wires are exposed.

  16. Olympus D590 LCD screen Replacement: шаг 16, изображение 1 из 1
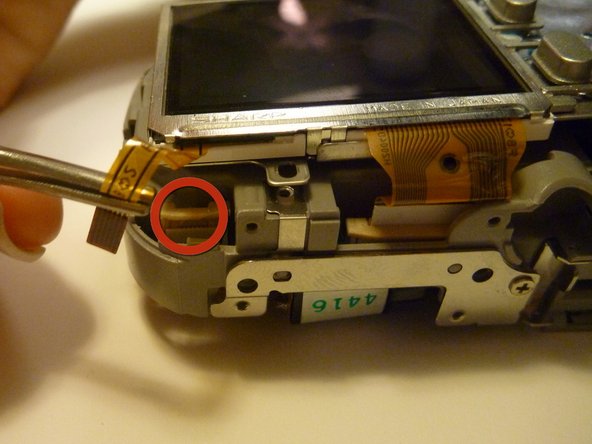
    • Flip Camera to the bottom side as shown.

    • Pull and wriggle the thin yellow wiring tape to detach it from the rest of the camera, while leaving it attached to the LCD screen.

  17. Olympus D590 LCD screen Replacement: шаг 17, изображение 1 из 3 Olympus D590 LCD screen Replacement: шаг 17, изображение 2 из 3 Olympus D590 LCD screen Replacement: шаг 17, изображение 3 из 3
    • Flip camera so the front is facing you.

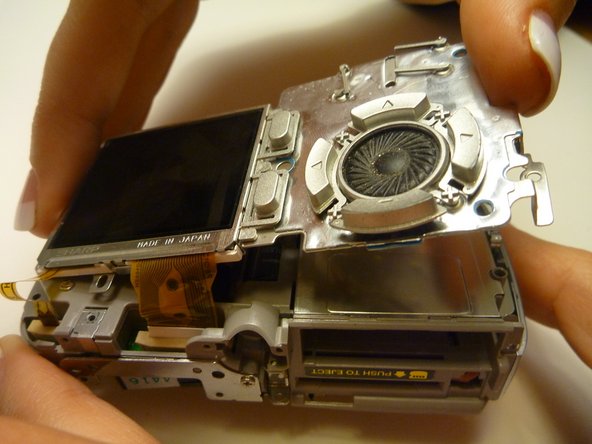
    • Locate speaker in upper right hand corner.

    • Gently lift with tweasers.

    • Feed wiring through designated spot so that it is no longer connected to the camera.

  18. Olympus D590 LCD screen Replacement: шаг 18, изображение 1 из 2 Olympus D590 LCD screen Replacement: шаг 18, изображение 2 из 2
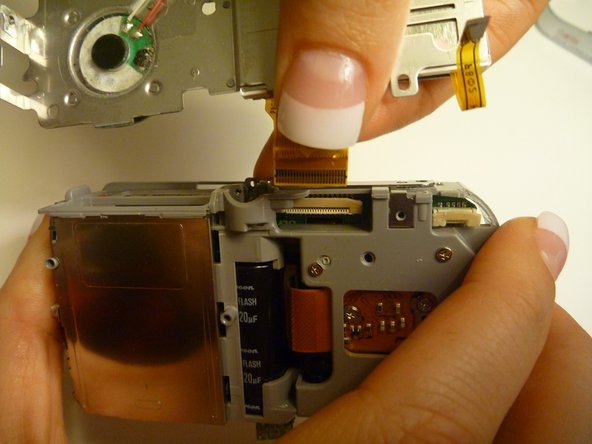
    • Lift the LCD screen so the thick yellow wiring is the only thing attaching the LCD screen to the camera.

    • Gently pull the thick yellow wiring out by using the forefinger and thumb.

Заключение

To reassemble your device, follow these instructions in reverse order.

Sara

Участник с: 04/15/10

84 Репутация

Автор 2 руководств

Команда

Cal Poly, Team 28-23, Regan Spring 2010 Участник Cal Poly, Team 28-23, Regan Spring 2010

CPSU-REGAN-S10S28G23

4 членов

Автор 14 руководств

0 Комментариев

Добавить комментарий

Просмотр статистики:

За последние 24часов: 0

За последние 7 дней: 0

За последние 30 дней: 1

За всё время: 2,007