Введение
This guide will walk you through how to remove the phone's screen, which includes the LCD panel and digitizer.
Выберете то, что вам нужно
-
-
Power off the phone by pressing the button on the right side of the phone, it will be the smaller button.
-
Press and hold the button down for a few seconds, until the option "Power Off" appears on the screen.
-
Select "Power Off" on the screen to turn off the phone.
 Спросите у FixBot
-
-
-
Insert a SIM card removal tool into the small hole located on the top right corner of the phone, just above the volume buttons.
-
Push the removal tool into the hole and the tray should pop out.
-
Remove the SIM tray from the phone.
-
-
-
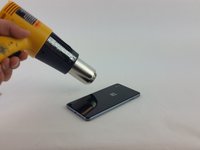
Using a heat gun, apply slow and even heat to the edges of the back panel.
-
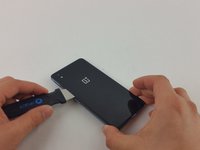
While heating the back panel, use a Jimmy to test if the adhesive is soft enough to allow the panel to separate from the device.
-
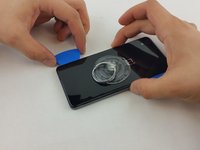
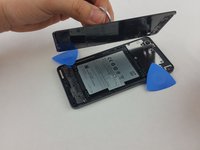
Carefully detach the back panel, using opening picks to hold the panel apart from the device.
-
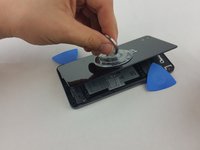
Once most of the edges are separated from the device, attach a suction cup to the back panel.
-
-
-
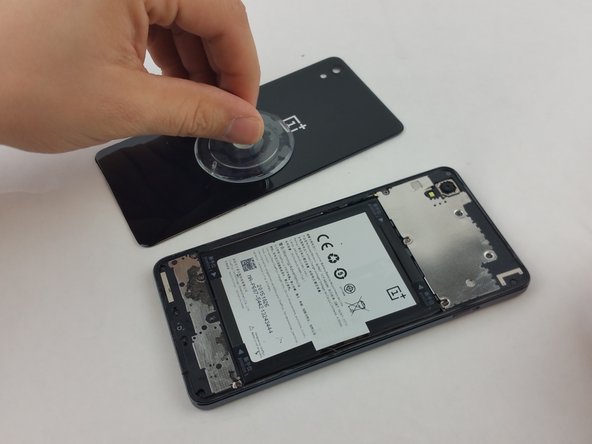
Press the suction cup to the back panel to secure it.
-
With the help of the suction cup, pull up on the panel to completely detach it from the device.
-
-
-
-
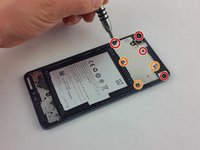
Using a PH000 screwdriver, remove the following seven screws circled with red and orange:
-
Four (longer) PH000 screws
-
Three shorter PH000 screws
-
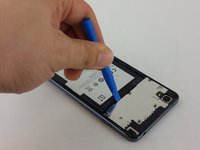
Once all of the screws are removed, proceed to using a plastic spudger to pry the metal cover off.
-
There are two clips near the bottom, right above the battery, so start by prying on the bottom edge of the plate.
-
-
-
Once the metal cover is removed, locate the battery connector wire, which clips into the motherboard.
-
Using a plastic spudger, gently pry on the clip to release it.
-
-
-
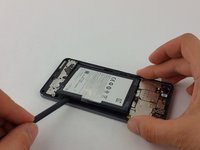
On the battery, locate a clear tab. This will be used to pull the battery out.
-
Firmly grasp the clear tab and pull up and away from the phone to remove the battery.
-
Continue to pull slowly on the battery, until it is completely free from the phone.
-
-
-
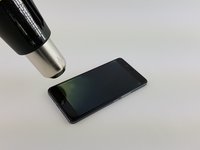
Once all of the components on the back of the phone have been removed (battery, SIM card, etc), prepare for a battle with your heat gun and "oven mitts".
-
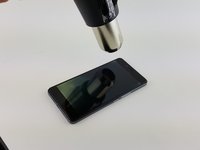
Using your heat resistant glove to hold onto the phone, evenly heat the edges of the phone.
-
Spend about 15-20 seconds on a small section about 2 inches long to make sure that it is sufficiently hot to remove the adhesive
-
-
-
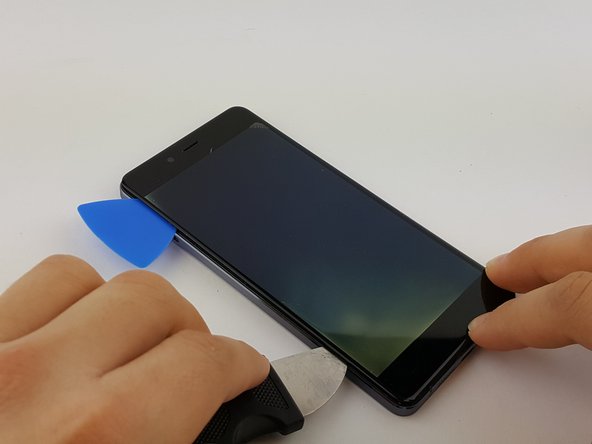
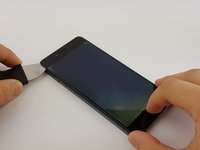
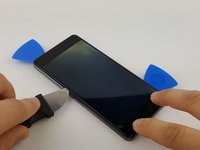
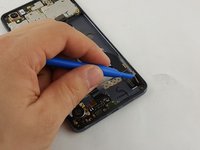
After sufficiently heating a section of the edge, use the jimmy tool and slide it between the glass screen and the aluminum bezel of the phone.
-
Proceed to gently slide the jimmy around the area that has been heated to remove the the screen from the adhesive.
-
Having heat resistant gloves are very important as the device will get very hot and will burn your fingers if you come into contact directly with the phone.
-
-
-
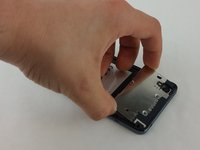
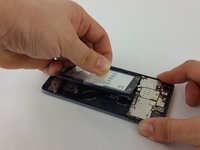
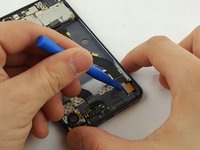
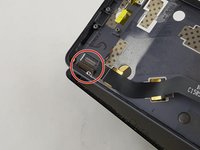
After removing the adhesive and the screen is now loose from the phone, you'll notice that it is still attached to the back through a connector.
-
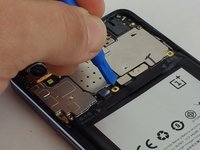
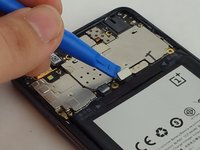
On the back of the phone, unclip the connector to the screen located on the bottom right hand side of the phone using a plastic pry tool.
-
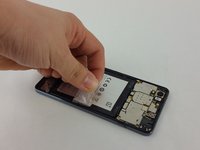
Now that the pin is disconnected, you will have to gently slip the connector through the hole in the back of the phone to free the entire screen.
-
Once the connector is slipped through the hole, the screen should be free from the phone for good.
-


To reassemble your device, follow these instructions in reverse order.
Отменить: Я не выполнил это руководство.
43 человек успешно провели ремонт по этому руководству.
Команда

USF Tampa, Team 3-6, Wollert Spring 2016 Участник USF Tampa, Team 3-6, Wollert Spring 2016
USFT-WOLLERT-S16S3G6
2 членов
Автор 15 руководств
19 Комментарии к руководству
Does anyone know where to get a screen for the opx?
i just ordered one from aliexpress.
anyone knows the best way to glue the screen back onto the x? 3M 2 sided tape 2mm thickness is ok?
thanks
Hi Kill,
Did u order the display and touch or just the display? and which web site did u order it from?
Aditi Mangal
I'm also interested! can you post a link of the site?!
My one plus x got fell from my hand. Now the display slowly getting fading away with blurriness. It's almost completely over the phone now :(
whats the options available now? and what will be the cost of display set for the replacement?