Эта версия возможно содержит некорректные исправления. Переключить на последнюю проверенную версию.
Выберете то, что вам нужно
-
Этот шаг не переведен. Помогите перевести
-
Remove the brush head by pulling the top away from the base.
-
-
Этот шаг не переведен. Помогите перевести
-
Pry open the end cap from the toothbrush body.
-
Remove the spring.
-
-
Этот шаг не переведен. Помогите перевести
-
Apply pressure on the brush shaft to release the toothbrush internals.
-
Remove the internals through the bottom of the toothbrush body.
-
-
-
Этот шаг не переведен. Помогите перевести
-
Use flat head screwdriver to remove power button pressure plate.
-
-
Этот шаг не переведен. Помогите перевести
-
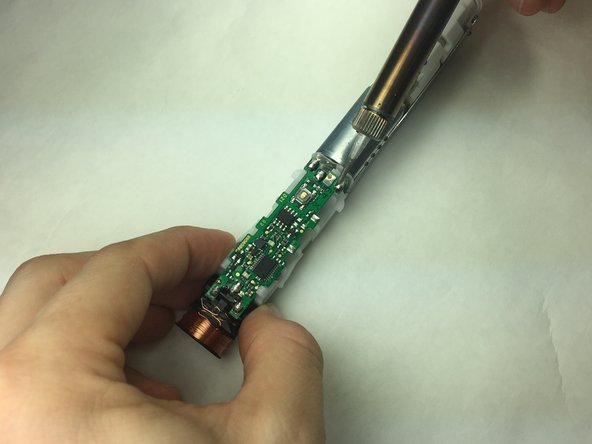
Desolder the coil wire from the motherboard.
-
Squeeze and remove coil from motherboard.
-
-
Этот шаг не переведен. Помогите перевести
-
Desolder the motor from motherboard.
-
Remove motherboard and battery from body of toothbrush internals.
-
-
Этот шаг не переведен. Помогите перевести
-
Desolder the battery connections from the motherboard.
-
Remove motherboard from battery holder.
-
-
Этот шаг не переведен. Помогите перевести
-
Pull to slide battery from battery housing.
-
Remove battery.
-


Отменить: Я не выполнил это руководство.
21 участников успешно повторили данное руководство.
Команда

IUPUI, Team S5-G4, Baechle Fall 2017 Участник IUPUI, Team S5-G4, Baechle Fall 2017
IUPUI-BAECHLE-F17S5G4
3 членов
Автор 6 руководств
14 Комментариев
This guide also works for Oral-B genius 9000. Thank You!! On mine, the coil wires was losen. Just soldered it back and works fine again.
Same with mine: coil was loose. I guessed it because the red blinking light would not react (turn off) by putting the toothbrush on the charger. (checked also a second charger, never through away older parts, using as spare…) ;)
Karsten -
This guide also works for Oral B PRO 2950N. Thank you so much!
I had the same issue, the coil was broken on one side, and it doesn't charge. Adding a little bit of solder to weld the broken end was enough for making it charge again
What type of battery is that? It's not listed under “parts.”
I’ve wrote it in another comment as well, but in case you didn’t see it: As far as I know, these are 4/5 AA batteries with about 1200 mAh and U-shaped solder tails. So the size of the battery is roughly 42x14mm . But as mentioned in the comments, regular AA size batteries worked in my case as well, just had to cut the spacers in the battery retainer. AA batteries are cheaper to get obviously and most likely they’ll have more capacity as well.
benn_i -