Перейти к основному содержанию

Oster 16-Speed Blender Power Cord Replacement

Выберете то, что вам нужно

  1. Oster 16-Speed Blender Power Cord Replacement, Fan and Motor: шаг 1, изображение 1 из 2 Oster 16-Speed Blender Power Cord Replacement, Fan and Motor: шаг 1, изображение 2 из 2
    • Remove the Blender Container from the Blender Base.

  2. Oster 16-Speed Blender Power Cord Replacement: шаг 2, изображение 1 из 2 Oster 16-Speed Blender Power Cord Replacement: шаг 2, изображение 2 из 2
    • Flip the blender so the bottom is facing you.

  3. Oster 16-Speed Blender Power Cord Replacement: шаг 3, изображение 1 из 3 Oster 16-Speed Blender Power Cord Replacement: шаг 3, изображение 2 из 3 Oster 16-Speed Blender Power Cord Replacement: шаг 3, изображение 3 из 3
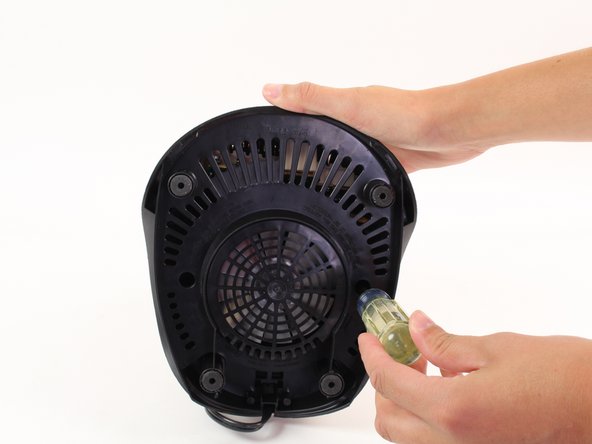
    • Unscrew the 16mm screws located on the plastic bottom from the blender base using a Phillips #2 screwdriver.

  4. Oster 16-Speed Blender Power Cord Replacement: шаг 4, изображение 1 из 2 Oster 16-Speed Blender Power Cord Replacement: шаг 4, изображение 2 из 2
    • Remove the plastic bottom from the base of the blender.

  5. Oster 16-Speed Blender Power Cord Replacement: шаг 5, изображение 1 из 2 Oster 16-Speed Blender Power Cord Replacement: шаг 5, изображение 2 из 2
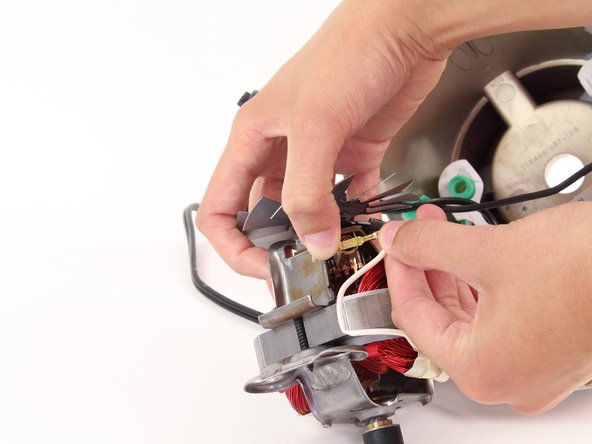
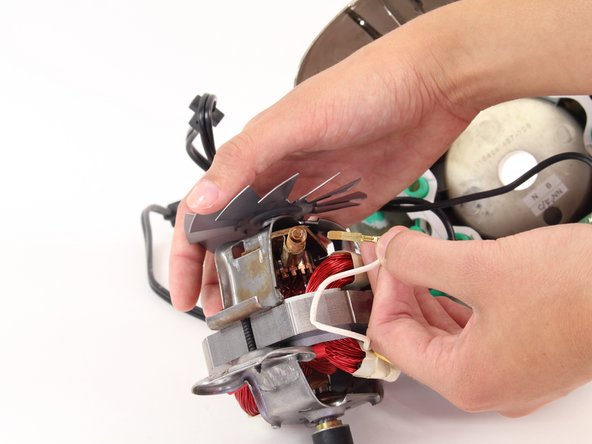
    • Holding the center of the fan, grip the knob in the center of the top of the blender with a wrench and twist the wrench counterclockwise.

  6. Oster 16-Speed Blender Power Cord Replacement: шаг 6, изображение 1 из 1
    • Carefully remove the motor and fan from the base of the blender.

  7. Oster 16-Speed Blender Power Cord Replacement: шаг 7, изображение 1 из 3 Oster 16-Speed Blender Power Cord Replacement: шаг 7, изображение 2 из 3 Oster 16-Speed Blender Power Cord Replacement: шаг 7, изображение 3 из 3
    • Now, gently pull the white wire that is connected to the base and the motor.

    • Be careful, as there is a spring behind the contact points, that might try to shoot out and hurt you.

  8. Oster 16-Speed Blender Power Cord Replacement: шаг 8, изображение 1 из 3 Oster 16-Speed Blender Power Cord Replacement: шаг 8, изображение 2 из 3 Oster 16-Speed Blender Power Cord Replacement: шаг 8, изображение 3 из 3
    • Now, turn the motor over, and remove the black wire from the motor.

    • Again, be warned as the is another spring that wants to shoot out and hurt you here as well.

  9. Oster 16-Speed Blender Power Cord Replacement: шаг 9, изображение 1 из 2 Oster 16-Speed Blender Power Cord Replacement: шаг 9, изображение 2 из 2
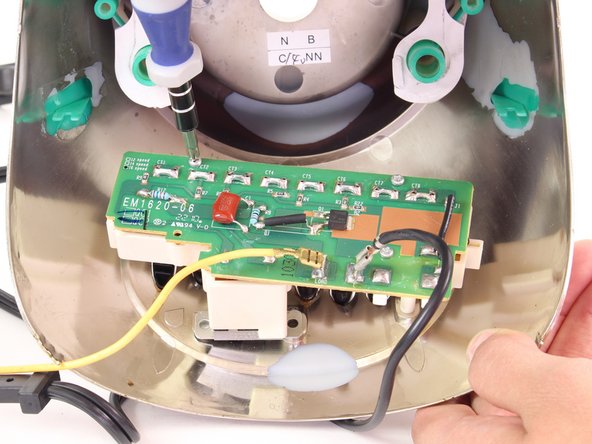
    • Now de-solder the yellow wire from circuit board. De-solder the wire following these instructions.

    • Be careful, as there is another, black wire, nearby that you do not want to de-solder.

  10. Oster 16-Speed Blender Power Cord Replacement, Circuit Board: шаг 10, изображение 1 из 3 Oster 16-Speed Blender Power Cord Replacement, Circuit Board: шаг 10, изображение 2 из 3 Oster 16-Speed Blender Power Cord Replacement, Circuit Board: шаг 10, изображение 3 из 3
    • Locate the four 11mm screws in the circuit board.

    • Unscrew the four screws using the Phillips #1 screwdriver.

  11. Oster 16-Speed Blender Power Cord Replacement: шаг 11, изображение 1 из 2 Oster 16-Speed Blender Power Cord Replacement: шаг 11, изображение 2 из 2
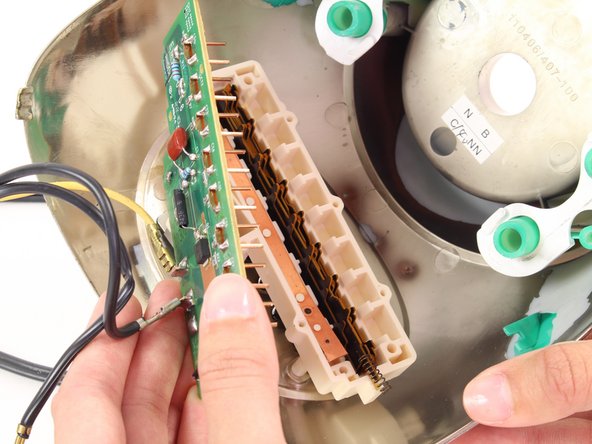
    • Desolder the circuit board from the base at the indicated point, following the directions by clicking here.

    • Now separate the circuit board from the base.

  12. Oster 16-Speed Blender Power Cord Replacement: шаг 12, изображение 1 из 3 Oster 16-Speed Blender Power Cord Replacement: шаг 12, изображение 2 из 3 Oster 16-Speed Blender Power Cord Replacement: шаг 12, изображение 3 из 3
    • You will see that the circuit board is still attached by a red wire and a black wire.

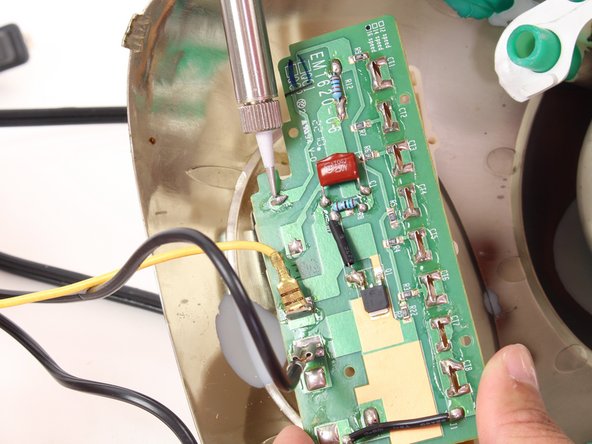
    • Flip the circuit board back over and desolder at the indicated points following the directions given here.

  13. Oster 16-Speed Blender Power Cord Replacement, Power Cord: шаг 13, изображение 1 из 1
    • You do not have to completely remove the circuit board to replace the power cord. You can, if desired, skip the steps of de-soldering the yellow wire, and the circuit board from the base.

    • De-solder the black wire from the circuit board, and then carefully remove the black wire.

    • Now you can solder on the new power cord.

Заключение

To reassemble your device, follow these instructions in reverse order.

4 участников успешно повторили данное руководство.

Dana

Участник с: 04/14/14

773 Репутация

Автор 5 руководств

Команда

Cal Poly, Team 12-37, Maness Spring 2014 Участник Cal Poly, Team 12-37, Maness Spring 2014

CPSU-MANESS-S14S12G37

4 членов

Автор 5 руководств

0 Комментариев

Добавить комментарий

Просмотр статистики:

За последние 24часов: 0

За последние 7 дней: 8

За последние 30 дней: 35

За всё время: 3,138