Введение
Use this guide to replace a failed battery in the Photive Rain.
Выберете то, что вам нужно
-
-
Remove the four 8.5 mm screws from the back panel of the speaker by using the Phillips #1 Screwdriver.
-
Remove back panel
-
-
-
-
Remove the plastic cover in front of the battery slot.
-
Unscrew all the 8.5mm screws that hold the cover to the slot.
-
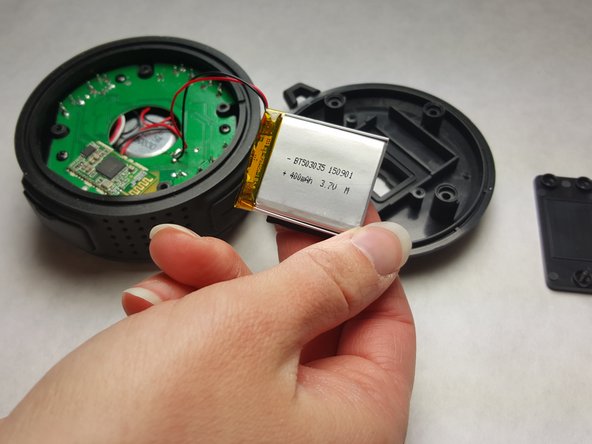
Separate the battery from the back panel as shown in photograph 3.
-
-
-
Remove the battery from the motherboard.
-
Use a soldering pen to remove the solder connecting the battery wires to the motherboard.
-


To reassemble your device, follow these instructions in reverse order.
To reassemble your device, follow these instructions in reverse order.
Отменить: Я не выполнил это руководство.
2 участников успешно повторили данное руководство.
Команда

IUPUI, Team 1-4, Harley Spring 2016 Участник IUPUI, Team 1-4, Harley Spring 2016
IUPUI-HARLEY-S16S1G4
3 членов
Автор 4 руководств