Введение
This guide will show the steps necessary to replace the heat pipe in the PS4 Pro. This process involves warranty-voiding disassembly and many steps. The heat pipe is located halfway between the top and bottom of the PS4 Pro, and thus requires components from both sides to be removed in order to replace.
Выберете то, что вам нужно
-
-
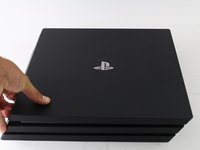
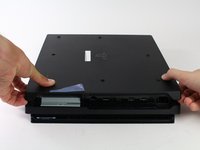
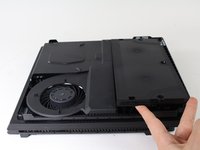
Flip the console upside down.
-
Use your finger to pull and snap off the plastic cover over the hard drive.
-
-
-
Use a Phillips #1 Screwdriver to remove the single screw securing the hard drive caddy.
-
Pull the hard drive caddy straight out.
-
-
-
Flip the console right side up.
-
Grip the two corners located at the front of the device.
-
Pull upwards until a loud click is heard.
-
After both corners detach, slide the cover backwards and lift off.
-
-
-
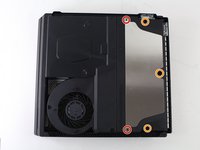
Use a T8 Torx Security screwdriver to remove five screws from the rear of the device.
-
Two 31mm screws.
-
Three 10mm screws for the 7000 models; Two gray 10mm screws (upper and lower screws on the illustration) if the PS4 Pro is a 7100-series model.
-
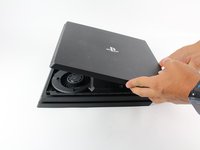
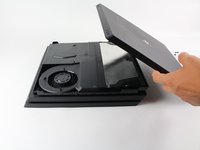
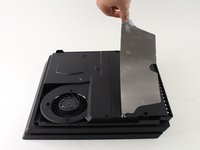
Remove the metal plate by pulling it up.
-
-
-
Flip the console over so the bottom is facing up.
-
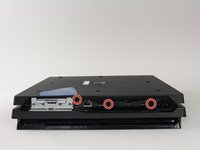
Use a T8 Torx Security screwdriver to remove the three black 7mm screws in the back panel. (7000-series models only); or one 7mm screw (the middle one) with 7100-series models and the warranty sticker to the left.
-
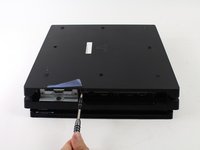
Remove the bottom cover in the same way as the top cover. Grip the cover on both sides and pull up until it clicks. Then slide the cover off; With 7100-series models, pay attention to the two clips that replace the corresponding screws.
-
-
-
-
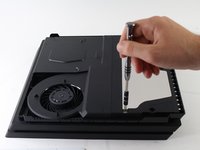
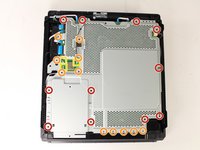
Use a T8 Torx security screwdriver to remove the eleven 10mm silver screws from the metal plate.
-
Use a Phillips #1 screwdriver to remove the eleven 4mm black screws from the metal plate.
-
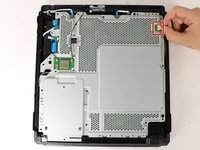
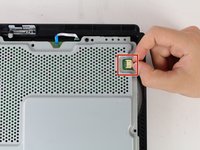
Use a spudger to disconnect the three antenna cables (two black and one white) by prying them straight up from their sockets.
-
-
-
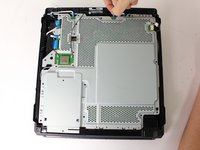
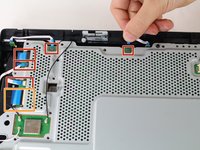
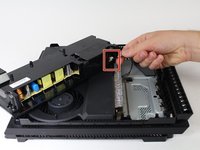
Pull the white fan connector straight out of the yellow mount on the motherboard.
-
-
-
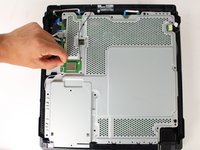
Pull out the five small, blue low profile cables connected to the metal plate.
-
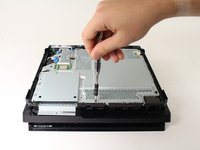
Lift the retaining flap on the ZIF connector of the large ribbon cable.
-
Pull the large ribbon cable from its socket.
-
-
-
Flip the console over to continue working on the top side.
-
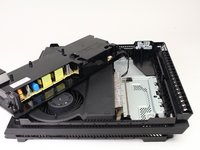
Pull up on the power supply unit and set it on the console.
-
Grip the connector behind the power supply and pull straight out.
-
-
-
Carefully flip the console over so the bottom is facing up.
-
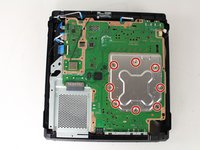
Use a Phillips #1 screwdriver to remove the eight 4mm screws on the metal plate with the X-like symbol.
-
Use a plastic opening tool to remove the metal plate with the X-like shape.
-
-
-
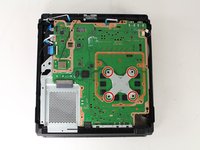
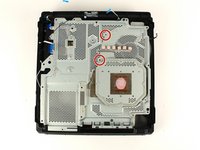
Use a Phillips #1 screwdriver to remove the four 13mm screws on the X-shaped metal plate underneath.
-
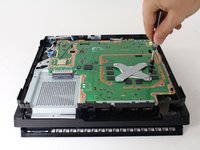
Grip the X-shaped retaining bracket and lift straight up.
-
-
-
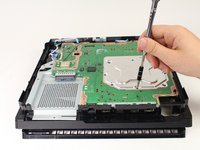
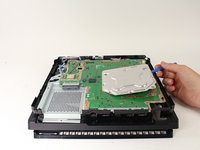
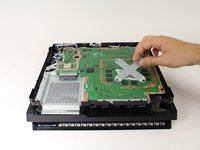
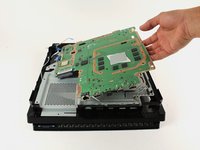
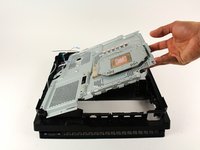
Grip the edge of the motherboard and slowly lift upwards to remove it from the device.
-
-
-
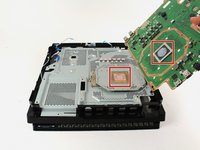
Use a Phillips #1 screwdriver to remove the two 6 mm silver screws from the metal plate.
-
-
-
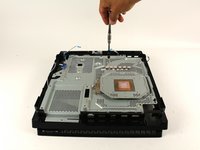
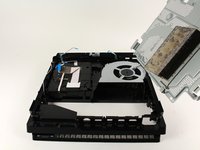
Lift the metal plate that is connected to the heat pipe straight up to remove it.
-


To reassemble your device, follow these instructions in reverse order.
To reassemble your device, follow these instructions in reverse order.
Отменить: Я не выполнил это руководство.
43 человек успешно провели ремонт по этому руководству.
Команду

Cal Poly, Team S21-G5, Livingston Spring 2017 Участник Cal Poly, Team S21-G5, Livingston Spring 2017
CPSU-LIVINGSTON-S17S21G5
4 членов
Автор 49 руководств
3 Комментариев
Can anyone explain what are those 5 blocks near heatsink as mine are broken when I open it 2 blocks have converted into dust plz help