Введение
You need to open or replace your Dell XPS 13 9380 back panel, this guide is for you!
Выберете то, что вам нужно
-
-
Use a Torx T5 driver to unscrew the eight screws securing the back panel.
-
Use a spudger to pry up and loosen the back panel.
-
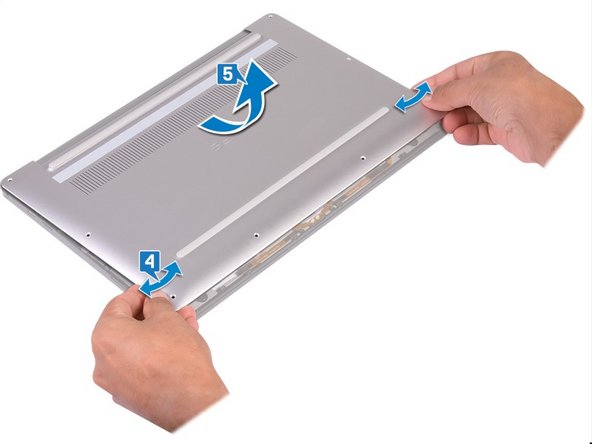
Lift the back panel up slightly from the non-hinged edge.
-
Pull the back panel away from the hinged edge, wiggling it back and forth to loosen the clips.
-
When the back panel clips are free, remove the back panel.
-
-


To reassemble your device, follow the instructions in reverse order.
To reassemble your device, follow the instructions in reverse order.
Отменить: Я не выполнил это руководство.
Еще один человек закончил это руководство.
Особая благодарность этим переводчикам:
100%


Эти переводчики помогают нам починить мир! Хотите внести свой вклад?
Начните переводить ›

Команда
