Перейти к основному содержанию

Replacing BenQ MP512ST Projector Central Fan

Выберете то, что вам нужно

  1. Replacing BenQ MP512ST Projector Central Fan, Central Fan: шаг 1, изображение 1 из 1
    • Be certain that the projector is powered off before beginning disassembly.

    • Remove the five Phillips screws on the bottom of the projector.

  2. Replacing BenQ MP512ST Projector Central Fan: шаг 2, изображение 1 из 1
    • Remove the Phillips screw on the back of the projector.

  3. Replacing BenQ MP512ST Projector Central Fan: шаг 3, изображение 1 из 1
    • Remove the four lock screws.

    • You may need to use pliers at first if the lock screws are too hard to twist with your fingers.

  4. Replacing BenQ MP512ST Projector Central Fan: шаг 4, изображение 1 из 2 Replacing BenQ MP512ST Projector Central Fan: шаг 4, изображение 2 из 2
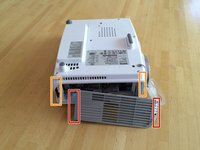
    • Pry the sides of the case off using your fingers.

    • Do not pull too hard on the sides because you may break the speaker wires attached to them.

    • Pop the tabs connecting the rest of the case together by running your fingers underneath the edges.

  5. Replacing BenQ MP512ST Projector Central Fan: шаг 5, изображение 1 из 1
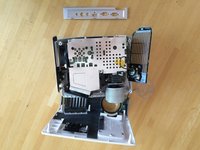
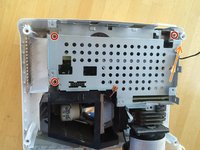
    • Remove the metal plate covering the circuit board by removing the four Phillips screws.

  6. Replacing BenQ MP512ST Projector Central Fan: шаг 6, изображение 1 из 1
    • Unplug the six cables by gently pulling up on the cable's connector.

    • Avoid pulling on the connector attached to the board as you may accidentally tear it off.

  7. Replacing BenQ MP512ST Projector Central Fan: шаг 7, изображение 1 из 1
    • Remove the two fans.

  8. Replacing BenQ MP512ST Projector Central Fan: шаг 8, изображение 1 из 2 Replacing BenQ MP512ST Projector Central Fan: шаг 8, изображение 2 из 2
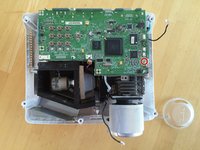
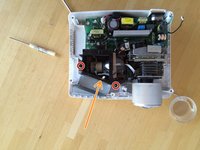
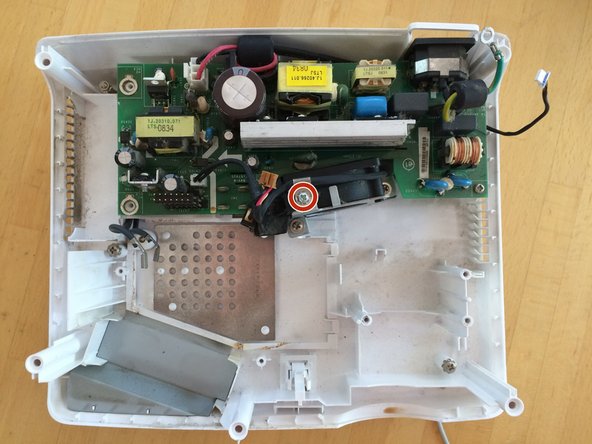
    • Remove the single Phillips screw on the circuit board.

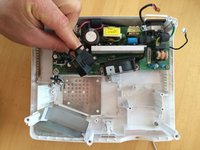
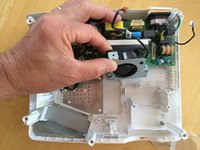
    • Gently pull up on the circuit board to remove it.

    • The circuit board still has a few connections to the other circuit board placed underneath it. Don't worry about these as they will disconnect as you lift up on the circuit board.

  9. Replacing BenQ MP512ST Projector Central Fan: шаг 9, изображение 1 из 2 Replacing BenQ MP512ST Projector Central Fan: шаг 9, изображение 2 из 2
    • Remove the four Phillips screws.

    • The orange arrow points to the location of the fourth screw which can be seen in the second picture.

  10. Replacing BenQ MP512ST Projector Central Fan: шаг 10, изображение 1 из 2 Replacing BenQ MP512ST Projector Central Fan: шаг 10, изображение 2 из 2
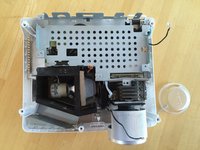
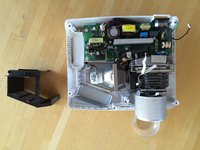
    • Remove the two Phillips screws.

    • The screw on the left is between two tall pieces of plastic which can make it difficult to see.

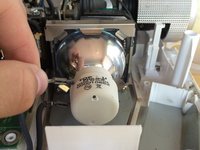
    • Lift up on the black plastic casing around the light bulb and remove it from the projector.

  11. Replacing BenQ MP512ST Projector Central Fan: шаг 11, изображение 1 из 2 Replacing BenQ MP512ST Projector Central Fan: шаг 11, изображение 2 из 2
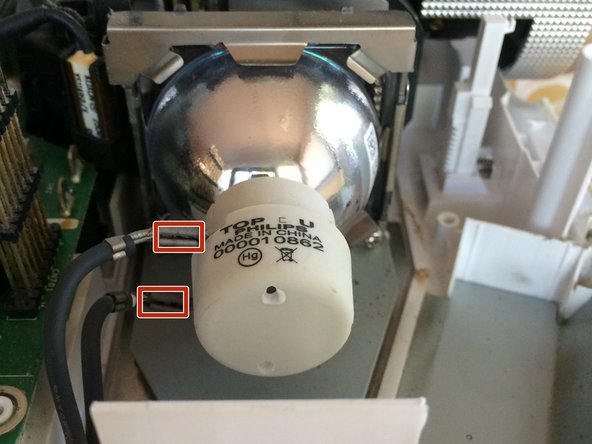
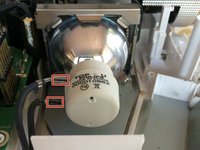
    • Disconnect the power supply from the light bulb by gently pulling on the two metal tabs attached to it.

  12. Replacing BenQ MP512ST Projector Central Fan: шаг 12, изображение 1 из 2 Replacing BenQ MP512ST Projector Central Fan: шаг 12, изображение 2 из 2
    • Remove the three screws circled in red that are holding the heat sink to the bottom part of the case.

  13. Replacing BenQ MP512ST Projector Central Fan: шаг 13, изображение 1 из 1
    • Lift the lens/light bulb combo out of the case.

    • It is necessary to remove the lens/light bulb combo in order to have easy access to the central fan.

  14. Replacing BenQ MP512ST Projector Central Fan: шаг 14, изображение 1 из 2 Replacing BenQ MP512ST Projector Central Fan: шаг 14, изображение 2 из 2
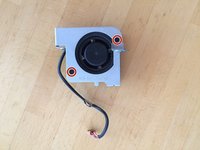
    • Remove the Phillips screw.

    • Slide the plastic piece on the left side of the fan out of its position.

  15. Replacing BenQ MP512ST Projector Central Fan: шаг 15, изображение 1 из 2 Replacing BenQ MP512ST Projector Central Fan: шаг 15, изображение 2 из 2
    • Remove the two screws.

    • Lift the fan out of the case.

  16. Replacing BenQ MP512ST Projector Central Fan: шаг 16, изображение 1 из 3 Replacing BenQ MP512ST Projector Central Fan: шаг 16, изображение 2 из 3 Replacing BenQ MP512ST Projector Central Fan: шаг 16, изображение 3 из 3
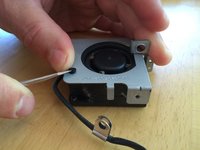
    • Remove the two connectors holding the fan to the metal frame.

    • Insert a flat head screw driver or other prying tool under the head of the connector and gently pry up.

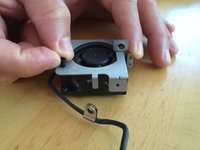
    • Insert the new fan in place of the old one.

Заключение

To reassemble your device, follow these instructions in reverse order.

3 участников успешно повторили данное руководство.

Dante Mazzanti

Участник с: 02/23/15

598 Репутация

Автор 3 руководств

Один комментарий

Excellent work. I followed all the steps.

desarrollohumano - Ответить

Добавить комментарий

Просмотр статистики:

За последние 24часов: 0

За последние 7 дней: 1

За последние 30 дней: 11

За всё время: 4,035