Эта версия возможно содержит некорректные исправления. Переключить на последнюю проверенную версию.
Выберете то, что вам нужно
-
Этот шаг не переведен. Помогите перевести
-
Remove the Samsung S-Pen stylus.
-
Remove the micro SD storage card.
-
-
Этот шаг не переведен. Помогите перевести
-
Using the plastic opening tool, start where the S-pen was located and carefully pry up the corner.
-
-
Этот шаг не переведен. Помогите перевести
-
Work your way around the entire device by carefully prying and sliding the plastic opening tool.
-
-
Этот шаг не переведен. Помогите перевести
-
Remove the 8 Phillips#00 3-mm screws holding the battery in place.
-
-
Этот шаг не переведен. Помогите перевести
-
Lift the top left corner of the battery up by the black tab.
-
-
Этот шаг не переведен. Помогите перевести
-
Gently grasp and lift up the white connector located at the bottom right corner of the battery. It is connected to the battery by two blue and two red wires.
-
-
-
Этот шаг не переведен. Помогите перевести
-
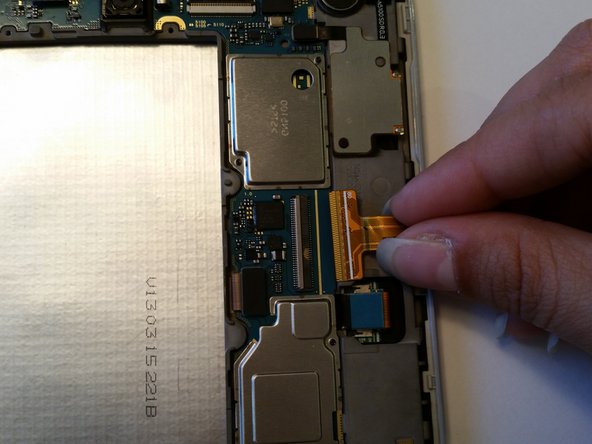
Gently pull the tan part of the digitizer connector up.
-
Carefully slide the orange ribbon out from connector.
-
-
Этот шаг не переведен. Помогите перевести
-
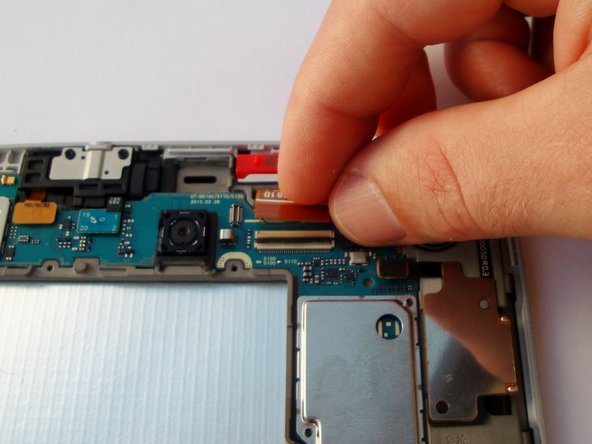
Gently pull up the black part of the LCD connector.
-
Carefully slide orange ribbon out from connector.
-
-
Этот шаг не переведен. Помогите перевести
-
Turn the tablet over screen up. Set your heat gun or blow dryer to the medium heat setting.
-
Sweep the heat gun over the white edge of the tablet screen. Apply heat for 30 seconds on each side before moving to the next side.
-
You will repeat a circular pattern bottom, left, top and then right. Repeat this pattern 3 times spending 30 seconds on each side.
-
-
Этот шаг не переведен. Помогите перевести
-
Insert your plastic opening tool between the silver surround and the screen, starting at the top of the tablet.
-
-
Этот шаг не переведен. Помогите перевести
-
Slide your opening tool down the side of the device with the volume and power buttons. Continue sliding down the side toward the home button until the glue is free on this side.
-
-
Этот шаг не переведен. Помогите перевести
-
Slide your opening tool down the home button edge until the glue is free on this side.
-
-
Этот шаг не переведен. Помогите перевести
-
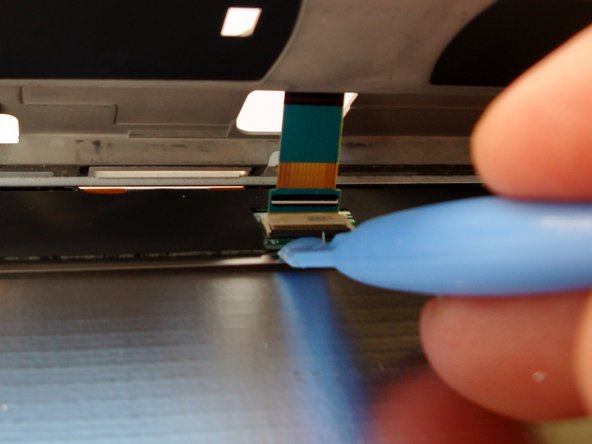
Turn the tablet over and carefully press out the LCD panel from the back along the power button edge only. Push gently on the back of the LCD in the battery opening.
-
Disconnect ribbon that is connecting the screen assembly to the motherboard
-
-
Этот шаг не переведен. Помогите перевести
-
Turn the tablet over and completely remove the LCD and screen assembly from the tablet by sliding a plastic opening tool down the final edge until the adhesive is free.
-
If you are replacing the screen by itself, continue to the next step. If you are replacing the screen digitizer only, simply follow the procedures in reverse to complete the replacement.
-
-
Этот шаг не переведен. Помогите перевести
-
To separate the screen from the LCD you will need to heat the adhesive holding the two together.
-
Holding the heat gun, set to medium, approximately 6 inches from the screen, sweep from left to right as you move the heat gun across the tablet from top to bottom.
-
Continue heating the screen from top to bottom as you sweep from left to right for 5 minutes.
-
-
Этот шаг не переведен. Помогите перевести
-
Find a plastic card you no longer need.
-
Slide the card between the screen and digitizer working around the edges toward the center.
-


Отменить: Я не выполнил это руководство.
47 участников успешно повторили данное руководство.
Команда

USF Tampa, Team 12-2, Blackwell Fall 2014 Участник USF Tampa, Team 12-2, Blackwell Fall 2014
USFT-BLACKWELL-F14S12G2
4 членов
Автор 16 руководств
20 Комментариев
For steps 15 and 16, removing just the glass digitizer from the lcd, does this step happen after you completely remove the lcd from the tablet? It is hard to tell because it looks like the silver from the tablet is present but it takes place in the instructions after the lcd should already be removed and no silver should be present. Any help on this would be appreciated. I have one where the digitizer screen is broken but the lcd has no damage at all.
No you dont need to remove the lcd you hav to unplug the toch connector n heat the glass like in the steps
For step 13, I ripped this motherboard connector trying to get the new lcd in. Anyone have any idea what I have actually damaged? And where I could find out how to fix it?
yes replacements are on ebay
Pantalla Flex Cable LCD Conector Display Screen Ribbon Samsung Galaxy Note 8.0.