Перейти к основному содержанию

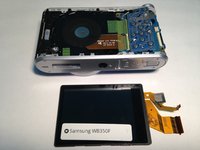
Samsung WB350F Screen Replacement

Выберете то, что вам нужно

  1. Samsung WB350F Screen Replacement, Rear Case: шаг 1, изображение 1 из 3 Samsung WB350F Screen Replacement, Rear Case: шаг 1, изображение 2 из 3 Samsung WB350F Screen Replacement, Rear Case: шаг 1, изображение 3 из 3
    • Remove the wristlet strap.

    • If you have difficulties use your plastic spudger. If you don't have a plastic spudger, you can also use a pen/pencil.

  2. Samsung WB350F Screen Replacement: шаг 2, изображение 1 из 3 Samsung WB350F Screen Replacement: шаг 2, изображение 2 из 3 Samsung WB350F Screen Replacement: шаг 2, изображение 3 из 3
    • Remove five 3.2 mm screws with a Phillips #000 Screwdriver.

    • There is one silver screw on the bottom and two black screws on each side.

    • Keep the screws together for an easier re-assembly later.

  3. Samsung WB350F Screen Replacement: шаг 3, изображение 1 из 3 Samsung WB350F Screen Replacement: шаг 3, изображение 2 из 3 Samsung WB350F Screen Replacement: шаг 3, изображение 3 из 3
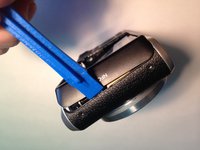
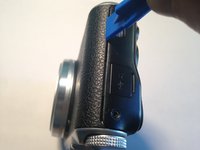
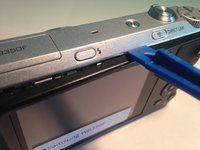
    • Open the case of the camera using your plastic opening tool.

    • Start on each end, working the tool into the opening and popping the casing up. Then work your way down the longer sides (top and bottom).

    • If you don’t have plastic opening tools, any flat plastic object, like a used gift card, can be used as an improvised alternative.

  4. Samsung WB350F Screen Replacement: шаг 4, изображение 1 из 1
    • Remove the plastic casing, exposing the inner workings of the camera.

  5. Samsung WB350F Screen Replacement, Screen: шаг 5, изображение 1 из 2 Samsung WB350F Screen Replacement, Screen: шаг 5, изображение 2 из 2
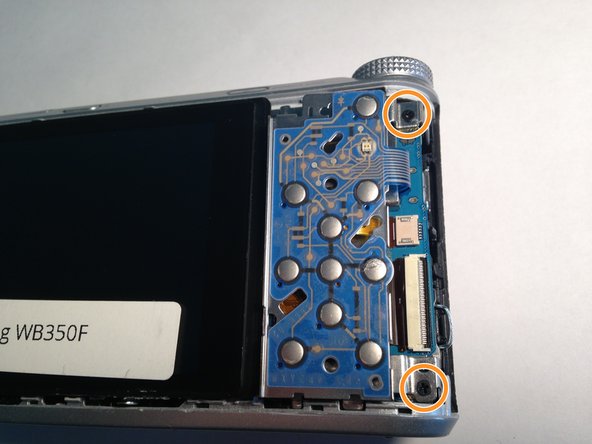
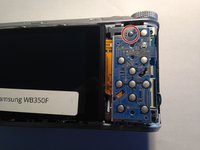
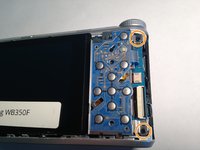
    • Using your Phillips #000 Screwdriver, remove one 3.2 mm screw above the menu buttons panel.

    • Next, remove the two 3.2 mm Phillips #000 screws to the left of the menu buttons panel.

  6. Samsung WB350F Screen Replacement: шаг 6, изображение 1 из 1
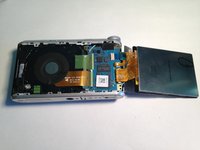
    • Move the menu button panel to the right as well as the screen.

    • Be careful because each are connected to the camera by a ribbon.

  7. Samsung WB350F Screen Replacement: шаг 7, изображение 1 из 1
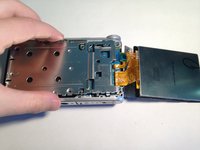
    • Remove two more 3.2 mm screws on the silver panel using your Phillips #000 Screwdriver.

  8. Samsung WB350F Screen Replacement: шаг 8, изображение 1 из 2 Samsung WB350F Screen Replacement: шаг 8, изображение 2 из 2
    • Remove the silver panel.

  9. Samsung WB350F Screen Replacement: шаг 9, изображение 1 из 2 Samsung WB350F Screen Replacement: шаг 9, изображение 2 из 2
    • Flip the screen back over.

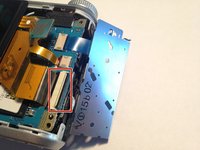
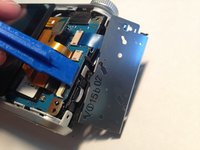
    • Using the plastic open tool, flip open the black retaining plastic piece holding the larger ribbon in place.

  10. Samsung WB350F Screen Replacement: шаг 10, изображение 1 из 2 Samsung WB350F Screen Replacement: шаг 10, изображение 2 из 2
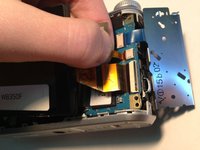
    • Carefully detach both ribbons by gently pulling one at a time.

    • The thinner ribbon isn't secured with a connector and you are able to pull it straight out.

    • Be sure to pull gently as you do not want to break either ribbon.

Заключение

To reassemble your device, follow these instructions in reverse order.

3 участников успешно повторили данное руководство.

Casey Bernier

Участник с: 03/04/16

131 Репутация

1 руководство автора

Команда

UMass Dartmouth, Team 6-2, Bhusal Spring 2016 Участник UMass Dartmouth, Team 6-2, Bhusal Spring 2016

UMASSD-BHUSAL-S16S6G2

4 членов

Автор 8 руководств

Один комментарий

Broke my screen, bought a new one on the internet (ebay) and used this tutorial for replacement.

Good photos and every step is clear to follow

Gerald Heidrich - Ответить

Добавить комментарий

Просмотр статистики:

За последние 24часов: 4

За последние 7 дней: 15

За последние 30 дней: 25

За всё время: 1,399