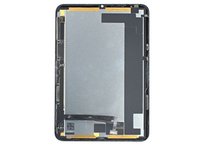
Перейти к основному содержанию

Screen Removal

Абсолютно необходимое руководство
Это руководство предназначено только для использования в качестве обязательного условия для других руководств. Оно не полностью само по себе.

Выберете то, что вам нужно

  1. Screen Removal, Apply tape to a cracked screen: шаг 1, изображение 1 из 3 Screen Removal, Apply tape to a cracked screen: шаг 1, изображение 2 из 3 Screen Removal, Apply tape to a cracked screen: шаг 1, изображение 3 из 3
    • If your display glass is cracked, keep further breakage contained and prevent bodily harm during your repair by taping the glass.

    • Lay overlapping strips of clear packing tape over the iPad's display until the whole face is covered.

    • This will keep glass shards contained and provide structural integrity when prying and lifting the display.

    • Do your best to follow the rest of the guide as described. However, once the glass is broken, it will likely continue to crack as you work, and you may need to use a metal prying tool to scoop the glass out.

    • Wear safety glasses to protect your eyes, and be careful not to damage the LCD screen.

  2. Screen Removal, Heat the bottom edge: шаг 2, изображение 1 из 1
    • Completely power off your device before you begin.

    • Apply a heated iOpener to the bottom edge of the device for 90 seconds to loosen the adhesive underneath.

    • A hair dryer, heat gun, or hot plate may also be used, but be careful not to overheat the device.

  3. Screen Removal, Screen removal information: шаг 3, изображение 1 из 3 Screen Removal, Screen removal information: шаг 3, изображение 2 из 3 Screen Removal, Screen removal information: шаг 3, изображение 3 из 3
    • While you're waiting for the adhesive to loosen, note the following:

    • The areas at the top and bottom of the screen are sensitive to prying.

    • Don't insert a pick more than 3 mm to avoid damaging the screen.

    • There's a long circuit board attached to the screen that sits parallel to the left edge.

    • Don't insert a pick more than 1.5 mm to avoid damaging the circuit board.

    • The first two images are mirrored for demonstration purposes.

  4. Screen Removal, Insert an opening pick: шаг 4, изображение 1 из 3 Screen Removal, Insert an opening pick: шаг 4, изображение 2 из 3 Screen Removal, Insert an opening pick: шаг 4, изображение 3 из 3
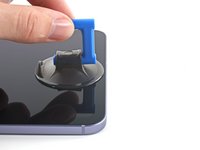
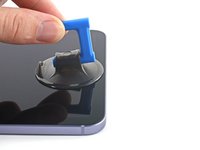
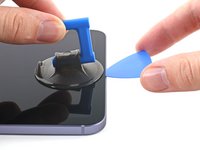
    • Once the screen is warm to touch, apply a suction handle to the bottom edge of the screen and as close to the edge as possible.

    • Lift the screen with the suction handle to create a small gap between the screen and the frame.

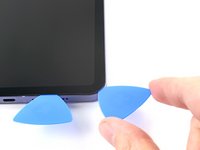
    • Insert an opening pick into the gap between the frame and the screen.

    • Don't insert the pick more than 1.5 mm to avoid damaging the circuit board.

    • Leave the opening pick in place to prevent the adhesive from resealing.

  5. Screen Removal, Separate the bottom adhesive: шаг 5, изображение 1 из 3 Screen Removal, Separate the bottom adhesive: шаг 5, изображение 2 из 3 Screen Removal, Separate the bottom adhesive: шаг 5, изображение 3 из 3
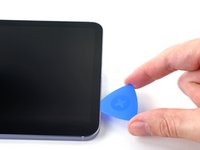
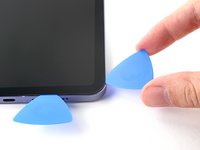
    • Slide the pick along the bottom edge of the device towards the bottom-right corner.

    • Leave the pick in to prevent the adhesive from resealing.

  6. Screen Removal, Heat the right edge: шаг 6, изображение 1 из 1
    • Apply a heated iOpener to the right edge of the device for 90 seconds to loosen the adhesive underneath.

  7. Screen Removal, Separate the bottom-right corner adhesive: шаг 7, изображение 1 из 3 Screen Removal, Separate the bottom-right corner adhesive: шаг 7, изображение 2 из 3 Screen Removal, Separate the bottom-right corner adhesive: шаг 7, изображение 3 из 3
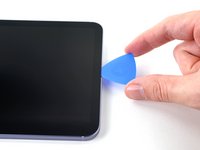
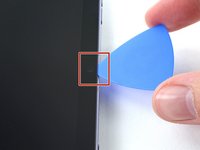
    • Rotate the opening pick around the bottom-right corner of the device.

  8. Screen Removal, Separate the remaining adhesive: шаг 8, изображение 1 из 2 Screen Removal, Separate the remaining adhesive: шаг 8, изображение 2 из 2
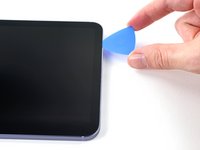
    • Repeat the heating, slicing, and leaving opening picks for the remaining edges of the device.

    • When you slice near the front camera, don't insert the pick more than 1.5 mm to avoid damaging or smearing the camera.

  9. Screen Removal, Reposition the screen: шаг 9, изображение 1 из 3 Screen Removal, Reposition the screen: шаг 9, изображение 2 из 3 Screen Removal, Reposition the screen: шаг 9, изображение 3 из 3
    • If there's still resistance around the edges of the screen, use an opening pick to cut the adhesive again.

    • Don't try to remove the screen all the way yet; it's still connected to the frame by a flex cable.

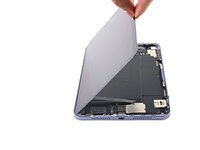
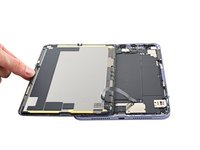
    • With the bottom of the device facing you, pull the right edge of the screen up and towards the left edge of the device.

    • Rest the screen upside down and parallel to the frame before continuing.

    • Don't twist the screen or move it too far away from the frame to avoid damaging the flex cable.

  10. Screen Removal, Unfasten the display cable bracket: шаг 10, изображение 1 из 2 Screen Removal, Unfasten the display cable bracket: шаг 10, изображение 2 из 2
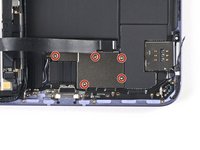
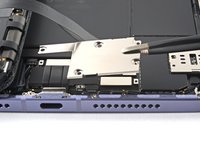
    • Use a Phillips #000 screwdriver to remove the five 1.2 mm-long screws securing the frame bracket to the frame.

  11. Screen Removal, Remove the display cable bracket: шаг 11, изображение 1 из 2 Screen Removal, Remove the display cable bracket: шаг 11, изображение 2 из 2
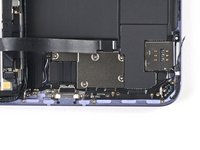
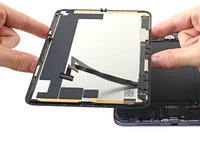
    • Use tweezers, or your fingers, to remove the display cable bracket from the frame.

  12. Screen Removal, Disconnect the display: шаг 12, изображение 1 из 3 Screen Removal, Disconnect the display: шаг 12, изображение 2 из 3 Screen Removal, Disconnect the display: шаг 12, изображение 3 из 3
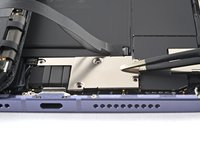
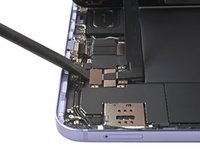
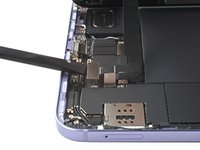
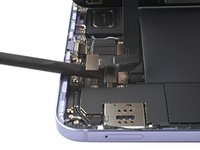
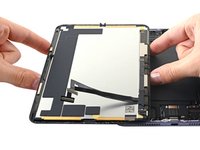
    • Use the flat end of a spudger to pry up and disconnect the display cable's two press connectors secured to the frame.

  13. Screen Removal, Remove the screen: шаг 13, изображение 1 из 2 Screen Removal, Remove the screen: шаг 13, изображение 2 из 2
    • Remove the screen from the frame.

Заключение

To reassemble your device, follow these instructions in reverse order.

Alex Diaz-Kokaisl

Участник с: 01/16/22

119 508 Репутация

Автор 549 руководств

Команда

iFixit Участник iFixit

Staff

135 членов

Автор 16 820 руководств

0 Комментариев

Добавить комментарий

Просмотр статистики:

За последние 24часов: 0

За последние 7 дней: 0

За последние 30 дней: 6

За всё время: 73