Перейти к основному содержанию

Sony α6500 LCD Screen Replacement

Выберете то, что вам нужно

  1. Sony α6500 LCD Screen Replacement, Battery: шаг 1, изображение 1 из 1
    • Verify the camera is powered off by setting the switch to OFF.

  2. Sony α6500 LCD Screen Replacement: шаг 2, изображение 1 из 2 Sony α6500 LCD Screen Replacement: шаг 2, изображение 2 из 2
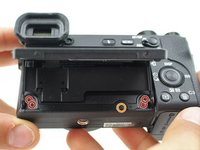
    • Flip the camera upside down.

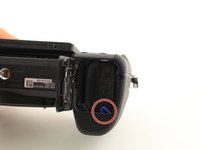
    • Slide the battery compartment lock to OPEN to unlock it.

  3. Sony α6500 LCD Screen Replacement: шаг 3, изображение 1 из 2 Sony α6500 LCD Screen Replacement: шаг 3, изображение 2 из 2
    • Push the blue lever aside to release the battery.

  4. Sony α6500 LCD Screen Replacement: шаг 4, изображение 1 из 1
    • Remove the released battery from the compartment.

  5. Sony α6500 LCD Screen Replacement, LCD Screen: шаг 5, изображение 1 из 3 Sony α6500 LCD Screen Replacement, LCD Screen: шаг 5, изображение 2 из 3 Sony α6500 LCD Screen Replacement, LCD Screen: шаг 5, изображение 3 из 3
    • To access the LCD assembly we need to remove the screws attaching its hinge to the camera body.

    • Remove four 3mm JIS 000 screws.

    • Remove one 3mm JIS 00 screw.

    • After dismounting the screen hinge be careful to not tear the black wire ribbon connecting the screen to the camera body.

  6. Sony α6500 LCD Screen Replacement: шаг 6, изображение 1 из 2 Sony α6500 LCD Screen Replacement: шаг 6, изображение 2 из 2
    • Remove the screen hinge from the camera.

    • Be careful to not tear the black flat cable connecting the lcd screen to the main body of the camera. This particular camera's cable has been cut for demonstration purposes.

  7. Sony α6500 LCD Screen Replacement: шаг 7, изображение 1 из 1
    • Flip the LCD screen up.

    • Remove two 2mm JIS 000 screws on the bottom edge.

  8. Sony α6500 LCD Screen Replacement: шаг 8, изображение 1 из 2 Sony α6500 LCD Screen Replacement: шаг 8, изображение 2 из 2
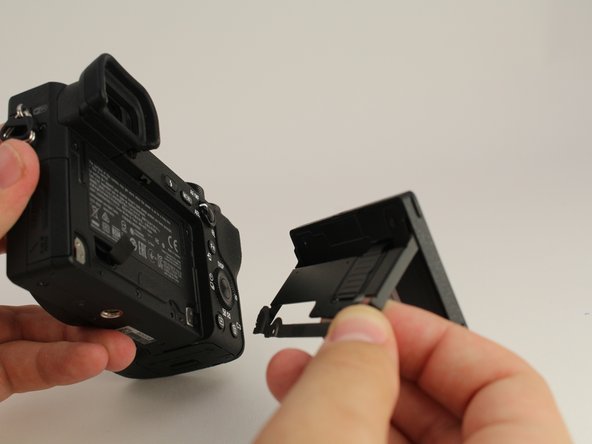
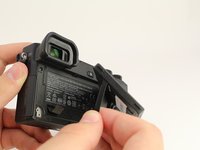
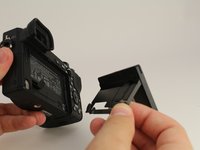
    • Flip the LCD screen down to access the back side.

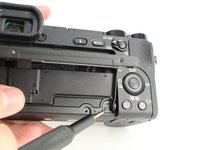
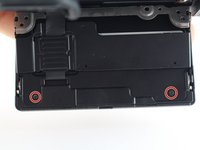
    • Remove two 2mm JIS 000 screws to release the back panel of the screen.

  9. Sony α6500 LCD Screen Replacement: шаг 9, изображение 1 из 2 Sony α6500 LCD Screen Replacement: шаг 9, изображение 2 из 2
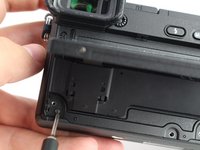
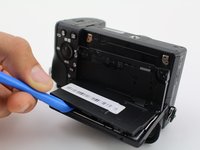
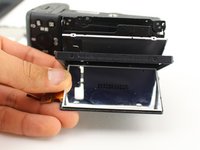
    • Use the opening tool to pry open the back panel.

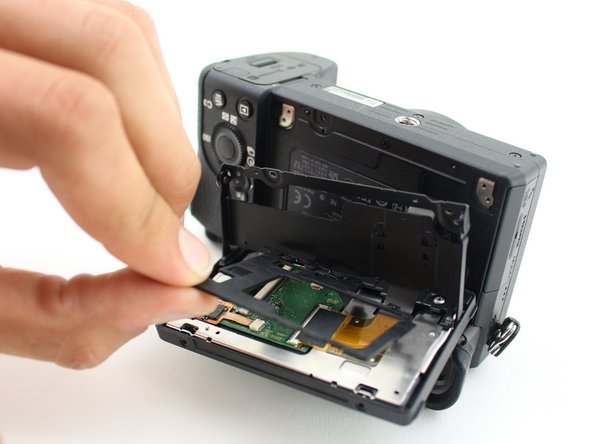
    • Remove the black plastic spacer laying on top of the circuit board.

  10. Sony α6500 LCD Screen Replacement: шаг 10, изображение 1 из 2 Sony α6500 LCD Screen Replacement: шаг 10, изображение 2 из 2
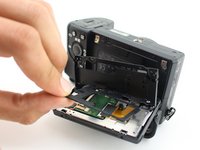
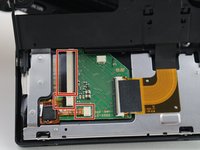
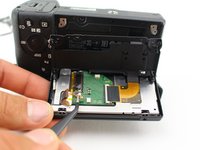
    • Carefully unplug the three wire ribbons from the circuit board with tweezers.

    • Likely you will need to wiggle the ribbons for a while before they come loose.

    • The ribbons can rip very easily, grasp the black plastic with the tweezers, on the two top ribbons, not the orange wires.

  11. Sony α6500 LCD Screen Replacement: шаг 11, изображение 1 из 3 Sony α6500 LCD Screen Replacement: шаг 11, изображение 2 из 3 Sony α6500 LCD Screen Replacement: шаг 11, изображение 3 из 3
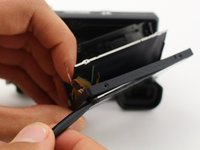
    • Slide the spudger around all sides of the screen's plastic frame, gently breaking the adhesive.

    • Remove the screen from the camera by prying it out.

Заключение

To reassemble your device, follow these instructions in reverse order.

3 участников успешно повторили данное руководство.

Micah Fitzgerald

Участник с: 10/03/19

624 Репутация

Автор 2 руководств

Команда

Cal Poly, Team S11-G5, Regan Fall 2019 Участник Cal Poly, Team S11-G5, Regan Fall 2019

CPSU-REGAN-F19S11G5

5 членов

Автор 14 руководств

2 Комментариев

Hello, do you have an updated link with a currently available lcd screen replacement part?

JRS - Joe’s Random Stuff - Ответить

Can I use an a6500 screen to replace an a6600 screen? Are they interchangeable?

Connor Snyder - Ответить

Добавить комментарий

Просмотр статистики:

За последние 24часов: 1

За последние 7 дней: 9

За последние 30 дней: 53

За всё время: 2,634