Перейти к основному содержанию

Sony H.ear On 2 Bluetooth Transceiver Replacement

Выберете то, что вам нужно

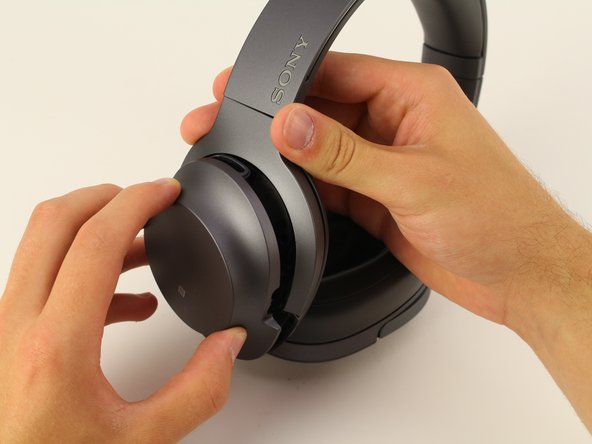
  1. Sony H.ear On 2 Bluetooth Transceiver Replacement, Ear Cup: шаг 1, изображение 1 из 2 Sony H.ear On 2 Bluetooth Transceiver Replacement, Ear Cup: шаг 1, изображение 2 из 2
    • Start by inserting the iFixit plastic opening tool in the crease between the hard plastic and the ear cup, and then gently apply pressure until it separates. You may need to repeat the process on back until it is completely separate.

    • This may take a considerable amount of pressure, but do not force it.

  2. Sony H.ear On 2 Bluetooth Transceiver Replacement: шаг 2, изображение 1 из 2 Sony H.ear On 2 Bluetooth Transceiver Replacement: шаг 2, изображение 2 из 2
    • Use the JIS #00 Screwdriver to remove the five 6.4 mm screws holding the back plastic cover in place.

    • Then, turn the ear cup over and carefully lift the plastic cap off to reveal the internal components of the left ear cup.

    • This same process can be repeated on the right ear cup as well. Be aware the right cup is connected to the rest of the headphones via ribbon cable.

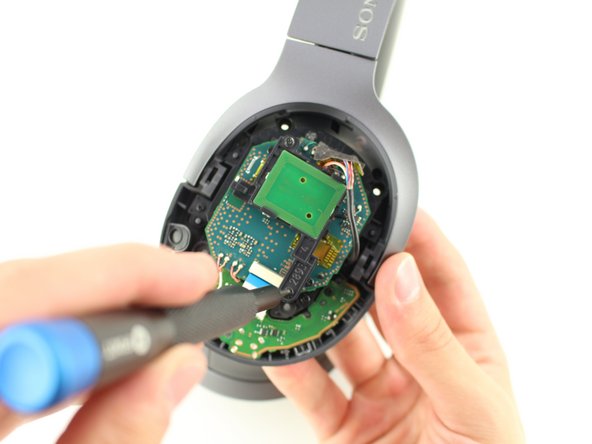
  3. Sony H.ear On 2 Bluetooth Transceiver Replacement, Bluetooth Transceiver: шаг 3, изображение 1 из 2 Sony H.ear On 2 Bluetooth Transceiver Replacement, Bluetooth Transceiver: шаг 3, изображение 2 из 2
    • Use the JIS #00 Screwdriver to remove the five 6.4 mm screws holding the back plastic cover in place.

    • Then, turn the ear cup over and carefully lift the plastic cover off to reveal the internal components of the right ear cup.

    • Unlike the right ear cup, there is no ribbon cable directly connecting the rest of the headphones to the outer cup.

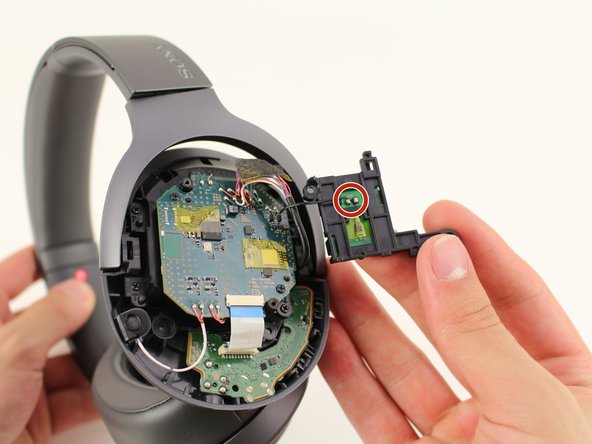
  4. Sony H.ear On 2 Bluetooth Transceiver Replacement: шаг 4, изображение 1 из 3 Sony H.ear On 2 Bluetooth Transceiver Replacement: шаг 4, изображение 2 из 3 Sony H.ear On 2 Bluetooth Transceiver Replacement: шаг 4, изображение 3 из 3
    • Using the JIS #00 screwdriver, remove the two 6.4 mm screws holding the NFC chip in place over the motherboard.

    • Once the screws are removed, gently turn over the board to the left to expose the soldered connection points.

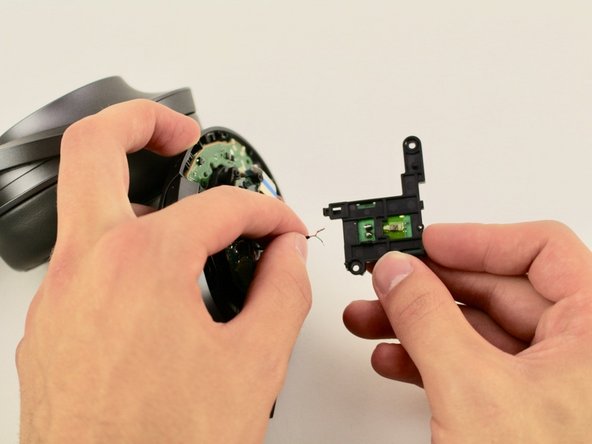
  5. Sony H.ear On 2 Bluetooth Transceiver Replacement: шаг 5, изображение 1 из 2 Sony H.ear On 2 Bluetooth Transceiver Replacement: шаг 5, изображение 2 из 2
    • Using a soldering iron, carefully de-solder the two connection points on the NFC chip.

    • Once the solder has completely melted, carefully separate the wires and the NFC chip itself.

    • Please see How to Solder and Desolder Connections before you attempt to use the soldering iron.

Заключение

To reassemble your device, follow these instructions in reverse order.

Peter Van Ness

Участник с: 04/15/19

147 Репутация

1 руководство автора

Команда

Cal Poly, Team S9-G11, Maness Spring 2019 Участник Cal Poly, Team S9-G11, Maness Spring 2019

CPSU-MANESS-S19S9G11

5 членов

Автор 16 руководств

0 Комментариев

Добавить комментарий

Просмотр статистики:

За последние 24часов: 0

За последние 7 дней: 3

За последние 30 дней: 18

За всё время: 1,323