Эта версия возможно содержит некорректные исправления. Переключить на последнюю проверенную версию.
Выберете то, что вам нужно
-
Этот шаг не переведен. Помогите перевести
-
Turn the laptop off and unplug it.
-
Remove the screw on the left-hand side of the computer towards the back using a small Phillips #0 screwdriver.
-
-
Этот шаг не переведен. Помогите перевести
-
Open the laptop with the screen facing you.
-
Carefully lift the left side of the panel and unhook the right side. Do not pull beyond the length of the ribbon cable that secures it to the motherboard.
-
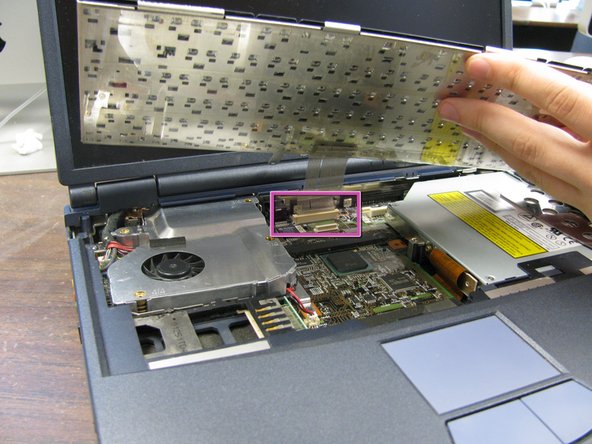
To separate the ribbon cable from the motherboard, grip it near the base and gently pull.
-
-
Этот шаг не переведен. Помогите перевести
-
To remove the keyboard, lift it a few inches from the computer, taking care not to pull beyond the length of the ribbon cable that secures it to the motherboard.
-
Separate the ribbon cable from the motherboard by placing your fingers at the base and pulling gently.
-
-
-
Этот шаг не переведен. Помогите перевести
-
Attach the new keyboard’s ribbon cable to the motherboard by carefully inserting it into the white plastic outlet located at the top center of the motherboard.
-
Set the keyboard in place.
-
-
Этот шаг не переведен. Помогите перевести
-
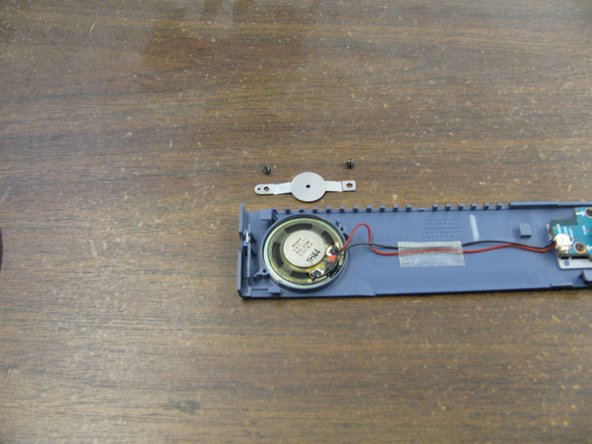
There are two speakers on the underside of the speaker panel, one on each end. Unplug both sets of the black and red wires from the circuit board by gently pulling at the base.
-
Remove the screws (two per speaker) with the Phillips #0 screwdriver. Then remove the metal brackets holding the speakers in place.
-
Remove the adhesive tape securing the speaker wires to the panel.
-
-
Этот шаг не переведен. Помогите перевести
-
The speakers are cemented to the panel. To remove the speakers from the panel, place either the screw driver or tweezers in the hole on the outer edge of the speaker and pry it off.
-


Отменить: Я не выполнил это руководство.
Еще один человек закончил это руководство.
Команда

Cal Poly, Team 18-68, Johann Spring 2010 Участник Cal Poly, Team 18-68, Johann Spring 2010
CPSU-JOHANN-S10S18G68
4 членов
Автор 9 руководств