Перейти к основному содержанию

Sony Walkman NWZ-S764 LCD Screen Replacement

Выберете то, что вам нужно

  1. Sony Walkman NWZ-S764 LCD Screen Replacement, Removing the back cover: шаг 1, изображение 1 из 3 Sony Walkman NWZ-S764 LCD Screen Replacement, Removing the back cover: шаг 1, изображение 2 из 3 Sony Walkman NWZ-S764 LCD Screen Replacement, Removing the back cover: шаг 1, изображение 3 из 3
    • Remove the two black 6.4mm Phillips screws from the back of the device.

  2. Sony Walkman NWZ-S764 LCD Screen Replacement: шаг 2, изображение 1 из 3 Sony Walkman NWZ-S764 LCD Screen Replacement: шаг 2, изображение 2 из 3 Sony Walkman NWZ-S764 LCD Screen Replacement: шаг 2, изображение 3 из 3
    • Using a plastic opening tool, work your way around the edges of the device, carefully prying off the front panel.

  3. Sony Walkman NWZ-S764 LCD Screen Replacement: шаг 3, изображение 1 из 2 Sony Walkman NWZ-S764 LCD Screen Replacement: шаг 3, изображение 2 из 2
    • Remove the two 2.8 mm phillips screws located on either side of the device near the top.

  4. Sony Walkman NWZ-S764 LCD Screen Replacement: шаг 4, изображение 1 из 2 Sony Walkman NWZ-S764 LCD Screen Replacement: шаг 4, изображение 2 из 2
    • Carefully pull the top piece away from the device.

  5. Sony Walkman NWZ-S764 LCD Screen Replacement, Removing the Bluetooth module: шаг 5, изображение 1 из 3 Sony Walkman NWZ-S764 LCD Screen Replacement, Removing the Bluetooth module: шаг 5, изображение 2 из 3 Sony Walkman NWZ-S764 LCD Screen Replacement, Removing the Bluetooth module: шаг 5, изображение 3 из 3
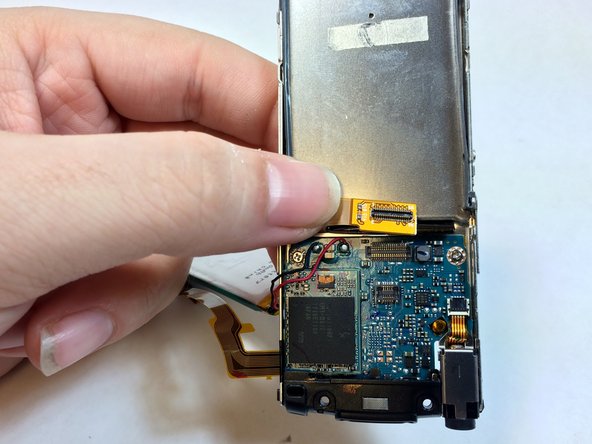
    • Use the flat end of the spudger to flip up the retaining flap for the bluetooth module.

    • Be sure to lift up on the retaining flap, and not the socket itself.

  6. Sony Walkman NWZ-S764 LCD Screen Replacement: шаг 6, изображение 1 из 3 Sony Walkman NWZ-S764 LCD Screen Replacement: шаг 6, изображение 2 из 3 Sony Walkman NWZ-S764 LCD Screen Replacement: шаг 6, изображение 3 из 3
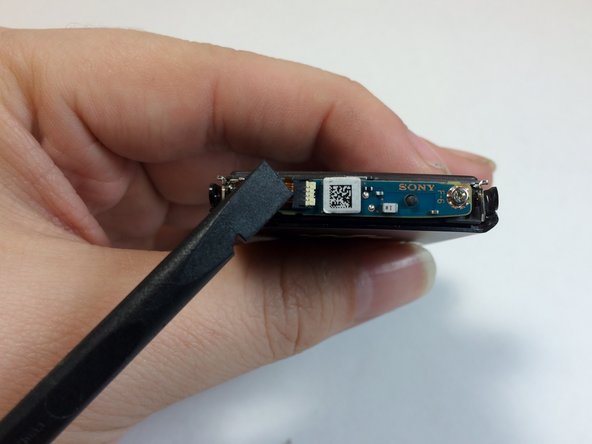
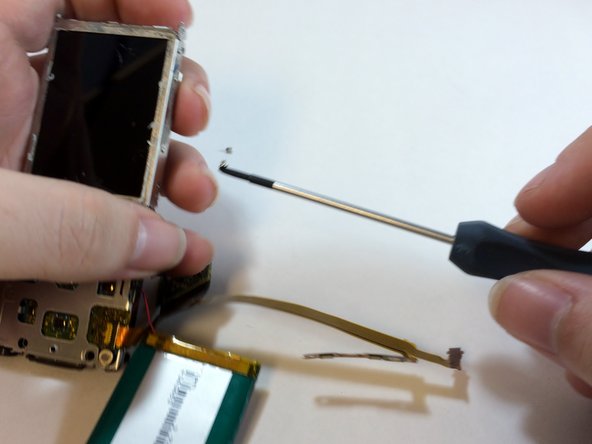
    • Remove the two 1.8mm silver Phillips screws on the Bluetooth module.

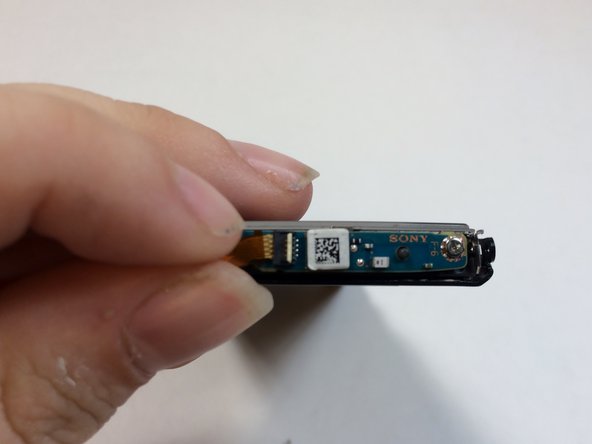
    • Lift up on and remove the Bluetooth module.

    • The ribbon cable must first be removed in order to access the highlighted screw.

  7. Sony Walkman NWZ-S764 LCD Screen Replacement, Audio Port: шаг 7, изображение 1 из 3 Sony Walkman NWZ-S764 LCD Screen Replacement, Audio Port: шаг 7, изображение 2 из 3 Sony Walkman NWZ-S764 LCD Screen Replacement, Audio Port: шаг 7, изображение 3 из 3
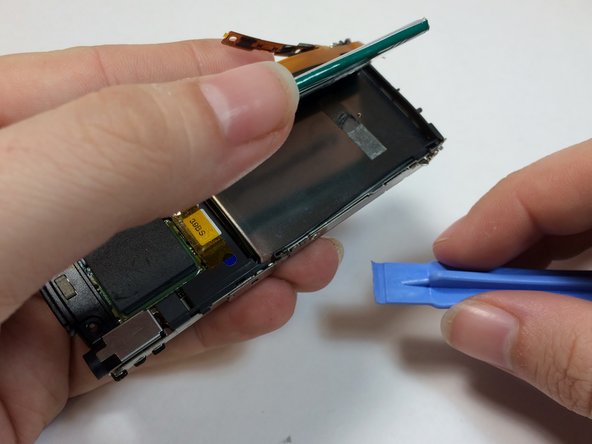
    • Remove the two 2.8mm silver Phillips screws on the sides of the frame.

    • The two 2.8mm screws are on each side of the device.

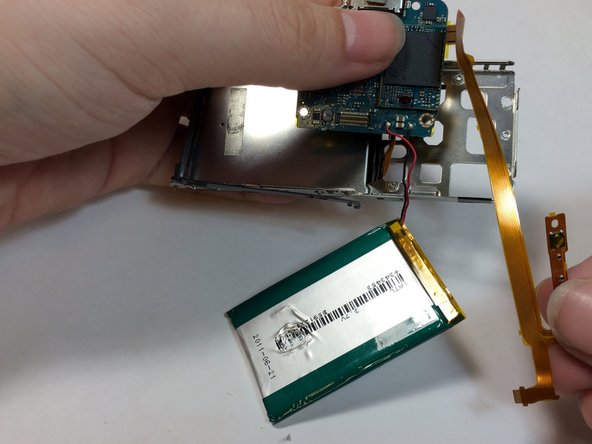
    • Insert a plastic prying tool between the bottom of the case and the motherboard.

    • Pry up the assembly and lift it away from the case.

  8. Sony Walkman NWZ-S764 LCD Screen Replacement: шаг 8, изображение 1 из 3 Sony Walkman NWZ-S764 LCD Screen Replacement: шаг 8, изображение 2 из 3 Sony Walkman NWZ-S764 LCD Screen Replacement: шаг 8, изображение 3 из 3
    • Remove the yellow tape from the battery and volume control module.

    • Save tape for reassembly.

  9. Sony Walkman NWZ-S764 LCD Screen Replacement: шаг 9, изображение 1 из 3 Sony Walkman NWZ-S764 LCD Screen Replacement: шаг 9, изображение 2 из 3 Sony Walkman NWZ-S764 LCD Screen Replacement: шаг 9, изображение 3 из 3
    • Use a prying tool to pry under the volume control module.

    • This module is glued on, using too much force may damage or warp the module.

  10. Sony Walkman NWZ-S764 LCD Screen Replacement: шаг 10, изображение 1 из 3 Sony Walkman NWZ-S764 LCD Screen Replacement: шаг 10, изображение 2 из 3 Sony Walkman NWZ-S764 LCD Screen Replacement: шаг 10, изображение 3 из 3
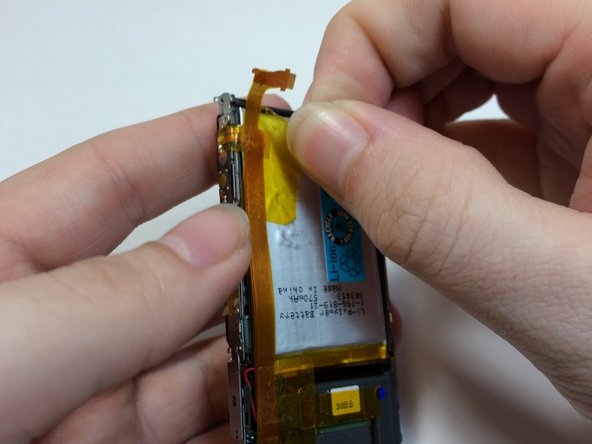
    • Remove the tape from EMF shield and the LCD housing.

    • Lift up on the volume control ribbon.

  11. Sony Walkman NWZ-S764 LCD Screen Replacement: шаг 11, изображение 1 из 3 Sony Walkman NWZ-S764 LCD Screen Replacement: шаг 11, изображение 2 из 3 Sony Walkman NWZ-S764 LCD Screen Replacement: шаг 11, изображение 3 из 3
    • Insert a plastic opening tool under the battery and lift up to remove it.

    • The battery is glued on, too much force may damage the battery casing.

    • The battery is soldered to the motherboard, care should be taken to not place too much stress on the wires.

  12. Sony Walkman NWZ-S764 LCD Screen Replacement: шаг 12, изображение 1 из 3 Sony Walkman NWZ-S764 LCD Screen Replacement: шаг 12, изображение 2 из 3 Sony Walkman NWZ-S764 LCD Screen Replacement: шаг 12, изображение 3 из 3
    • Remove the black shielding tape from above the Hard Drive.

    • Peel the foam cover away from the hard drive.

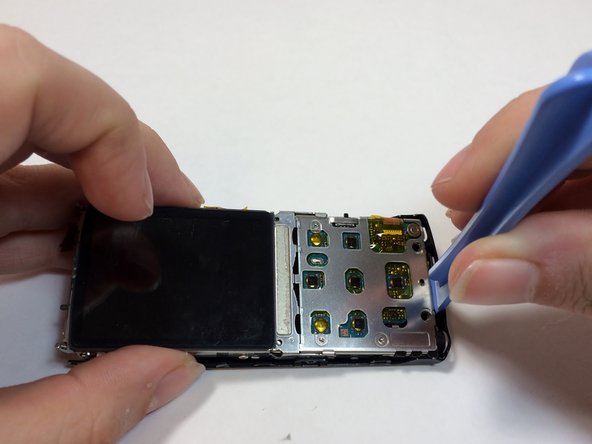
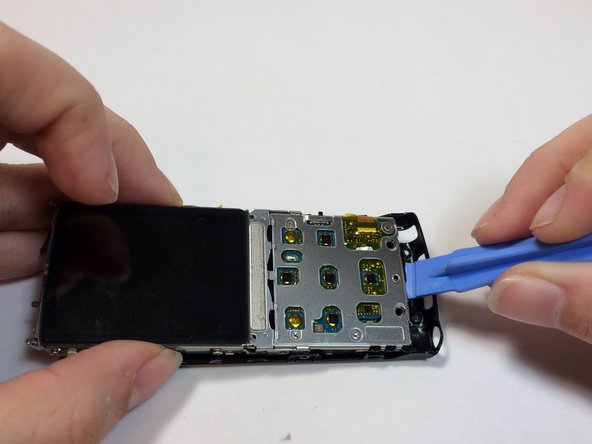
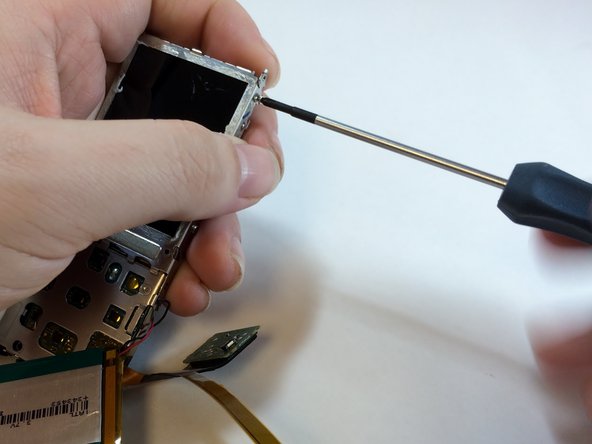
    • Use a plastic opening tool to remove the EMF chip from the motherboard.

    • The hard drive is soldered onto the device. Be careful not to pull too hard on the hard drive.

  13. Sony Walkman NWZ-S764 LCD Screen Replacement: шаг 13, изображение 1 из 3 Sony Walkman NWZ-S764 LCD Screen Replacement: шаг 13, изображение 2 из 3 Sony Walkman NWZ-S764 LCD Screen Replacement: шаг 13, изображение 3 из 3
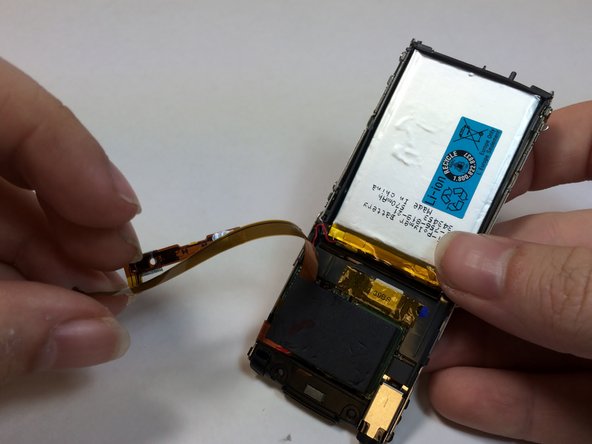
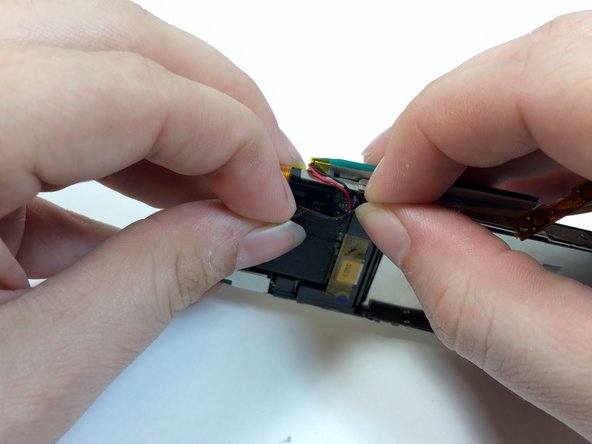
    • Remove the plastic bracket by pushing up with your thumb to expose the display connection.

  14. Sony Walkman NWZ-S764 LCD Screen Replacement: шаг 14, изображение 1 из 3 Sony Walkman NWZ-S764 LCD Screen Replacement: шаг 14, изображение 2 из 3 Sony Walkman NWZ-S764 LCD Screen Replacement: шаг 14, изображение 3 из 3
    • Use the flat end of a spudger to flip up the retaining flap on the audio jack module.

  15. Sony Walkman NWZ-S764 LCD Screen Replacement: шаг 15, изображение 1 из 2 Sony Walkman NWZ-S764 LCD Screen Replacement: шаг 15, изображение 2 из 2
    • Peel back the ribbon for the audio jack and remove the 1.8mm silver Phillips screw.

  16. Sony Walkman NWZ-S764 LCD Screen Replacement: шаг 16, изображение 1 из 3 Sony Walkman NWZ-S764 LCD Screen Replacement: шаг 16, изображение 2 из 3 Sony Walkman NWZ-S764 LCD Screen Replacement: шаг 16, изображение 3 из 3
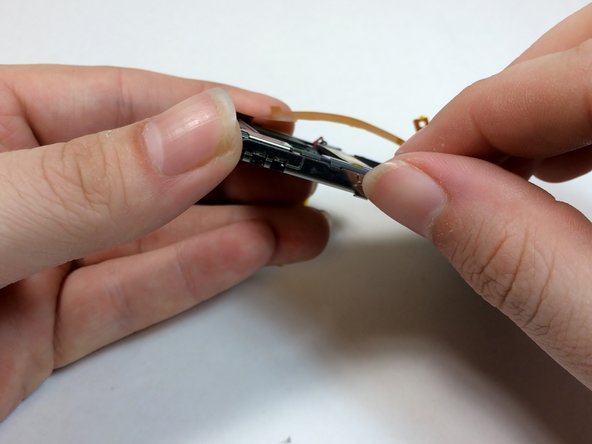
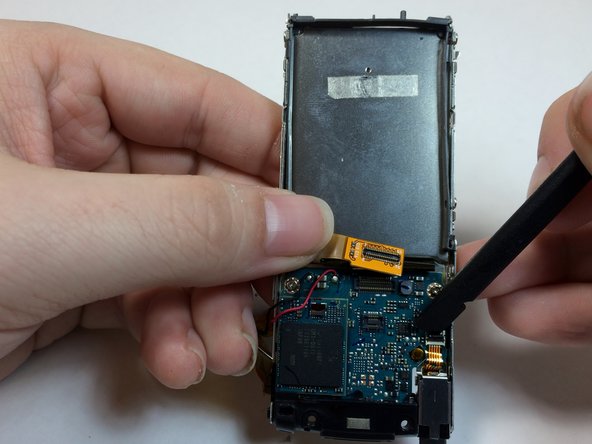
    • Remove the mic casing by pushing up and in.

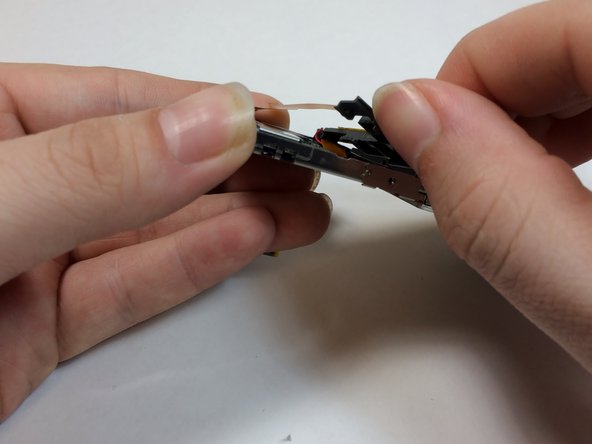
    • Remove the headphone jack and the bottom casing.

  17. Sony Walkman NWZ-S764 LCD Screen Replacement, Motherboard: шаг 17, изображение 1 из 2 Sony Walkman NWZ-S764 LCD Screen Replacement, Motherboard: шаг 17, изображение 2 из 2
    • Use the prying tool to remove the LCD ribbon wire.

  18. Sony Walkman NWZ-S764 LCD Screen Replacement: шаг 18, изображение 1 из 1
    • Lift up on the LCD ribbon and remove the two 1.8mm silver Phillips screws.

  19. Sony Walkman NWZ-S764 LCD Screen Replacement: шаг 19, изображение 1 из 3 Sony Walkman NWZ-S764 LCD Screen Replacement: шаг 19, изображение 2 из 3 Sony Walkman NWZ-S764 LCD Screen Replacement: шаг 19, изображение 3 из 3
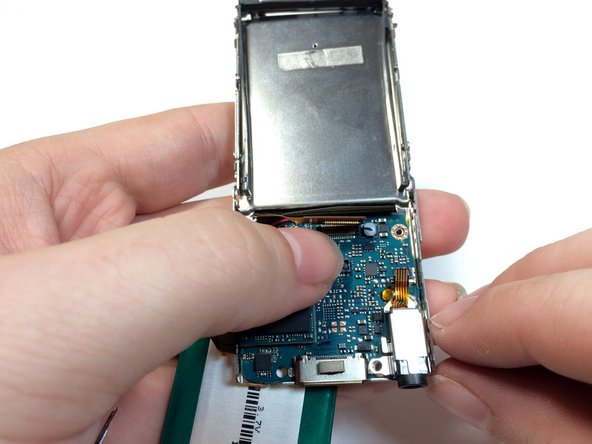
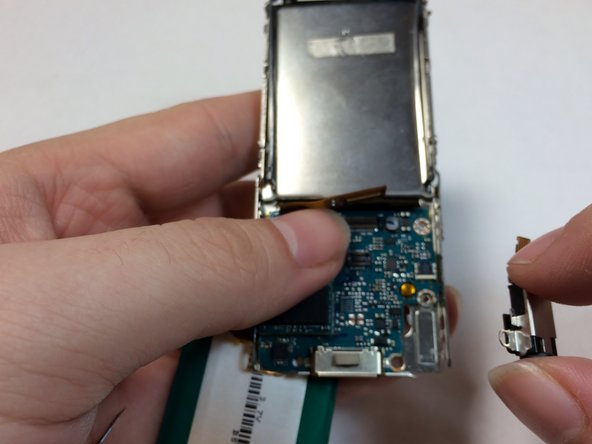
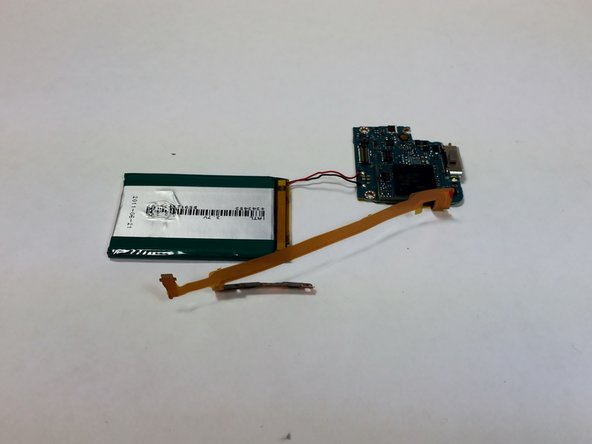
    • Lift the motherboard away from the frame with your thumb to remove it from the device.

    • Pull the volume control module through the space in the frame.

    • If you are using the magnetic project pad or other magnetic surface to keep your screws, do not place the hard drive on or near the magnet.

  20. Sony Walkman NWZ-S764 LCD Screen Replacement, LCD Screen: шаг 20, изображение 1 из 2 Sony Walkman NWZ-S764 LCD Screen Replacement, LCD Screen: шаг 20, изображение 2 из 2
    • To remove the LCD display cover, first melt the glue with the iOpener tool.

    • For more detailed instructions on how to use the iOpener, see iOpener Instructions

  21. Sony Walkman NWZ-S764 LCD Screen Replacement: шаг 21, изображение 1 из 3 Sony Walkman NWZ-S764 LCD Screen Replacement: шаг 21, изображение 2 из 3 Sony Walkman NWZ-S764 LCD Screen Replacement: шаг 21, изображение 3 из 3
    • Carefully slide the iOpener wedge tool under the edge of the LCD display cover to separate it from the device.

    • Slide the wedge under all edges of the cover.

    • Once all of the glue has been broken, you can pull up on the cover to remove it.

    • The flat side of the spudger tool also works for this step

  22. Sony Walkman NWZ-S764 LCD Screen Replacement: шаг 22, изображение 1 из 3 Sony Walkman NWZ-S764 LCD Screen Replacement: шаг 22, изображение 2 из 3 Sony Walkman NWZ-S764 LCD Screen Replacement: шаг 22, изображение 3 из 3
    • Remove the two 1.8 mm Phillips screws from both sides of the frame.

  23. Sony Walkman NWZ-S764 LCD Screen Replacement: шаг 23, изображение 1 из 3 Sony Walkman NWZ-S764 LCD Screen Replacement: шаг 23, изображение 2 из 3 Sony Walkman NWZ-S764 LCD Screen Replacement: шаг 23, изображение 3 из 3
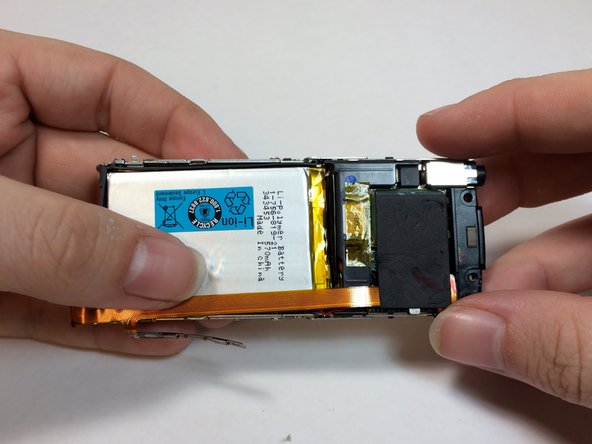
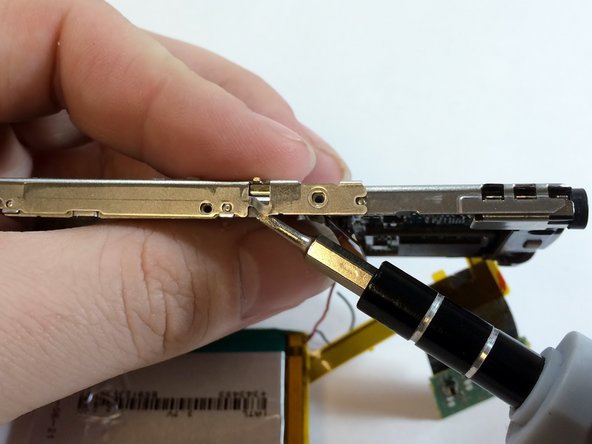
    • Use a strong pry tool to lift the metal brackets away from the device. You will need to bend the metal slightly to remove it from the dimples.

    • This step will require slight force to separate the frame. Do not bend the brackets too far so that they can be replaced later.

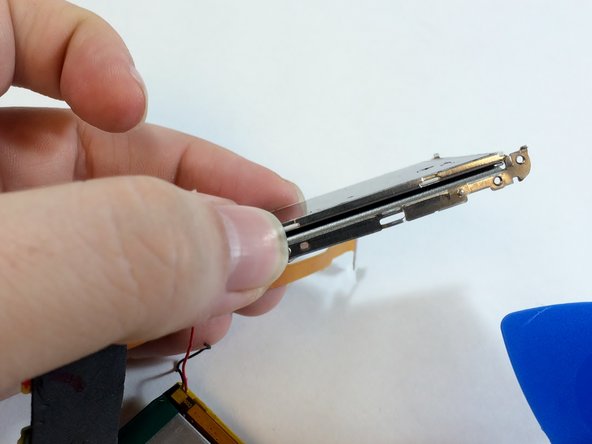
    • Once separated, pull the innermost frame containing the LCD display away from the brackets.

  24. Sony Walkman NWZ-S764 LCD Screen Replacement: шаг 24, изображение 1 из 3 Sony Walkman NWZ-S764 LCD Screen Replacement: шаг 24, изображение 2 из 3 Sony Walkman NWZ-S764 LCD Screen Replacement: шаг 24, изображение 3 из 3
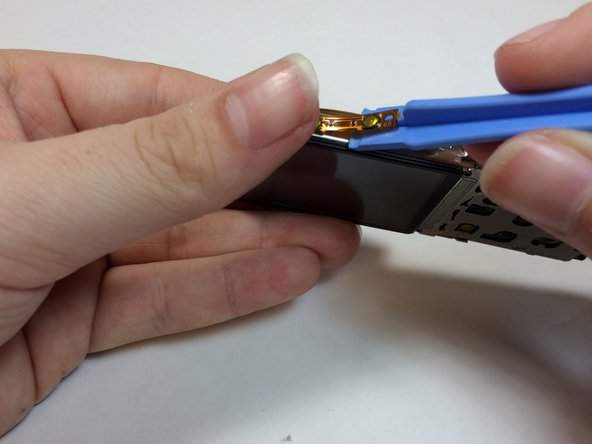
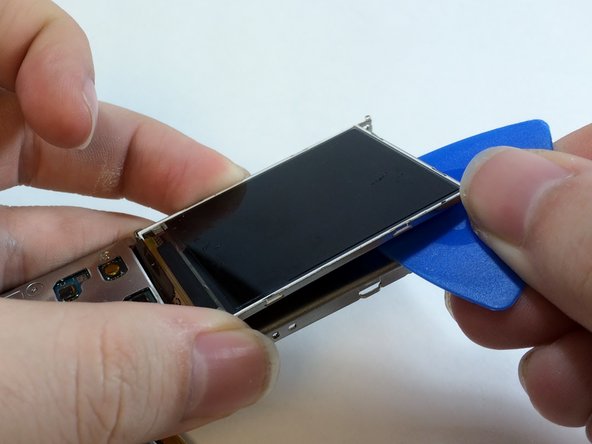
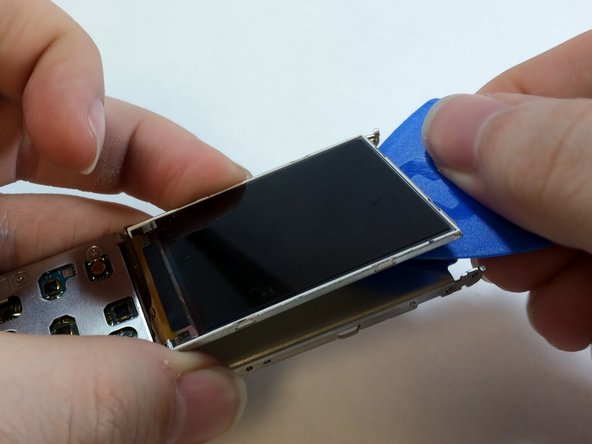
    • Slide an opening pick under the LCD display to separate it from the rest of the device.

    • The pry tool also works for this step.

  25. Sony Walkman NWZ-S764 LCD Screen Replacement: шаг 25, изображение 1 из 2 Sony Walkman NWZ-S764 LCD Screen Replacement: шаг 25, изображение 2 из 2
    • Lift the LCD display off of the frame to remove it from the device.

Заключение

To reassemble your device, follow these instructions in reverse order.

Еще один человек закончил это руководство.

Matthew Olson

Участник с: 01/21/15

175 Репутация

1 руководство автора

Команда

USF Tampa, Team 4-2, Brown Winter 2015 Участник USF Tampa, Team 4-2, Brown Winter 2015

USFT-BROWN-W15S4G2

4 членов

Автор 6 руководств

0 Комментариев

Добавить комментарий

Просмотр статистики:

За последние 24часов: 3

За последние 7 дней: 12

За последние 30 дней: 25

За всё время: 1,937