Введение
I am making a guide to explain in detail how to replace a charging port on a Toshiba Satellite A505-6005. While iFixit has many guides up, I was unable to find one that matched the design of the laptop I chose to work on. I believe that this guide will help expand on the vast knowledge that is already available, and will enable many consumers to save money and have success when replacing a charging port. This is a necessary repair because without a way to charge the battery, the laptop will soon be rendered useless with the power supply runs out. To avoid damage to hardware it is strongly recommended to take your time and move slow. This is because the components are small and fragile. As far as safety goes, the only risk comes from opening the system up if there is still power running through the system, this is avoided by removing the battery before you begin. It is strongly recommended to use labeled bowls to place the screws you removed. This is to avoid losing screws or having screws leftover after reassembling the laptop.
Выберете то, что вам нужно
-
-
The battery can be removed by sliding the mechanism on the left to the right. Once this is done slide the mechanism further to the right while pulling up on the battery.
-
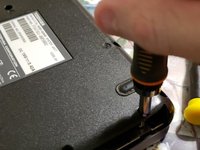
Use the Phillips #0 screwdriver to remove the two screws under the battery.
-
-
-
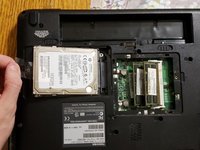
Remove nine screws with a Phillips #0 screwdriver and then remove the cover of the hard drive/RAM.
-
-
-
Once the screw for the hard drive is removed, gently pull on the ribbon to completely unplug the hard drive.
-
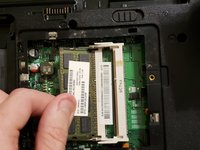
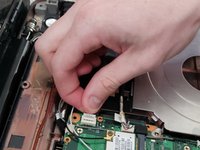
Use a spudger to gently push the sides of the clip holding both RAM sticks into place. After that, simply pull the RAM sticks out.
-
-
-
-
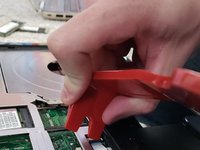
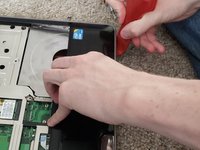
Use a plastic opening tool to pry the disc drive open and remove it. This will be easy, as you have already removed the screws holding the disc drive in place.
-
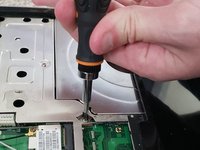
Do not forget to remove the three screws under the disc drive. I found the best way to do this is to use a long screwdriver with a small magnetic Phillips tip.
-
-
-
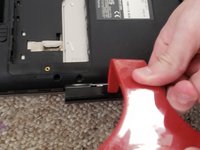
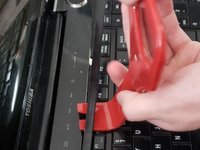
Gently pry up with a plastic opening tool on the bottom of the trim in the little slots that are cut out.
-
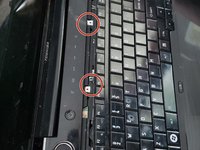
Remove the four screws under the small piece.
-
-
-
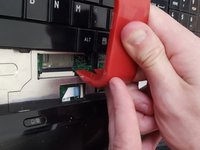
Gently pull up on the keyboard after the four screws have been removed.
-
There will be a ribbon anchoring the keyboard in place. Use a plastic opening tool to push against the small black clip holding it in place, then carefully remove the ribbon.
-
-
-
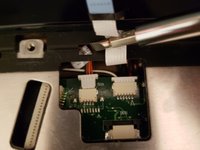
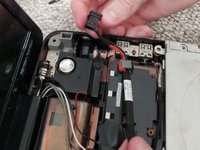
Near the top of the keyboard there will be two power sources to unplug. Gently unplug both of them.
-
Near the bottom of the picture you'll see an area where a ribbon is plugged in. Remove the ribbon cable.
-
-
-
Now the charging port will be exposed. Simply unplug and remove the old one, and plug in and properly place the new charging port.
-


To reassemble your device, follow these instructions in reverse order.
To reassemble your device, follow these instructions in reverse order.
Отменить: Я не выполнил это руководство.
Еще один человек закончил это руководство.
Команду

Purdue University Northwest, Team S6-G1, Hingst Spring 2020 Участник Purdue University Northwest, Team S6-G1, Hingst Spring 2020
PNW-HINGST-S20S6G1
1 член
Автор 2 руководств