Перейти к основному содержанию

Эта версия возможно содержит некорректные исправления. Переключить на последнюю проверенную версию.

Выберете то, что вам нужно

  1. Этот шаг не переведен. Помогите перевести

    : шаг 1, изображение 1 из 1
    • Flip the laptop over so the bottom is facing up.

    • Slide each of the three tabs on the bottom half of the assembly into the unlocked position.

  2. Этот шаг не переведен. Помогите перевести

    : шаг 2, изображение 1 из 1
    • Gently lift the battery out of the computer.

  3. Этот шаг не переведен. Помогите перевести

    : шаг 3, изображение 1 из 1
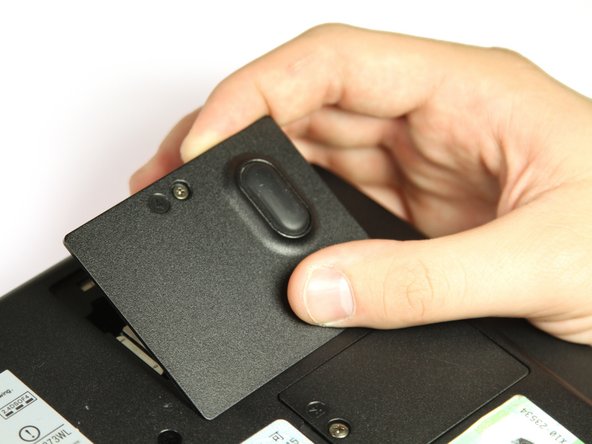
    • Remove the single 3mm Phillips #00 screw that secures the wireless card cover.

  4. Этот шаг не переведен. Помогите перевести

    : шаг 4, изображение 1 из 1
    • Remove the WIFI module cover. It will pull right off.

  5. Этот шаг не переведен. Помогите перевести

    : шаг 5, изображение 1 из 2 : шаг 5, изображение 2 из 2
    • Unplug the white and black wires from the WiFi module.

  6. Этот шаг не переведен. Помогите перевести

    : шаг 6, изображение 1 из 1
    • Remove the twelve 8mm button head Phillips #00 B8 screws.

    • Remove the two 14 mm button head Phillips #00 B14 screws.

    • Remove the two 10 mm Phillips #00 battery compartment screws.

    • Remove the two 8 mm Phillips #00 screws.

  7. Этот шаг не переведен. Помогите перевести

    : шаг 7, изображение 1 из 1
    • Remove the seven 4mm flat Phillips #00 screws.

    • Remove the seven 20mm button head Phillips #00 screws.

  8. Этот шаг не переведен. Помогите перевести

    : шаг 8, изображение 1 из 1
    • Use the plastic opening tool to pry the two halves apart.

  9. Этот шаг не переведен. Помогите перевести

    : шаг 9, изображение 1 из 1
    • Orient the bottom assembly as displayed.

  10. Этот шаг не переведен. Помогите перевести

    : шаг 10, изображение 1 из 2 : шаг 10, изображение 2 из 2
    • Remove the two 3 mm Phillips #00 screws.

  11. Этот шаг не переведен. Помогите перевести

    : шаг 11, изображение 1 из 1
    • Slide the optical drive out of the laptop through the opening on the left side of the bottom assembly.

Финишная черта

Geoff Wacker

Участник с: 09/30/13

89 972 Репутация

Автор 89 руководств

Один комментарий

Or, simply remove the screw (the center one in this photo) from the bottom case that holds the bracket in and pull the drive out.

J Howard Markley - Ответить

Добавить комментарий

Просмотр статистики:

За последние 24часов: 0

За последние 7 дней: 10

За последние 30 дней: 14

За всё время: 987