Введение
Exercise caution when removing the camera lens's connecting ribbon , as any excessive pulling can damage the motherboard. Otherwise, the camera lens is one of the quickest replacements, as it only requires light unscrewing, prying, and re-applying hot glue.
Выберете то, что вам нужно
-
-
-
Using a plastic opening tool, gently pry off the circular plating over the camera lens.
-
-
Инструмент, используемый на этом этапе:Magnetic Project Mat$19.95
-
Use a #0 screwdriver to remove the two 2.5mm Phillips head screws located on the second layer of plating.
-
Remove the second layer of plating previously held down by the screws by gripping it with your fingers and pulling upward.
-
-
-
Pry off the transparent plating and paper design using a plastic opening tool.
-
-
-
-
Unscrew the (4) 2.5mm Phillips head screws from the third layer of plating using a #0 screwdriver.
-
-
-
Turn the camera around and gently remove the plating that surrounds the LCD screen by grasping it with your fingers and pulling away from the device.
-
-
-
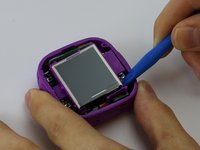
Use the plastic opening tool to lift the LCD screen, including the purple casing and set it aside, revealing the motherboard and connector ribbon.
-
-
-
-
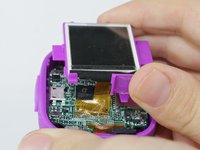
Use the plastic opening tool to pry the lens from it's holder.
-
-
-
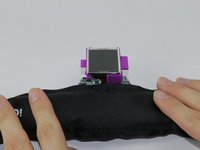
Heat the iOpener tool, then press the iOpener tool onto the connectors to heat the glue on the connector ribbon.
-
-
-
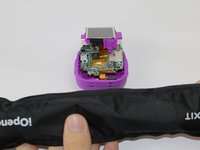
Gently peel the connector ribbon being held down by the heated glue until it is completely removed.
-
When connecting the new camera lense, press the new connector ribbon to the original ribbon's position.
-
-


To reassemble your device, follow these instructions in reverse order.
Отменить: Я не выполнил это руководство.
Еще один человек закончил это руководство.
Команда

USF Tampa, Team 3-5, Sullivan Spring 2016 Участник USF Tampa, Team 3-5, Sullivan Spring 2016
USFT-SULLIVAN-S16S3G5
3 членов
Автор 6 руководств