Введение
This guide can be used to fix the first generation of Xbox. When taking the Xbox apart to replace the fan make sure to be careful in carefully following all of the steps to ensure that you can put it back together properly.
Выберете то, что вам нужно
Видеообзор
-
-
Turn the Xbox on its back and remove the rubber feet in each corner using a flathead screwdriver.
 Спросите у FixBot
-
-
-
Peel off the stickers on the bottom side of the Xbox and unscrew all six screws using a Torx 20 screwdriver bit. Set the screws off to the side so you don't misplace them.
-
-
-
In order to remove the IDE cable, pull firmly on the cable straight back from the hard drive.
-
-
-
-
Remove the screw from underneath the IDE cable using a Torx 10 screwdriver.
-
-
-
Remove the hard drive by pulling it directly up and out of the case.
-
-
-
Remove the cable the same way that the hard drive cable was removed. Simply pull the cable straight out from the DVD drive.
-
-
-
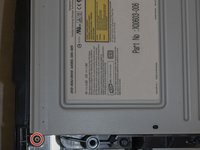
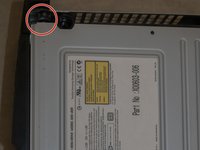
Remove the screws from each end of the DVD drive using a Torx 10 screwdriver.
-
-
-
Once both screws have been removed pull straight upwards to remove the drive.
-
-
-
Unscrew all eleven screws that hold the mother board in place. Use a Torx 10 screwdriver to unscrew them.
-
-
-
Remove the power cord by gently lifting it out at a 45 degree angle.
-
After the power cord is removed gently lift out the mother board by placing your fingers around the edges inside the case and lifting straight up and out.
-
-
-
Remove the old fan by pressing gently on the clips on each side with a flathead screwdriver and then carefully clip in a new fan.
-




To reassemble your device, follow these instructions in reverse order.
Отменить: Я не выполнил это руководство.
4 человек успешно провели ремонт по этому руководству.

