Введение
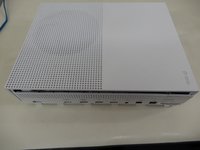
This guide will provide you with the necessary steps to remove your Xbox One S case.
Note: The clips keeping the case on the system are fragile and may easily break during removal.
Выберете то, что вам нужно
-
-
Begin by working at the case on the rear where the warranty sticker is located. Insert the plastic opening tool into the gap between the bottom of the case and the grated top side. Then find the clips in between that hold the case in place. Use the opening tool to pop the clips out. The best method is to pry the black case away from the bottom.
-
Use the opening tool to pop the clips out. The best method is to pry the black case away from the bottom.
-
-
-
-
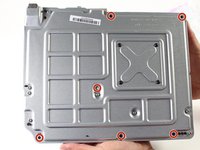
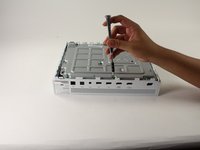
Use a T10 Torx screwdriver to remove the six green 50 mm long screws from the metal case labeled F1 through F6.
-
-
-
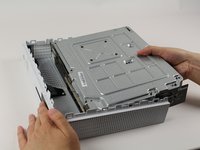
Gently separate the interior case from the white exterior case using the appropriate method.
-
Pry the white plastic sides outwards at the rear to separate from the plastic I/O shield.
-


To reassemble your device, follow these instructions in reverse order.
Отменить: Я не выполнил это руководство.
42 человек успешно провели ремонт по этому руководству.
Команда

Cal Poly, Team S22-G3, Livingston Spring 2017 Участник Cal Poly, Team S22-G3, Livingston Spring 2017
CPSU-LIVINGSTON-S17S22G3
4 членов
Автор 59 руководств
5 Комментарии к руководству
I struggled with the retention tabs the first time I opened the Xbox S. I dabbed a little Armor All on a Qtip and coated both sides of tabs with a little. Popped right open the second time, wiped Armor All on the fan blades as well to minimize dust collection.
Hi!
Great review of the process! I have a question, having stripped down an rebuilt an XBox One S to extract a 500 yuan note and two peties my 7 year old inserted in the CD/DVD slop, as well as a DOA DVD drive the power switch is not working. It works if I short the contact but there appears to be a square hole in the back of the power switch (the x box logo)
Should there be a conducting contact in the back of the switch and if so, is it simply a square lump of steel or is it tapered? Would like the dimensions please.
Many thanks for taking time to reply!
Dr B
Dr John C Bullas
Southampton UK
Hi can u fit a core i5 apple gen in Xbox one s case
Excuse me but is there an everyday item that I can use to open the bottom of my Xbox one s with?