Введение
Hi all,
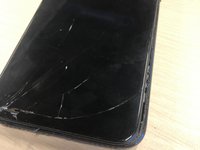
Follow this guide to replace your screen for the Xiaomi Mi A2.
Note: It’s possible that you’ll need to transfer the backplate from the screen to the new screen. For some screens you need to transfer the bracket, backplate and small parts too. This guide only shows how to replace the full screen with all the small parts on it.
New adhesive is required to attach the bracket/earpiece/earpiece dust filter again if needed.
Выберете то, что вам нужно
-
-
Remove the 2 Pentalobe screws.
-
Remove the sim card(s) from the phone.
-
-
-
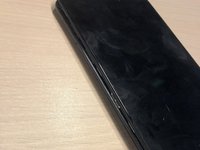
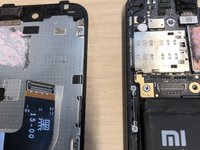
Insert the opening pick in the middle of the phone.
-
The 2nd image shows you where to put the opening pick in. You'll see that the screen will get loosen. There is lightly adhesive holding the screen.
-
Now take another opening pick and slide it around the whole screen.
-
-
-
-
The screen is now loose from the phone.
-
Just flip the screen carefully. The cable is short so please be careful! The ribbon cable can break easily. You could also hold the screen with your hand to be sure.
-
-
Инструмент, используемый на этом этапе:Tweezers$4.99
-
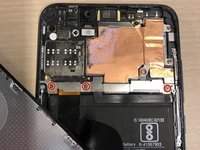
Remove the 3 PH00 screws from the battery holder plate.
-
Now remove the battery holder plate with your tweezers carefully.
-
-
-
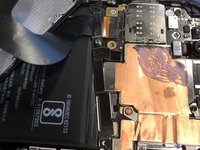
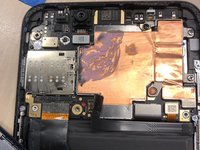
Now you will see multiple cables attached to the motherboard.
-
Remove the battery ribbon cable first. This will prevent the phone from turning on accidentally by pressing the button. Please remove it straight out of it's socket with your finger nail or spudger (circled red).
-
Now remove the LCD ribbon cable straight out of it's socket with your finger nail or spudger (circled green).
-


To reassemble your device, follow these instructions in reverse order.
Don’t forget: It’s possible that you need to transfer the backplate and/or bracket and/or small parts! How to transfer those items are NOT included in this guide.
Note: New adhesive is required to attach the bracket/earpiece/earpiece dust filter again if needed.
Отменить: Я не выполнил это руководство.
6 человек успешно провели ремонт по этому руководству.

4 Комментарии к руководству
Now how to fix it
Hi!
Depends on how your new screen came in. Some of them do not have the frame where it fits in, so you need to transfer the frame from the old one.
It’s glued, so you need to heat it to detach the screen from the frame and need to glue it to the new screen. Then follow the guide in reverse order to reassemble it.
Note: The silver plate is attached to the frame, be carefull for it and also for the small parts on it.
This isn't a guide for the Xiaomi Mi 2/2S, please fix the title.
Hi! This is regarding the Xiaomi Mi 2 only. Not sure if it’s applicable for the 2S. This device used in this guide is Mi 2.