Эта версия возможно содержит некорректные исправления. Переключить на последнюю проверенную версию.
Выберете то, что вам нужно
-
Этот шаг не переведен. Помогите перевести
-
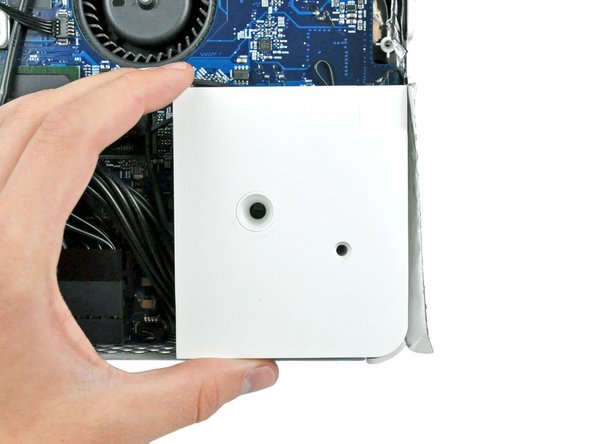
Loosen the two Phillips screws securing the access door to your iMac.
-
Remove the access door.
-
-
Этот шаг не переведен. Помогите перевести
-
Remove the following screws along the lower edge of your iMac:
-
Three 6 mm T8 Torx screws
-
One 8 mm T8 Torx screw (Right side of the RAM slot on 2105)
-
-
Этот шаг не переведен. Помогите перевести
-
Insert a plastic card up into the corner of the air vent slot near the top of the rear case.
-
Push the card toward the top of the iMac to release the front bezel latch.
-
Pull the front bezel away from the rear case.
-
Repeat this process for the other side of the front bezel.
-
If the bezel refuses to release, try lifting the lower edge of the front bezel slightly away from the rear case (detailed in the next few steps) and repeat the latch release process.
-
-
Этот шаг не переведен. Помогите перевести
-
Lay your iMac stand-side down on a flat surface.
-
To lift the front bezel off the iMac, simultaneously:
-
Use your thumbs to press in the RAM arms and hold the iMac down.
-
Use your index fingers to pull the small bridge of material on the front bezel toward yourself.
-
Pull the front bezel up with your index fingers.
-
Once the small bridge of material has cleared the RAM arms, lift the front bezel by its lower edge just enough to clear the bottom edge of the rear case.
-
-
Этот шаг не переведен. Помогите перевести
-
Lift the front bezel off the rear case and rotate it away from the bottom edge of the iMac, minding the camera and microphone cables still attached to its upper edge.
-
-
Этот шаг не переведен. Помогите перевести
-
Disconnect the microphone cable.
-
Disconnect the camera cable by pulling its connector away from the socket on the camera board.
-
-
Этот шаг не переведен. Помогите перевести
-
Tape the EMI shield to the face of the display to keep it out of the way.
-
-
Этот шаг не переведен. Помогите перевести
-
Remove the two 5 mm T6 Torx screws securing the display data cable connector to the logic board.
-
Pull the display data cable connector up off the logic board by its black pull tab.
-
-
Этот шаг не переведен. Помогите перевести
-
Peel back the EMI tape from the two vertical edges of the display.
-
-
Этот шаг не переведен. Помогите перевести
-
Allow the lower EMI shield to hang down from the display.
-
Remove the four 7.5 mm T10 Torx screws securing the display to the rear case.
-
-
Этот шаг не переведен. Помогите перевести
-
Lift the lower edge of the display and rotate it toward the top edge of your iMac.
-
-
-
Этот шаг не переведен. Помогите перевести
-
Disconnect the two inverter cables at the top edge of the inverter using the method explained in the previous step.
-
-
Этот шаг не переведен. Помогите перевести
-
Rotate the display until it is nearly perpendicular to the rear case and lift it up to peel it off the EMI shield stuck to its top edge.
-
-
Этот шаг не переведен. Помогите перевести
-
Remove the single T10 Torx screw securing the left speaker to the rear case.
-
Pull the left speaker out of the rear case.
-
-
Этот шаг не переведен. Помогите перевести
-
Use the flat end of a spudger to pry both antenna connectors up off the AirPort Extreme card.
-
-
Этот шаг не переведен. Помогите перевести
-
Use a metal spudger to disconnect the SATA data cable up off the logic board.
-
-
Этот шаг не переведен. Помогите перевести
-
Pull the IR board cable connector away from its socket on the IR board.
-
-
Этот шаг не переведен. Помогите перевести
-
De-route the speaker cables from beneath the IR Board and heatsink assembly.
-
-
Этот шаг не переведен. Помогите перевести
-
Remove the single T10 Torx screw securing the right speaker to the logic board.
-
Lift the right speaker out of the rear case and move it out of the way.
-
-
Этот шаг не переведен. Помогите перевести
-
Disconnect the speaker cable connector by lifting it straight up off its socket on the logic board.
-
-
Этот шаг не переведен. Помогите перевести
-
Disconnect the HDD fan and power button from the logic board by pulling their connectors straight up off the sockets on the logic board.
-
-
Этот шаг не переведен. Помогите перевести
-
If necessary, remove the pieces of tape holding the SATA data cable to the logic board.
-
Move the SATA data cable away from the face of the logic board.
-
-
Этот шаг не переведен. Помогите перевести
-
Disconnect the DC-In cable by simultaneously depressing both locking arms and pulling its connector away from the socket on the logic board toward the top of your iMac.
-
-
Этот шаг не переведен. Помогите перевести
-
Pull the ambient light sensor cable connector up off the logic board.
-
-
Этот шаг не переведен. Помогите перевести
-
Use the flat end of a spudger to pry the Bluetooth antenna cable connector up off the Bluetooth board.
-
-
Этот шаг не переведен. Помогите перевести
-
Carefully de-route the IR board cable out from under the IR board and move it out of the way of the logic board.
-
-
Этот шаг не переведен. Помогите перевести
-
Disconnect the following connectors from the logic board:
-
Camera/IR board cable.
-
Optical drive fan.
-
-
Этот шаг не переведен. Помогите перевести
-
Disconnect the optical drive thermal sensor cable from the logic board by pulling its connector away from the socket on the logic board.
-
-
Этот шаг не переведен. Помогите перевести
-
Remove the two T6 Torx screws securing the optical drive ribbon cable connector to the logic board.
-
-
Этот шаг не переведен. Помогите перевести
-
Use the flat end of a spudger to pry the optical drive ribbon cable connector up off the logic board.
-
Bend the optical drive ribbon cable back away from the logic board.
-
-
Этот шаг не переведен. Помогите перевести
-
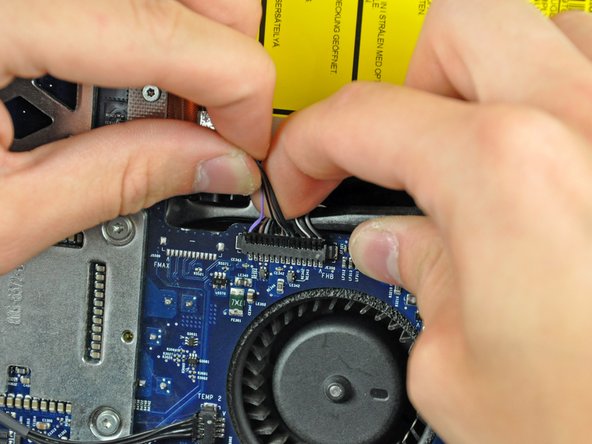
Disconnect the following connectors from the logic board:
-
Hard drive thermal sensor cable.
-
CPU fan cable.
-
-
Этот шаг не переведен. Помогите перевести
-
Remove the two T6 Torx screws securing the top of the heat sink framework to the chassis.
-
-
Этот шаг не переведен. Помогите перевести
-
Remove the following seven screws securing the logic board to the rear case:
-
Three coarse-thread T10 Torx.
-
Three fine-thread T10 Torx.
-
One long coarse-thread T10 Torx.
-
-
Этот шаг не переведен. Помогите перевести
-
Carefully rotate the top edge of the logic board out of the rear case and lift the board up out of the iMac, minding the RAM arms and any cables that may get caught.
-
-
Этот шаг не переведен. Помогите перевести
-
Remove the 6.1 mm T8 Torx screw from both sides of the heat sink nearest the logic board (two screws total).
-
-
Этот шаг не переведен. Помогите перевести
-
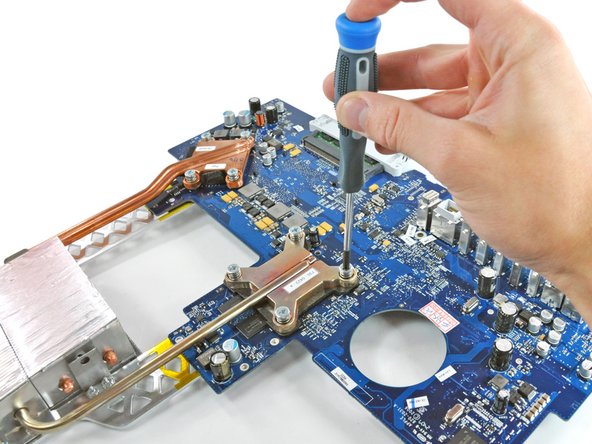
Remove the following ten screws:
-
Eight 7.8 mm T8 Torx.
-
Two 6.1 mm T8 Torx.
-
If the eight screws around the processors refuse to unscrew, use a Phillips screwdriver to hold the lug from the one side of the board while you remove the Torx screw from the other side.
-
-
Этот шаг не переведен. Помогите перевести
-
Carefully lift both metal heat sink brackets off the logic board.
-


Отменить: Я не выполнил это руководство.
14 участников успешно повторили данное руководство.
