Перейти к основному содержанию
/
Мой рабочий стол для верстки руководств

Получите быстрый доступ к руководствам, запчастям и ответам касательно ваших устройств

iPad 9 Front Panel Replacement

iPad 9 Front Panel Replacement

Alex Diaz-Kokaisl

Alex Diaz-Kokaisl и еще один участник

Последнее обновление November 13, 2023

Нет оценки
Сложно
Абсолютно необходимое руководство
Это руководство предназначено только для использования в качестве обязательного условия для других руководств. Оно не полностью само по себе.

Prereq to open the iPad 9.

Выберете то, что вам нужно

Запчасти

Инструменты

Показать больше…

  1. iPad 9 Front Panel Replacement, Front Panel: шаг 1, изображение 1 из 3 iPad 9 Front Panel Replacement, Front Panel: шаг 1, изображение 2 из 3 iPad 9 Front Panel Replacement, Front Panel: шаг 1, изображение 3 из 3
    • If your display glass is cracked, keep further breakage contained and prevent bodily harm during your repair by taping the glass.

    • Lay overlapping strips of clear packing tape over the iPad's display until the whole face is covered.

    • This will keep glass shards contained and provide structural integrity when prying and lifting the display.

    • Do your best to follow the rest of the guide as described. However, once the glass is broken, it will likely continue to crack as you work, and you may need to use a metal prying tool to scoop the glass out.

    • Wear safety glasses to protect your eyes, and be careful not to damage the LCD screen.

  2. iPad 9 Front Panel Replacement: шаг 2, изображение 1 из 2 iPad 9 Front Panel Replacement: шаг 2, изображение 2 из 2
    • Handling it by the tag, place the heated iOpener on the side of the iPad to the left of the home button assembly.

    • Let the iOpener sit for at least a minute to soften the adhesive beneath the glass.

  3. iPad 9 Front Panel Replacement: шаг 3, изображение 1 из 3 iPad 9 Front Panel Replacement: шаг 3, изображение 2 из 3 iPad 9 Front Panel Replacement: шаг 3, изображение 3 из 3
    • While the iPad looks uniform from the outside, there are delicate components under the front glass. To avoid damage, only heat and pry in the areas described in each step.

    • As you follow the directions, take special care to avoid prying in the following areas:

    • Front-facing camera

    • Antennas

    • Display cables

    • Sensors

  4. iPad 9 Front Panel Replacement: шаг 4, изображение 1 из 3 iPad 9 Front Panel Replacement: шаг 4, изображение 2 из 3 iPad 9 Front Panel Replacement: шаг 4, изображение 3 из 3
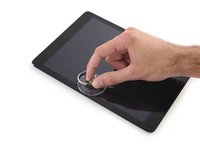
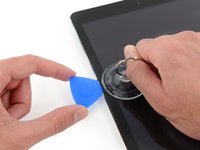
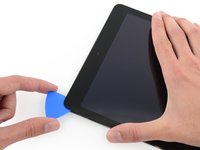
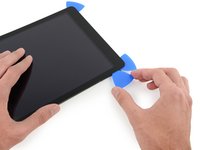
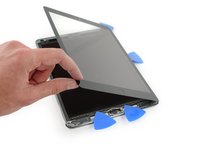
    • Carefully place a suction cup halfway up the heated side.

    • Be sure the cup is completely flat on the screen to get a tight seal.

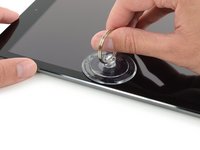
    • While holding the iPad down with one hand, pull up on the suction cup to slightly separate the front panel glass from from the rear case.

    • If your iPad's screen is badly cracked, covering it with a smooth layer of clear packing tape may help the suction cup adhere. Alternatively, use a strong piece of tape (such as duct tape) and fold it into a handle.

  5. iPad 9 Front Panel Replacement: шаг 5, изображение 1 из 3 iPad 9 Front Panel Replacement: шаг 5, изображение 2 из 3 iPad 9 Front Panel Replacement: шаг 5, изображение 3 из 3
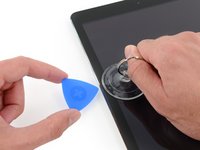
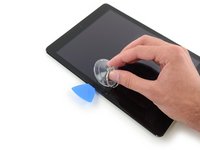
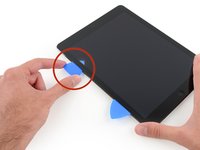
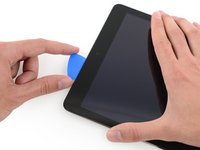
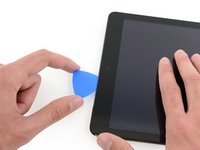
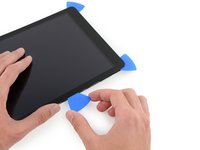
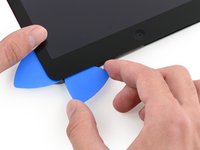
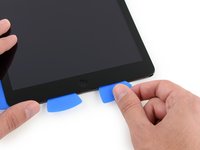
    • Place an opening pick in the gap opened by the suction cup.

    • Don't insert the opening pick any deeper than the black bezel on the side of the display. Inserting the pick too far may damage the LCD.

    • Pull the suction cup's plastic nub to release the vacuum seal and remove the suction cup from the display assembly.

  6. iPad 9 Front Panel Replacement: шаг 6, изображение 1 из 1
    • Reheat and replace the iOpener.

    • Be careful not to overheat the iOpener during the repair procedure. Always wait at least ten minutes before reheating the iOpener.

  7. iPad 9 Front Panel Replacement: шаг 7, изображение 1 из 3 iPad 9 Front Panel Replacement: шаг 7, изображение 2 из 3 iPad 9 Front Panel Replacement: шаг 7, изображение 3 из 3
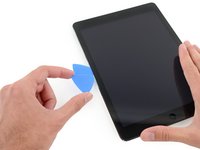
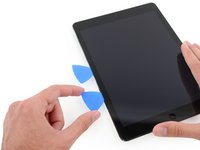
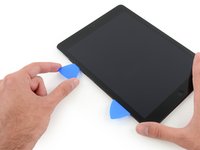
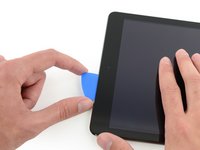
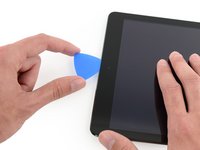
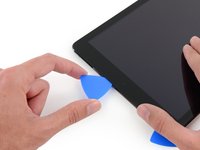
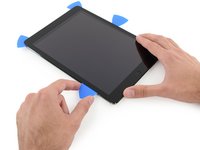
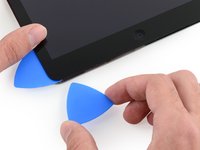
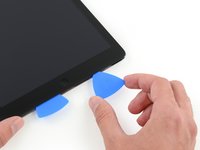
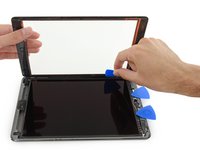
    • Place a second opening pick alongside the first and slide the pick down along the edge of the iPad, releasing the adhesive as you go.

  8. iPad 9 Front Panel Replacement: шаг 8, изображение 1 из 3 iPad 9 Front Panel Replacement: шаг 8, изображение 2 из 3 iPad 9 Front Panel Replacement: шаг 8, изображение 3 из 3
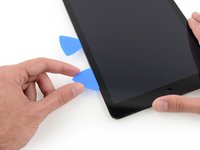
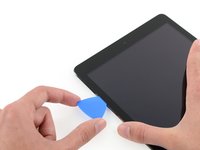
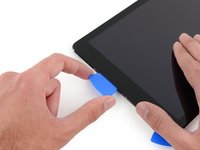
    • Continue moving the opening pick down the side of the display to release the adhesive.

    • If the opening pick gets stuck in the adhesive, "roll" the pick along the side of the iPad, continuing to release the adhesive.

  9. iPad 9 Front Panel Replacement: шаг 9, изображение 1 из 3 iPad 9 Front Panel Replacement: шаг 9, изображение 2 из 3 iPad 9 Front Panel Replacement: шаг 9, изображение 3 из 3
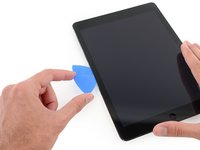
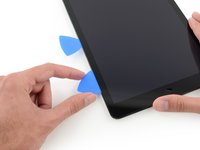
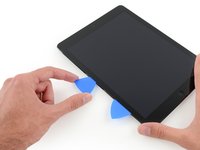
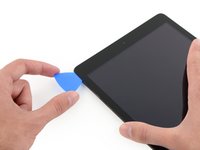
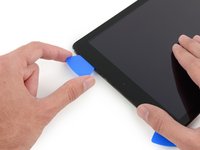
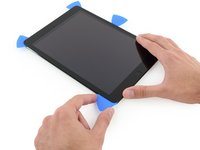
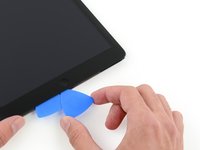
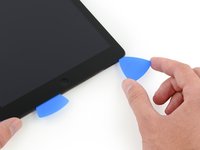
    • Take the first pick you inserted and slide it up toward the top corner of the iPad.

    • If you can see the tip of the opening pick through the front glass, don't panic—just pull the pick out just a little bit. Most likely, everything will be fine, but try to avoid this as it may deposit adhesive on the front of the LCD that is difficult to clean off.

  10. iPad 9 Front Panel Replacement: шаг 10, изображение 1 из 1
    • Reheat the iOpener and place it on the top edge of the iPad, over the front-facing camera.

    • Be careful not to overheat the iOpener during the repair procedure. Wait at least ten minutes before reheating the iOpener.

    • If you have a flexible iOpener, you can bend it to heat both the upper left corner and the upper edge at the same time.

  11. iPad 9 Front Panel Replacement: шаг 11, изображение 1 из 3 iPad 9 Front Panel Replacement: шаг 11, изображение 2 из 3 iPad 9 Front Panel Replacement: шаг 11, изображение 3 из 3
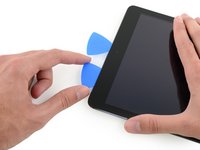
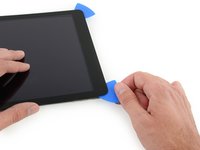
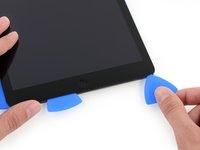
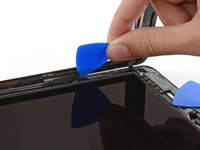
    • Slide the opening pick around the top left corner of the iPad to separate the adhesive.

  12. iPad 9 Front Panel Replacement: шаг 12, изображение 1 из 3 iPad 9 Front Panel Replacement: шаг 12, изображение 2 из 3 iPad 9 Front Panel Replacement: шаг 12, изображение 3 из 3
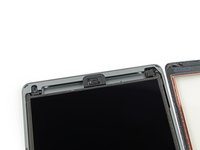
    • Slide the opening pick along the top edge of the iPad, stopping just before you reach the camera.

    • The third image shows where the front-facing camera and housing are in the iPad.

    • Avoid sliding the opening pick over the front facing camera, as you may smear adhesive onto the lens or damage the camera. The following steps will detail how to best avoid disturbing the front facing camera.

  13. iPad 9 Front Panel Replacement: шаг 13, изображение 1 из 3 iPad 9 Front Panel Replacement: шаг 13, изображение 2 из 3 iPad 9 Front Panel Replacement: шаг 13, изображение 3 из 3
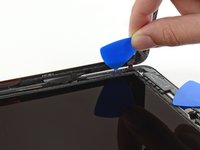
    • Pull the pick out slightly, and slide the very tip gently along the top of the front-facing camera section of the top edge.

  14. iPad 9 Front Panel Replacement: шаг 14, изображение 1 из 3 iPad 9 Front Panel Replacement: шаг 14, изображение 2 из 3 iPad 9 Front Panel Replacement: шаг 14, изображение 3 из 3
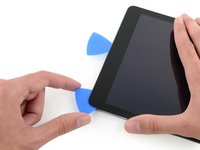
    • Leave the opening pick in the iPad slightly past the front-facing camera.

    • Take a second pick and insert it to the left of the camera, and then slide it to the corner of the iPad to finish cutting the adhesive on that edge.

  15. iPad 9 Front Panel Replacement: шаг 15, изображение 1 из 3 iPad 9 Front Panel Replacement: шаг 15, изображение 2 из 3 iPad 9 Front Panel Replacement: шаг 15, изображение 3 из 3
    • Insert the previous pick deeper into the iPad and slide it away from the camera toward the corner.

  16. iPad 9 Front Panel Replacement: шаг 16, изображение 1 из 1
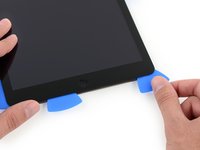
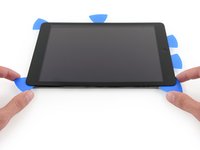
    • Leave the three picks in the corners of the iPad to prevent re-adhering of the front panel adhesive.

    • Reheat the iOpener and place it on the remaining side of the iPad—along the volume and lock buttons.

  17. iPad 9 Front Panel Replacement: шаг 17, изображение 1 из 2 iPad 9 Front Panel Replacement: шаг 17, изображение 2 из 2
    • Slide the opening pick around the top right corner of the iPad, releasing the adhesive there.

    • Leave this pick in place to keep the adhesive from re-sealing itself, and grab a new pick for the next step.

  18. iPad 9 Front Panel Replacement: шаг 18, изображение 1 из 3 iPad 9 Front Panel Replacement: шаг 18, изображение 2 из 3 iPad 9 Front Panel Replacement: шаг 18, изображение 3 из 3
    • Insert a new opening pick and slide it to the middle of the right edge of the iPad, releasing the adhesive as you go.

    • The display cables are located approximately halfway from the bottom of the iPad. Stop sliding the pick when you get ~4.5" from the bottom of the iPad.

  19. iPad 9 Front Panel Replacement: шаг 19, изображение 1 из 1
    • Leave the opening picks in place, and set the reheated iOpener on the home button end of the iPad.

  20. iPad 9 Front Panel Replacement: шаг 20, изображение 1 из 3 iPad 9 Front Panel Replacement: шаг 20, изображение 2 из 3 iPad 9 Front Panel Replacement: шаг 20, изображение 3 из 3
    • Slide the lower left pick to the lower left corner to cut the adhesive on that corner.

    • Leave the pick at the corner. Do not pry any farther, and do not remove the pick from the iPad.

    • The third image shows the two antennas and the home button cavity in the lower case of the iPad.

    • The following steps will direct you where to pry to avoid damage to these components. Only apply heat and pry where directed.

  21. iPad 9 Front Panel Replacement: шаг 21, изображение 1 из 3 iPad 9 Front Panel Replacement: шаг 21, изображение 2 из 3 iPad 9 Front Panel Replacement: шаг 21, изображение 3 из 3
    • Leave the pick from the last step in place to prevent the adhesive from re-sealing.

    • With a new pick, slice gently over the left-hand antenna, stopping before the home button.

    • Only slide the pick from the outer edge toward the center of the iPad. Do not move the pick back toward the outer edge, as moving in this direction may damage the antenna.

    • If you need to slide the pick over the lower section more than once, remove it and re-insert at the outer edge, and slide inwards.

    • Leave the pick in place before moving on.

  22. iPad 9 Front Panel Replacement: шаг 22, изображение 1 из 3 iPad 9 Front Panel Replacement: шаг 22, изображение 2 из 3 iPad 9 Front Panel Replacement: шаг 22, изображение 3 из 3
    • Take a new pick and slip it in to the right of the previous pick.

    • Slide across the home button and right-hand antenna using only the very tip to remove the adhesive.

  23. iPad 9 Front Panel Replacement: шаг 23, изображение 1 из 3 iPad 9 Front Panel Replacement: шаг 23, изображение 2 из 3 iPad 9 Front Panel Replacement: шаг 23, изображение 3 из 3
    • With the adhesive loosened, you can now insert the pick near the right-hand corner. Slide the pick to the left, and stop just short of the Home button.

    • Just like with the left antenna, only slide from the outer edge toward the center. Reversing this direction may damage the antenna.

  24. iPad 9 Front Panel Replacement: шаг 24, изображение 1 из 1
    • Reheat and reapply the iOpener to the volume control side of the iPad.

  25. iPad 9 Front Panel Replacement: шаг 25, изображение 1 из 2 iPad 9 Front Panel Replacement: шаг 25, изображение 2 из 2
    • Be very careful with this step. Take your time and ensure the adhesive is hot and soft, and that you've been through all of the adhesive with an opening pick. Don't be afraid to stop and reheat.

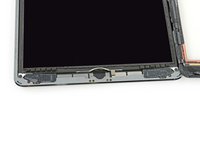
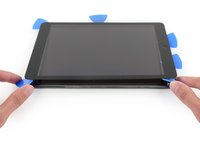
    • On the side of the iPad opposite the volume controls, you should have a pick lodged into each corner. Twist the picks to lift the glass slightly, separating the last of the adhesive along the display cable edge.

    • If you encounter a significant amount of resistance, leave the picks in place, reheat, and reapply the iOpener to the problem areas.

  26. iPad 9 Front Panel Replacement: шаг 26, изображение 1 из 2 iPad 9 Front Panel Replacement: шаг 26, изображение 2 из 2
    • Lift slowly and gently to further detach the adhesive along the display cable edge.

  27. iPad 9 Front Panel Replacement: шаг 27, изображение 1 из 3 iPad 9 Front Panel Replacement: шаг 27, изображение 2 из 3 iPad 9 Front Panel Replacement: шаг 27, изображение 3 из 3
    • While supporting the front panel glass, use an opening pick to cut the last of the adhesive.

    • Be very careful not to cut or damage any of the display cables.

  28. iPad 9 Front Panel Replacement: шаг 28, изображение 1 из 2 iPad 9 Front Panel Replacement: шаг 28, изображение 2 из 2
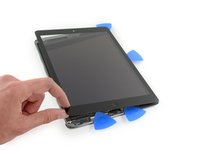
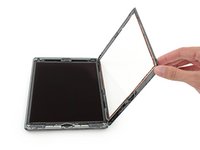
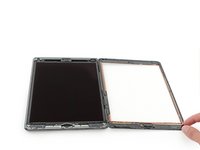
    • Once all of the adhesive has been separated, open the glass panel like a page in a book and rest it on your workspace.

    • During reassembly, clean the remains of the adhesive from the case (and the front glass if you are re-using it) with isopropyl alcohol, and replace the adhesive using our display adhesive application guide and pre-cut adhesive strips.

    • It's easy to pinch a flex cable between the front glass and the iPad's frame during reassembly. Be mindful of the flex cables and make sure they gently fold and tuck under the frame. If the folds in a flex cable are pressed completely flat, it may be damaged beyond repair.

Заключение

To reassemble your device, follow these instructions in reverse order.

Alex Diaz-Kokaisl

Участник с: 01/16/22

162 696 Репутация

Автор 769 руководств

Команду

iFixit Участник iFixit

Staff

119 членов

Автор 19 481 руководств

0 Комментариев

Добавить комментарий

Статистика просмотров:

За последние 24 час(ов): 0

За последние 7 дней: 0

За последние 30 дней: 0

За всё время: 21