Перейти к основному содержанию

iRulu AX760 Screen Display Replacement

Выберете то, что вам нужно

  1. iRulu AX760 Screen Display Replacement, Battery: шаг 1, изображение 1 из 3 iRulu AX760 Screen Display Replacement, Battery: шаг 1, изображение 2 из 3 iRulu AX760 Screen Display Replacement, Battery: шаг 1, изображение 3 из 3
    • Use a plastic opening tool or metal spudger to free the rear cover.

    • Insert your spudger into the side of your tablet.

    • Crack open each edge and remove the cover.

  2. iRulu AX760 Screen Display Replacement: шаг 2, изображение 1 из 1
    • Open your tablet.

  3. iRulu AX760 Screen Display Replacement: шаг 3, изображение 1 из 1
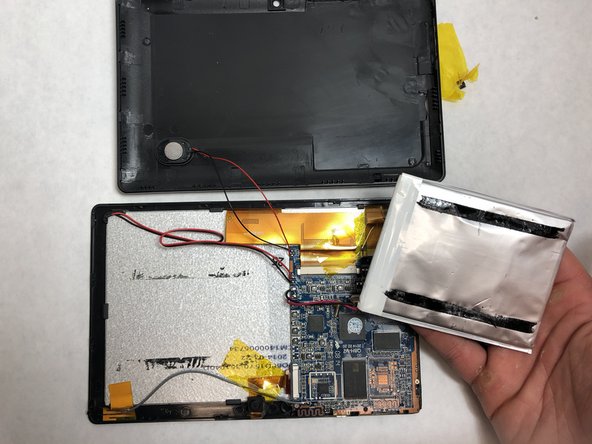
    • Take your plastic flat head tool and insert it under the battery.

    • Lift the battery up.

    • Make sure to remove any tape from the battery.

  4. iRulu AX760 Screen Display Replacement: шаг 4, изображение 1 из 2 iRulu AX760 Screen Display Replacement: шаг 4, изображение 2 из 2
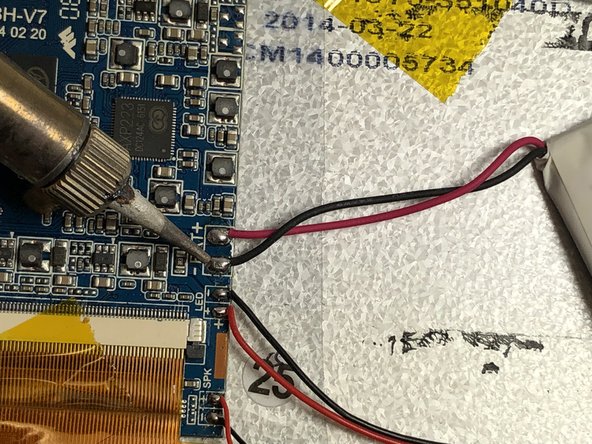
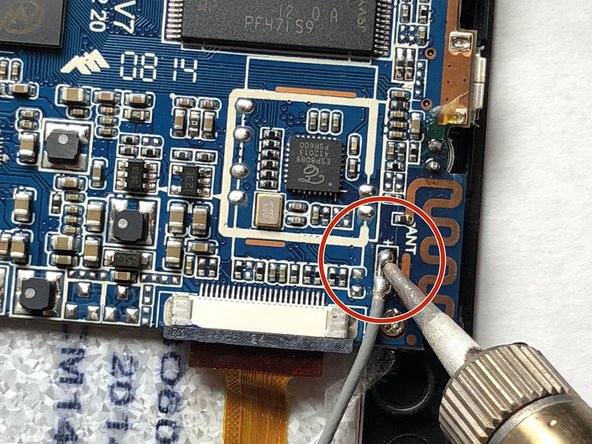
    • Use a soldering iron to remove the solder that connects the black and red wires of the battery to the motherboard.

    • Keep the wires of the battery taught.

    • The iron should only be pressed to the solder for 2-3 seconds max.

    • Be very carful, the soldering iron will be very hot!

    • Visit this link for information about soldering. How To Solder and Desolder Connections

  5. iRulu AX760 Screen Display Replacement: шаг 5, изображение 1 из 1
    • Remove your old battery and replace it with the new battery.

  6. iRulu AX760 Screen Display Replacement, Camera: шаг 6, изображение 1 из 2 iRulu AX760 Screen Display Replacement, Camera: шаг 6, изображение 2 из 2
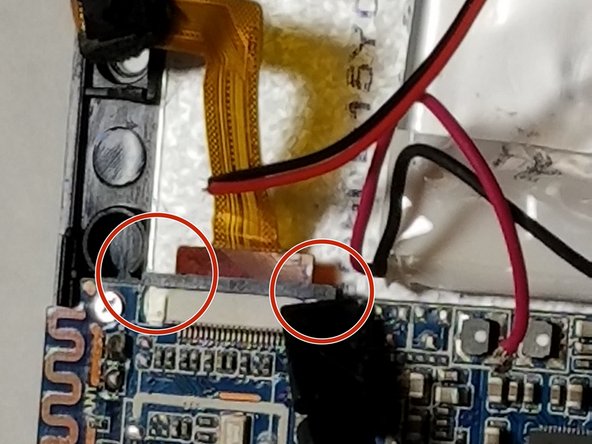
    • Use the plastic spudger to pry the tabs open on the digitizer ribbon sockets.

  7. iRulu AX760 Screen Display Replacement: шаг 7, изображение 1 из 1
    • Pull the digitizer ribbon cables straight out of their sockets.

  8. iRulu AX760 Screen Display Replacement: шаг 8, изображение 1 из 1
    • Pull the camera out of the device.

  9. iRulu AX760 Screen Display Replacement, Motherboard: шаг 9, изображение 1 из 2 iRulu AX760 Screen Display Replacement, Motherboard: шаг 9, изображение 2 из 2
    Инструмент, используемый на этом этапе:
    Plastic Cards
    $2.99
    Купить
    • There are two thin adhesive strips under the battery that run vertically along the left and right side.

    • Carefully wedge a plastic card or spudger under the battery and along both adhesive strips. Gently work the card or spudger up and down to free the battery.

    • Do not use metal tools, and do not bend or puncture the battery.

  10. iRulu AX760 Screen Display Replacement: шаг 10, изображение 1 из 3 iRulu AX760 Screen Display Replacement: шаг 10, изображение 2 из 3 iRulu AX760 Screen Display Replacement: шаг 10, изображение 3 из 3
    • WARNING: SOLDERING IRONS BECOME EXTREMELY HOT. DO NOT TOUCH

    • For information on soldering and desoldering, check this link.

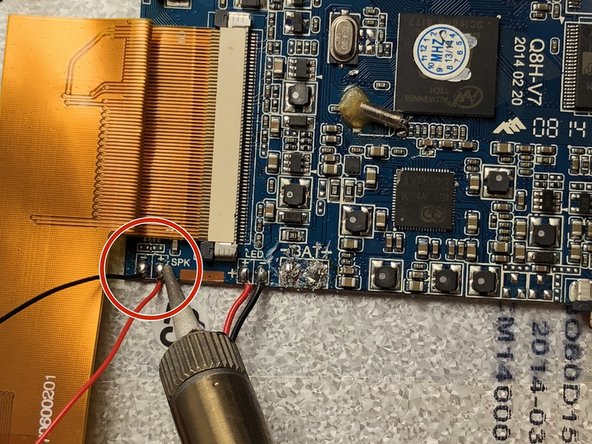
    • You must desolder several sets of contacts before attempting to remove the motherboard.

    • You must desolder the BAT (battery), LED, SPK (speaker), and ANT (antenna) contacts.

  11. iRulu AX760 Screen Display Replacement: шаг 11, изображение 1 из 2 iRulu AX760 Screen Display Replacement: шаг 11, изображение 2 из 2
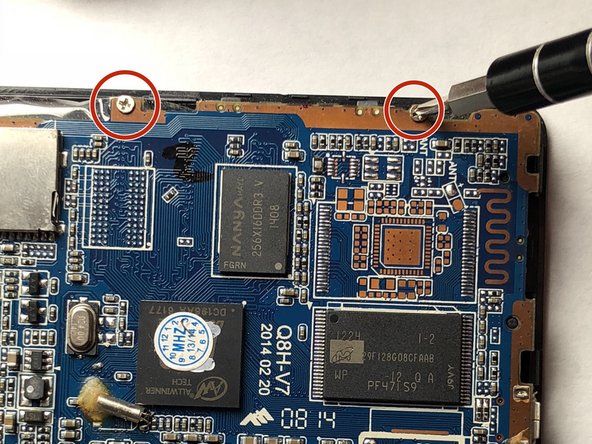
    • Unscrew the motherboard from the screen with the JIS #000 Screwdriver, a Phillips-head type screwdriver

  12. iRulu AX760 Screen Display Replacement: шаг 12, изображение 1 из 2 iRulu AX760 Screen Display Replacement: шаг 12, изображение 2 из 2
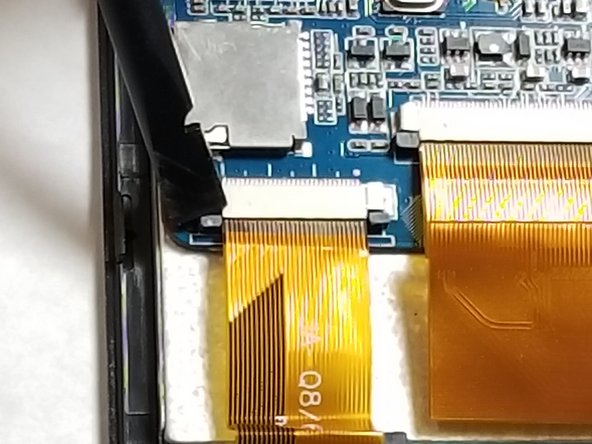
    • Use a plastic spudger to push the tab, releasing the motherboard from the screen. You can now remove the old motherboard.

    • You will not need a metal spudger in order to re-place the motherboard

  13. iRulu AX760 Screen Display Replacement, Screen Display: шаг 13, изображение 1 из 1
    • Remove the plastic peel attached to the back of the screen display.

  14. iRulu AX760 Screen Display Replacement: шаг 14, изображение 1 из 2 iRulu AX760 Screen Display Replacement: шаг 14, изображение 2 из 2
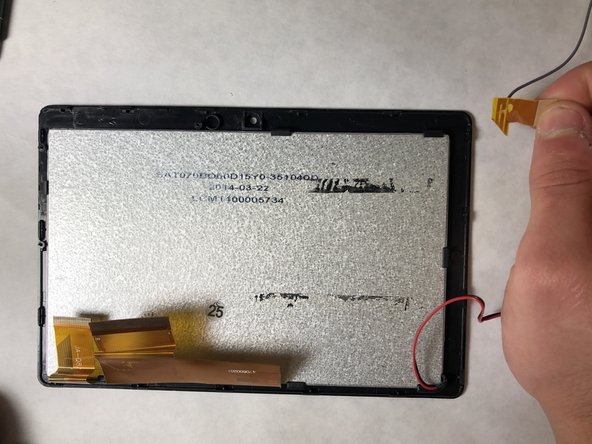
    • Remove the grey wire from the back of the screen display.

  15. iRulu AX760 Screen Display Replacement: шаг 15, изображение 1 из 1
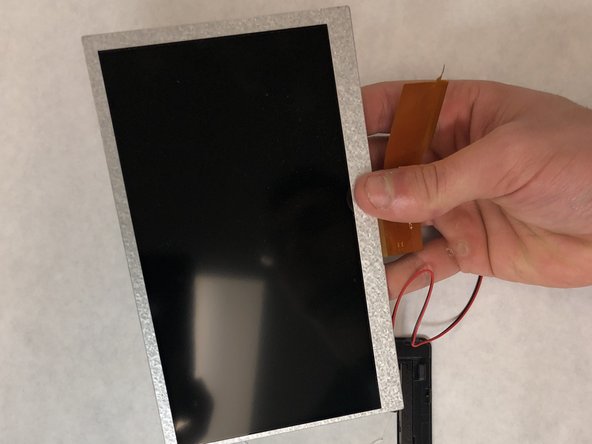
    • Insert the plastic spudger underneath the screen display and lift.

  16. iRulu AX760 Screen Display Replacement: шаг 16, изображение 1 из 2 iRulu AX760 Screen Display Replacement: шаг 16, изображение 2 из 2
    • Continue lifting the screen by hand and pull it out until it is completely removed.

Заключение

To reassemble your device, follow these instructions in reverse order.

Еще один человек закончил это руководство.

Jamison Kritz

Участник с: 03/20/18

245 Репутация

Автор 2 руководств

Команда

IUPUI, Team S6-G4, Baechle Spring 2018 Участник IUPUI, Team S6-G4, Baechle Spring 2018

IUPUI-BAECHLE-S18S6G4

4 членов

Автор 8 руководств

0 Комментариев

Добавить комментарий

Просмотр статистики:

За последние 24часов: 0

За последние 7 дней: 4

За последние 30 дней: 12

За всё время: 439