Перейти к основному содержанию

Reemplazo del digitalizador y LCD del iPhone XR

Примечание: Вы редактируете необходимое руководство. Любые внесенные вами изменения повлияют на руководство, которое включает эту стадию.

Английский
Испанский
Шаг 12
iPhone XR LCD and Digitizer Replacement, Check the EMI fingers: шаг 0, изображение 1 из 3 iPhone XR LCD and Digitizer Replacement, Check the EMI fingers: шаг 0, изображение 2 из 3 iPhone XR LCD and Digitizer Replacement, Check the EMI fingers: шаг 0, изображение 3 из 3
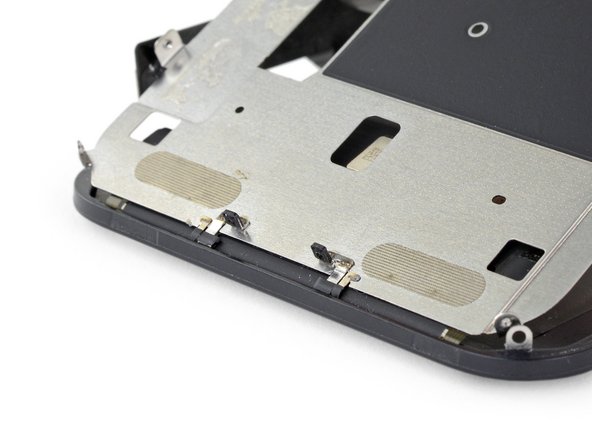
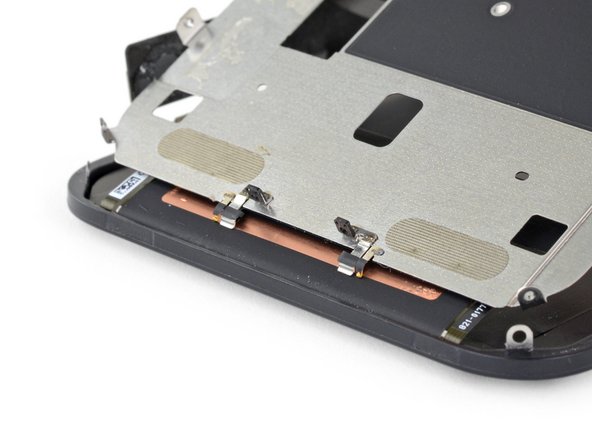
Check the EMI fingers
  • As you lift the LCD shield, note the metal prongs on the bottom edge.

  • During reassembly, make sure these prongs (a.k.a. EMI fingers) are correctly inserted into the LCD frame as shown.

Al levantar la pantalla LCD, observa las puntas metálicas en el borde inferior.

Durante el reensamblaje, asegúrese de que estas puntas (también conocidas como puntas EMI) estén correctamente insertadas en el marco de la pantalla LCD, tal como se muestra.

Ваш вклад лицензируется под свободной лицензией Creative Commons .