Введение
If you’re fixing a broken screen, and the back of your new display already includes a thin metal LCD shield plate, you should follow this shorter guide for an easier repair. But if that LCD shield plate is missing, keep reading—this guide will show you how to replace your screen and keep your old LCD shield plate.
The combined earpiece speaker + sensor assembly affixed to the back of the display is paired to your individual iPhone at the factory, so you must transfer it from your old display to your new one during any screen replacement. It contains the flood illuminator, which is part of the biometric Face ID security feature. If it is damaged or replaced, Face ID won’t work, so take extra care not to damage any of these components during this procedure. If damaged, only Apple can restore Face ID function.
Note: True Tone functionality is disabled after a screen replacement, even when using an original Apple screen.
Выберете то, что вам нужно
-
-
Power off your iPhone before beginning disassembly.
-
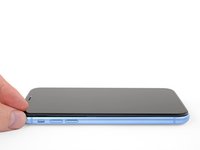
Remove the two 6.7 mm-long pentalobe screws at the bottom edge of the iPhone.
 Спросите у FixBot
-
-
-
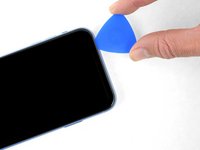
Measure 3 mm from the tip and mark the opening pick with a permanent marker.
-
-
-
If your iPhone has a cracked screen, keep further breakage contained and prevent bodily harm during your repair by taping over the glass.
-
Lay overlapping strips of packing tape over the iPhone's display until the whole face is covered.
-
If the broken glass makes it difficult to get a suction cup to stick in the next few steps, try folding a strong piece of tape (such as duct tape) into a handle and lifting the display with that instead.
-
-
-
Lay overlapping strips of clear packing tape over the iPhone's screen until the whole face is covered.
-
If you can't get the suction cup to stick in the next few steps, fold a strong piece of tape (such as duct tape) into a handle and lift the screen with that instead.
-
-
Инструмент, используемый на этом этапе:Clampy - Anti-Clamp$24.95
-
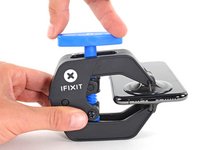
Pull the blue handle backwards to unlock the Anti-Clamp's arms.
-
Slide the arms over either the left or right edge of your iPhone.
-
Position the suction cups near the bottom edge of the iPhone—one on the front, and one on the back.
-
Squeeze the cups together to apply suction to the desired area.
-
-
-
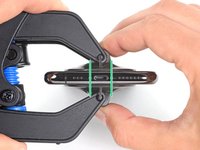
Pull the blue handle forward to lock the arms.
-
Turn the handle clockwise 360 degrees or until the cups start to stretch.
-
Make sure the suction cups remain aligned with each other. If they begin to slip out of alignment, loosen the suction cups slightly and realign the arms.
-
-
-
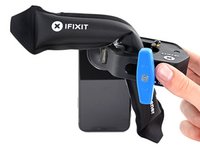
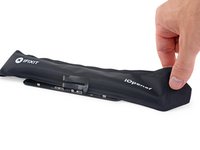
Heat an iOpener and thread it through the arms of the Anti-Clamp.
-
Fold the iOpener so it lays on the bottom edge of the iPhone.
-
Wait one minute to give the adhesive a chance to release and present an opening gap.
-
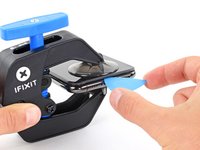
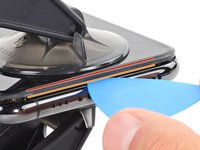
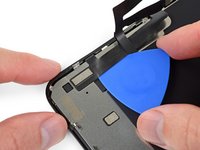
Insert an opening pick under the screen and the plastic bezel, not the screen itself.
-
Skip the next three steps.
-
-
-
Use a hairdryer or heat gun, or prepare an iOpener and apply it to the lower edge of the iPhone for about a minute in order to soften up the adhesive underneath.
-
-
-
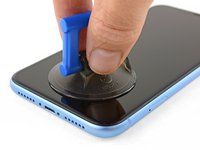
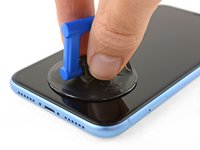
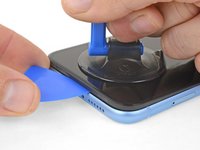
If you're using a single suction handle, apply it to the bottom edge of the phone, while avoiding the curved portion of the glass.
-
-
-
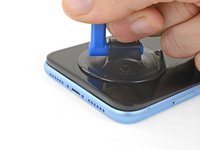
Pull up on the suction cup with firm, constant pressure to create a slight gap between the front panel and rear case.
-
Insert an opening pick under the screen and the plastic bezel, not the screen itself.
-
-
-
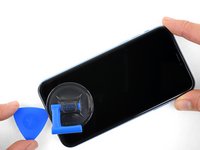
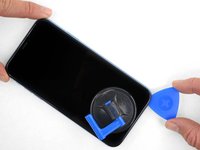
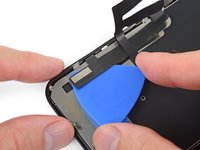
Slide the opening pick around the lower left corner and up the left edge of the iPhone, slicing through the adhesive holding the display in place.
-
-
-
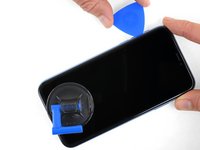
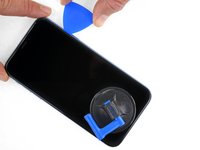
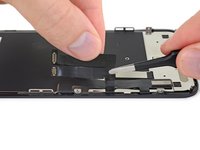
Re-insert your pick at the bottom edge of the iPhone, and slide it up the right side to continue separating the adhesive.
-
-
-
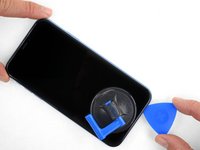
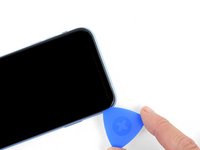
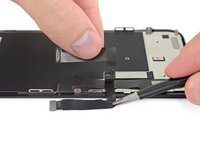
Slide the opening pick around the top corner of the display, while gently pulling or wiggling the display down in the direction of the Lightning port.
-
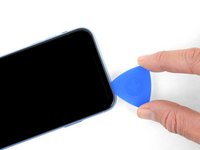
Slide the pick to the opposite corner and cut any remaining adhesive securing the display.
-
-
-
Pull on the small nub on the suction cup to remove it from the front panel.
-
-
-
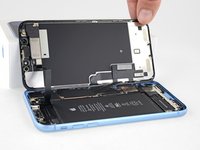
Open the iPhone by swinging the display up from the left side, like the back cover of a book.
-
Lean the display against something to keep it propped up while you're working on the phone.
-
-
-
Инструмент, используемый на этом этапе:Magnetic Project Mat$19.95
-
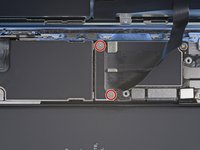
Remove three 1.2 mm Y000 screws securing the battery connector cover bracket.
-
Remove the bracket.
-
-
-
Use the point of a spudger to pry the battery connector straight up out of its socket.
-
Bend the connector slightly away from the logic board to prevent it from accidentally making contact with the socket and providing power to the phone during your repair.
-
-
-
Remove the two 1.2 mm Y000 screws securing the display connector bracket.
-
Remove the bracket.
-
-
-
Use the tip of a spudger to pry up and disconnect the digitizer cable.
-
-
-
Use the tip of a spudger to disconnect the display cable connector.
-
-
-
Remove the five screws securing the logic board connector bracket to the rear case:
-
One 1.3 mm Phillips #000 screw
-
One 1.5 mm Phillips #000 screw
-
Three 1.2 mm Y000 screws
-
Remove the bracket.
-
-
-
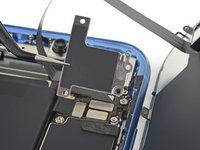
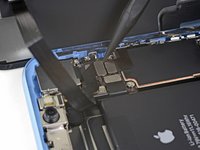
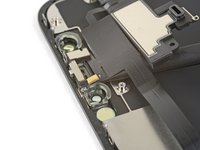
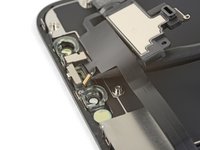
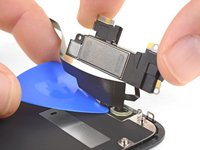
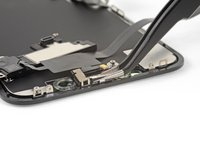
Use the tip of a spudger to pry the front sensor assembly connector up from its socket.
-
-
-
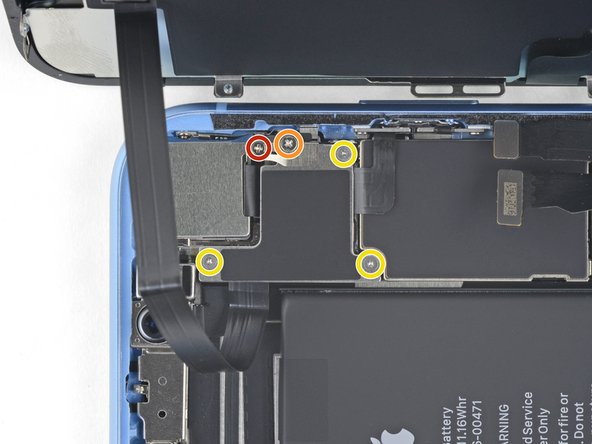
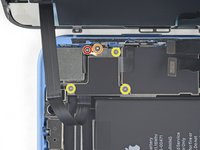
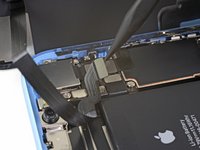
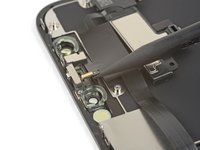
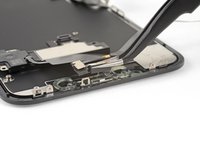
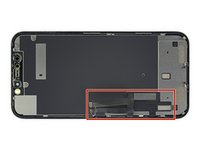
Remove the four screws securing the speaker/sensor assembly to the back of the display:
-
Two 1.6 mm Phillips screws
-
One 2.3 mm Phillips screw
-
One 1.2 mm Y000 screw
-
-
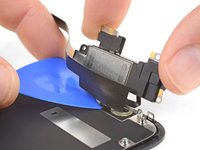
Инструмент, используемый на этом этапе:Tweezers$4.99
-
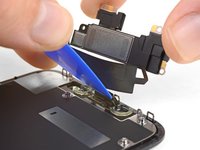
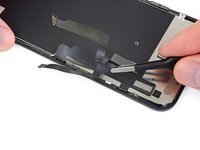
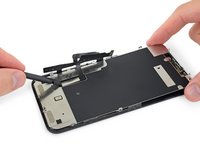
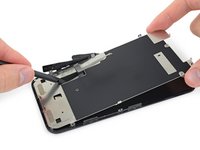
Using tweezers, gently flip the speaker assembly over—down and away from the top edge of the display.
-
-
-
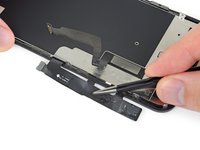
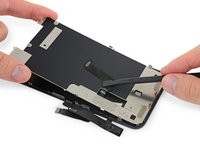
Use a hairdryer, a heat gun, or a heated iOpener applied to the top front of the display for about a minute, in order to soften the adhesive securing the sensors.
-
-
-
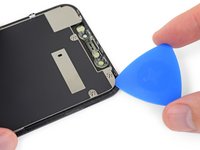
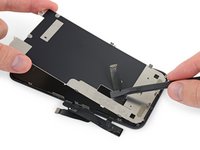
Carefully slide the flat edge of a spudger underneath the flex cable below the microphone.
-
Twist gently to separate the microphone, while being careful not to strain or damage the flex cable.
-
If needed, use the point of the spudger to finish separating the microphone from its notch in the front panel. If the microphone remains difficult to separate, apply more heat.
-
-
-
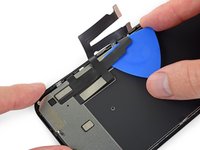
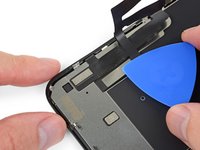
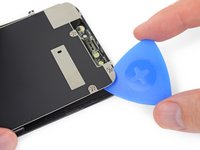
Working left to right, slide an opening pick beneath the flex cable and underneath the proximity sensor + flood illuminator module.
-
Gently wiggle and lift to separate the module from its notch in the front panel.
-
-
-
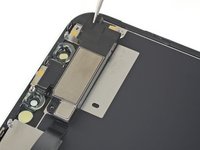
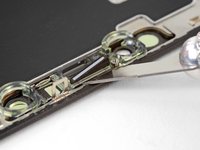
Use tweezers to slide the small bracket straight up and off of the ambient light sensor.
-
-
-
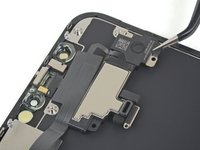
Use tweezers to wiggle the ambient light sensor and lift it from its notch in the display.
-
-
-
If you successfully removed the entire ambient light sensor, as shown in the first photo, continue to the next step below.
-
If the white diffuser strip is detached and remains embedded in the display, as shown in the second photo, you will need to carefully lever it out along the top edge using a thin blade or pry tool. Re-applying heat first may make this task a bit easier.
-
-
-
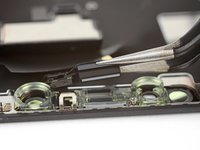
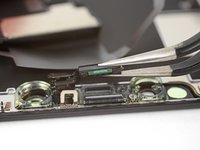
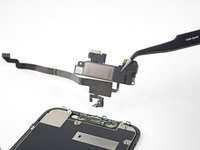
Remove the earpiece speaker and front sensor assembly.
-
Proximity sensor
-
Flood illuminator
-
The module must be positioned so that these components are not obstructed by any adhesive.
-
-
-
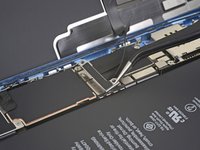
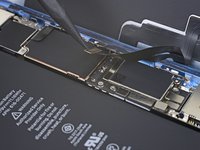
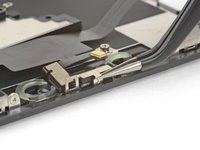
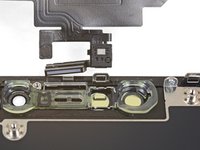
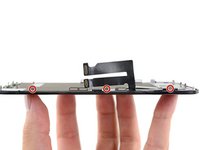
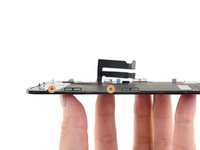
Use a Y000 driver to remove the 1.1 mm screws securing the LCD shield:
-
Three screws on the side nearest the display cables
-
Two more screws on the opposite side
-
-
-
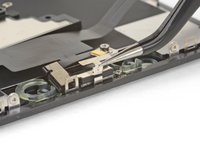
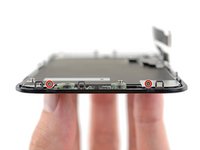
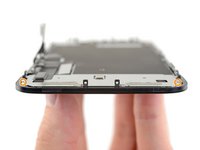
Remove the remaining 1.1 mm Y000 screws from the top and bottom edges of the LCD shield:
-
Two screws near the camera cutouts
-
Two screws at the bottom corners
-
-
-
Apply a little heat from an iOpener (or hair dryer / heat gun) to the back of the display, in order to soften the adhesive securing the display cables to the LCD shield.
-
-
-
Insert an opening pick between the display cables and LCD shield.
-
Slide it toward the bottom edge of the display to begin separating the cables.
-
Stop when you reach the end of the first cable.
-
-
-
Re-insert your opening pick, this time between the two cables.
-
Slide the pick to the bottom edge of the display to separate the cables from each other.
-
-
-
Peel the entire digitizer cable away from the LCD shield, and fold it aside.
-
-
-
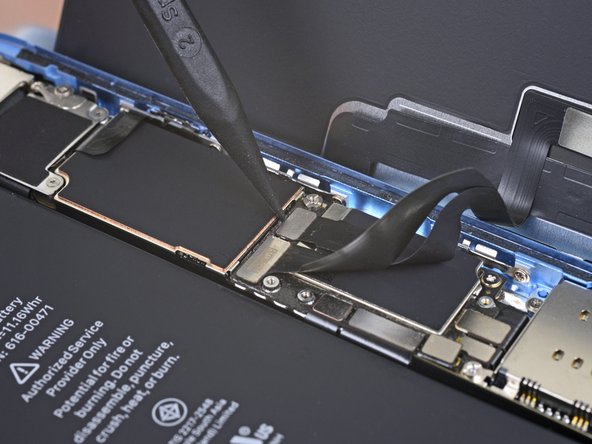
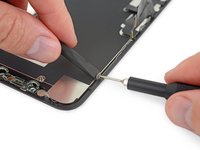
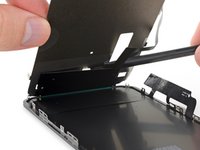
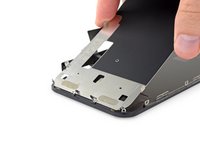
Insert an opening pick under the top edge of the LCD shield, and twist to separate it from the display.
-
-
-
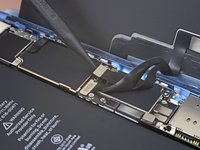
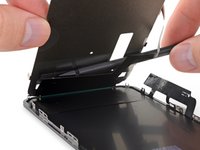
Grab the LCD shield by its top edge and swing it upward a few degrees.
-
Using your spudger, press gently on the lower part of the display cable, pushing it through the cutout in the LCD shield.
-
-
-
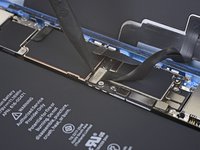
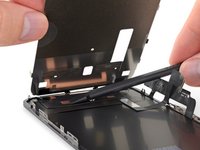
Raise the top edge of the LCD shield a bit higher, and feed the rest of the display cable through the cutout in the shield.
-
-
-
Raise the LCD shield up at a higher angle, until you can see the rest of the display cable stuck to the back.
-
Slide a spudger between the LCD shield and the display cable, and separate them completely.
-
-
-
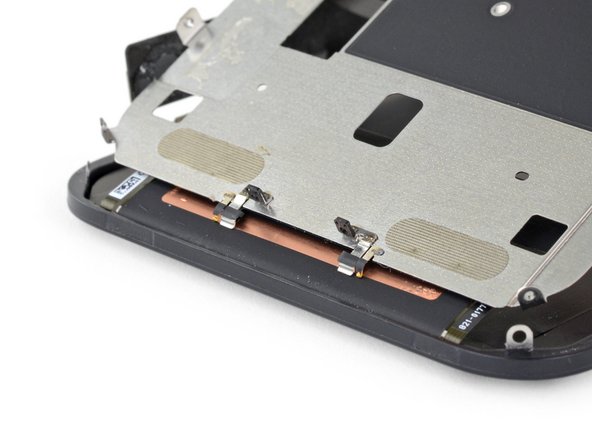
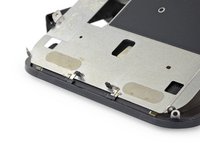
As you lift the LCD shield, note the metal prongs on the bottom edge.
-


To reassemble your device, follow the above steps in reverse order.
Take your e-waste to an R2 or e-Stewards certified recycler.
Repair didn’t go as planned? Try some basic troubleshooting, or search our Answers forum for help.
Отменить: Я не выполнил это руководство.
103 человек успешно провели ремонт по этому руководству.


15 Комментарии к руководству
So it’s like the X had a baby with an 8
Hello everyone! Hoping I can get some feedbacks on a problem I’m having. I’m doing a screen replacement on an XR but the bottom half of the screen is unresponsive to touch. The replacement screen is from another XR with original Apple screen. When I put the replacement screen back, it works fine so it can’t be anything that’s damaged on the replacement screen. Also this replacement screen does the same thing to any iphone XR I put in so I know it means there’s no problems with the logic board. The replacement screen only works with its original but not on any other XR.
i have same problem. Need Help
Did you find a way Around this ??im experiencing the same thing
What if I just needed to replace the front outer glass only, what steps are needed? Do you have to disassemble the phone?