Перейти к основному содержанию

Remplacement de l'écran LCD et de la vitre tactile de l'iPhone XR

Примечание: Вы редактируете необходимое руководство. Любые внесенные вами изменения повлияют на руководство, которое включает эту стадию.

Английский
Французский
Шаг 12
iPhone XR LCD and Digitizer Replacement, Check the EMI fingers: шаг 0, изображение 1 из 3 iPhone XR LCD and Digitizer Replacement, Check the EMI fingers: шаг 0, изображение 2 из 3 iPhone XR LCD and Digitizer Replacement, Check the EMI fingers: шаг 0, изображение 3 из 3
Check the EMI fingers
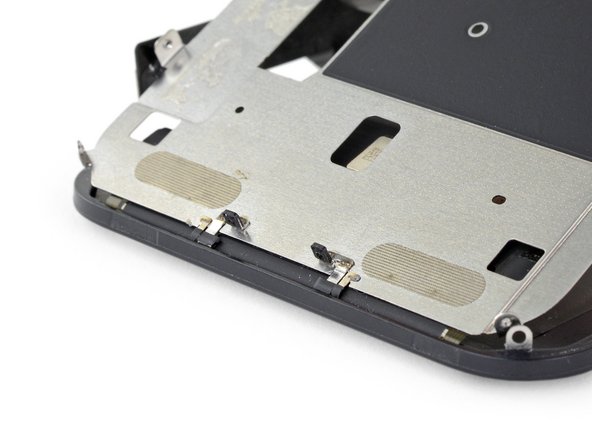
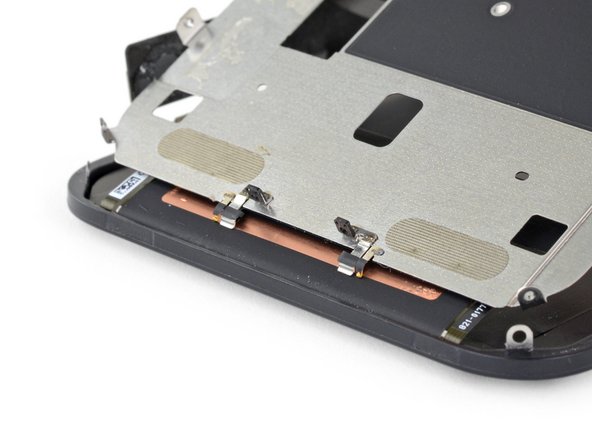
  • As you lift the LCD shield, note the metal prongs on the bottom edge.

  • During reassembly, make sure these prongs (a.k.a. EMI fingers) are correctly inserted into the LCD frame as shown.

Au moment de soulever la plaque de protection de l'écran LCD, notez les deux dispositifs métalliques qui dépassent du bord inférieur.

Lors du remontage, assurez-vous que ces dispositifs (c.-à.d. les doigts de contact EMI) sont correctement insérés dans le châssis du LCD, comme illustré.

Ваш вклад лицензируется под свободной лицензией Creative Commons .