Перейти к основному содержанию

Nintendo 2DS Lautstärkeregler tauschen

Английский
Немецкий
Шаг 5
Nintendo 2DS Volume Slider Replacement: шаг 0, изображение 1 из 3 Nintendo 2DS Volume Slider Replacement: шаг 0, изображение 2 из 3 Nintendo 2DS Volume Slider Replacement: шаг 0, изображение 3 из 3
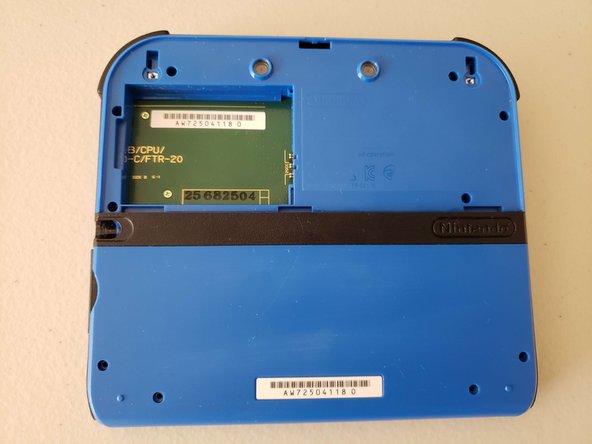
  • Use a spudger to pry the back case off by working around the perimeter of the device, starting from the bottom of the 2DS.

  • Don't yank or pull the back case off because the camera ribbon is attached to the motherboard and back case and may rip or damage the cable or camera itself.

  • Use the tip of a spudger, an opening tool, or your fingernail to flip up the small, hinged locking flap on the camera cable.

  • Use your spudger to gently slide the cable out of the connector.

  • Remove the back case.

Löse die Rückabdeckung mit einem Spudger ab. Dazu musst du dich rund um den Rand des Geräts unten am 2DS beginnend arbeiten.

Ziehe die Rückabdeckung nicht ruckartig ab, da das Kamerakabel an der Hauptplatine und der Rückabdeckung befestigt ist. Andernfalls könnte das Kabel oder die Kamera selbst beschädigt werden.

Verwende die Spitze eines Spudgers, ein Öffnungswerkzeug oder deinen Fingernagel, um den kleinen, scharnierartigen Sicherungsbügel am Kamerakabel hochzuklappen.

Schiebe das Kabel mit einem Spudger vorsichtig aus dem Anschluss heraus.

Entferne die Rückabdeckung.

Ваш вклад лицензируется под свободной лицензией Creative Commons .