Перейти к основному содержанию

iPhone 15 Pro Akku tauschen

Английский
Немецкий
Шаг 3
iPhone 15 Pro Battery Replacement, Remove the stretch release adhesive: шаг 0, изображение 1 из 3 iPhone 15 Pro Battery Replacement, Remove the stretch release adhesive: шаг 0, изображение 2 из 3 iPhone 15 Pro Battery Replacement, Remove the stretch release adhesive: шаг 0, изображение 3 из 3
Remove the stretch release adhesive
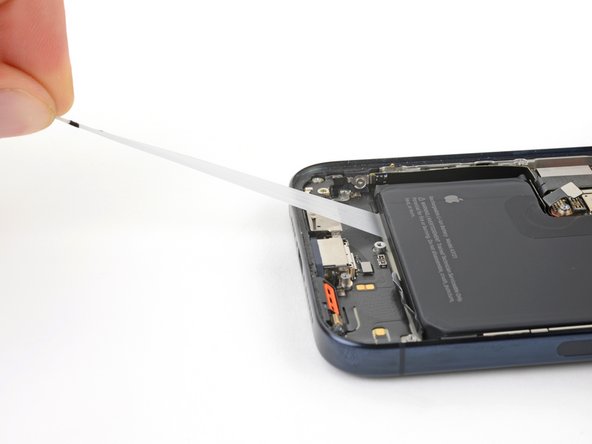
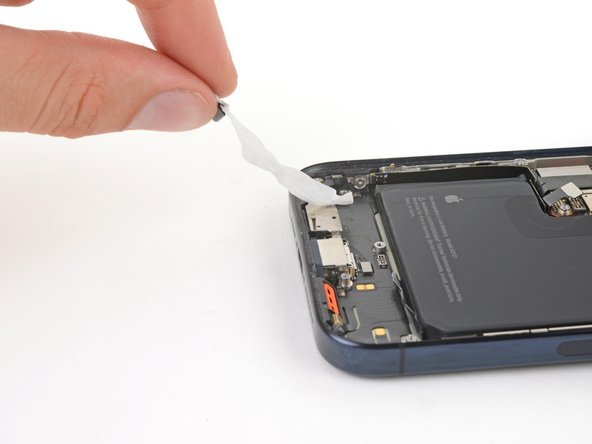
  • Pull one of the pull tabs out from under the battery until you can grip it with your fingers or wrap it around your tool.

  • Hold the phone steady using the edges of the frame—don't press down on the battery.

  • Pull the strip slowly, evenly, and at a low angle without dragging on other components.

  • Continue pulling, re-gripping or wrapping it around your tool as you go, until the strip fully releases from under the battery.

  • If the strip breaks off, try to retrieve it. If you can't grip it from under the battery, move on to the next step.

  • Repeat this step for the other two strips.

Ziehe eine der Zuglaschen so weit unter dem Akku heraus, bis du sie mit den Fingern fassen kannst oder wickle sie um dein Werkzeug herum.

Halte das Smartphone gut an den Kanten des Rahmens fest, drücke den Akku nicht nach unten.

Ziehe langsam und gleichmäßig in einem flachen Winkel am Klebestreifen, damit der Klebestreifen nicht irgendwo hängen bleibt.

Fahre fort, den Streifen herauszuziehen und nachzufassen, beziehungsweise um das Werkzeug zu wickeln, bis der Streifen ganz unter dem Akku herausgekommen ist.

Wenn einer der Klebestreifen unter dem Akku reißt, versuche ihn zu fassen. Wenn du ihn nicht unter dem Akku hervorholen kannst, dann mache mit dem nächsten Schritt weiter.

Wiederhole das Ganze für die anderen beiden Klebestreifen.

Ваш вклад лицензируется под свободной лицензией Creative Commons .