Перейти к основному содержанию

Reemplazo de la batería del iPhone 15 Pro

Английский
Испанский
Шаг 3
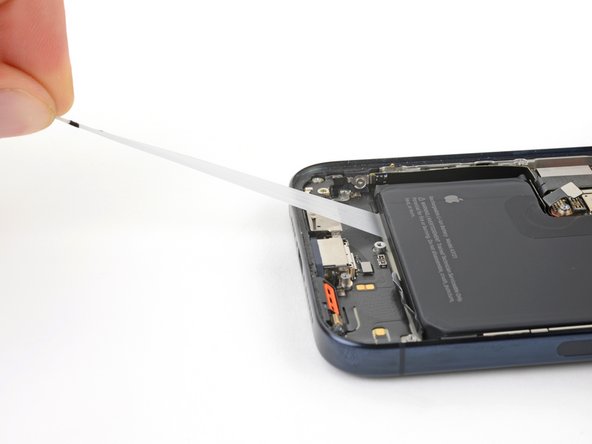
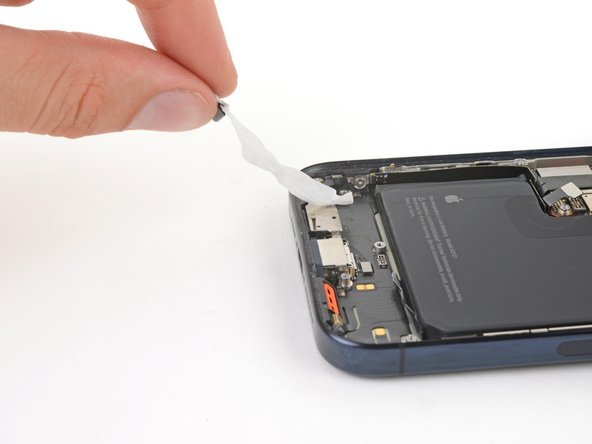
iPhone 15 Pro Battery Replacement, Remove the stretch release adhesive: шаг 0, изображение 1 из 3 iPhone 15 Pro Battery Replacement, Remove the stretch release adhesive: шаг 0, изображение 2 из 3 iPhone 15 Pro Battery Replacement, Remove the stretch release adhesive: шаг 0, изображение 3 из 3
Remove the stretch release adhesive
  • Pull one of the pull tabs out from under the battery until you can grip it with your fingers or wrap it around your tool.

  • Hold the phone steady using the edges of the frame—don't press down on the battery.

  • Pull the strip slowly, evenly, and at a low angle without dragging on other components.

  • Continue pulling, re-gripping or wrapping it around your tool as you go, until the strip fully releases from under the battery.

  • If the strip breaks off, try to retrieve it. If you can't grip it from under the battery, move on to the next step.

  • Repeat this step for the other two strips.

Saca una de las lengüetas de debajo de la batería hasta que pueda agarrarla con los dedos o envolverla alrededor de la herramienta.

Sostén el teléfono firmemente usando los bordes del marco—no presiones la batería.

Tira de la tira de forma lenta, uniforme y en un ángulo bajo sin arrastrar otros componentes.

Continúa tirando, volviendo a agarrarla o envolviéndola alrededor de tu herramienta a medida que avanza, hasta que la tira se suelte por completo de debajo de la batería.

Si la tira se rompe, intenta recuperarla. Si no puedes agarrarlo por debajo de la batería, continúa con el siguiente paso.

Repite este paso para las otras dos tiras.

Ваш вклад лицензируется под свободной лицензией Creative Commons .