Введение
More power, more screen, more battery, more speed. What does all that really mean? More heat. So how do you get all of that heat out of a device like a smart phone? It's not like you can add a fan or a large liquid cooling system... let's see how the magic is done.
Выберете то, что вам нужно
-
-
Hi everyone, I'm Greg. I design thermal solutions for consumer electronics for a living. I thought this would be a fun community to share and learn with. This is my first tear down I am posting so I will try and get better with time. I welcome any feed back and comments that you might have! Thanks, and enjoy!
-
Here it is...fresh from my friend in the Far East. Triple camera and squishy protective cover included!
-
That being said, this teardown will be a good guide to get you into the device for repairing whatever you need to. :)
-
-
-
No visible exterior fasteners...seems pretty standard now-a-days. Looks like we need some heat. They say it can handle heat...how much? Just to get here took me 25 min...I started at the bottom.
-
-
-
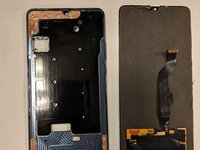
~30min later, success! That was a lot of effort. But, now we get to see what kind of guts this machine has!
-
-
-
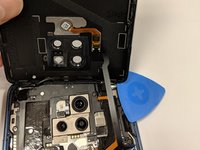
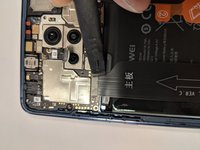
Right away, we have a hidden land mine. But, to be honest, expected. The fingerprint sensor has a ribbon cable that attaches to the motherboard (somewhere).
-
Thankfully, this is a very long and flexible cable, making it simple enough to dispatch.
-
-
-
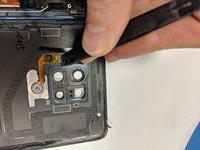
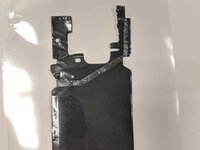
There we have it! Our first foray into the thermal solution of this beast! For the uninitiated, this is graphite. It is covered in black plastic, but it is an incredible thermal conductor.
-
Take note here...if you are ever to do work on these (or any smart phone today) take special care around this material. It is critical to the thermal stability of the device!
-
Did I mention is it flexible? Plus, 3X the thermal conductivity of Copper! Cool stuff.
-
-
-
-
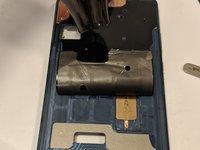
They always find ways to thin things down in these phones, so lets keep on digging.
-
The flash came loose a little while taking off the back cover. Just make note of that.
-
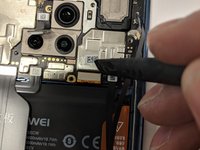
The long copper colored ribbon cable going across the graphite part will need to be removed, carefully.
-
With a little heat and careful tugging, the cable and graphite separate without issue.
-
-
-
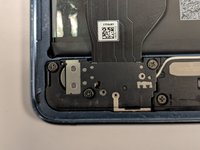
Finally some fasteners! A lot actually, 10 just for the mother boards plastic cover. There is a hidden screw under a white security sticker.
-
-
-
Standard ribbon cable attachments here need to be disengaged to get the PCB out. I prefer plastic spludgers. :)
-
-
-
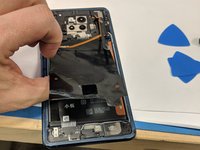
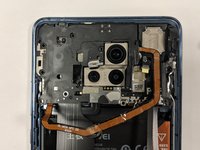
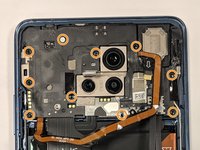
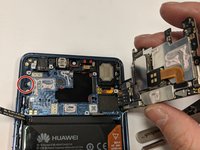
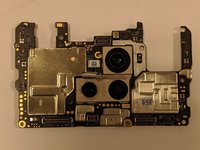
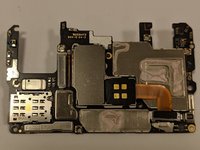
It always amazes me how small the PCBs of these smart phones have gotten!
-
There is a clip cast into the metal chassis on the left side of the PCB. That needs to be addressed to remove the board.
-
It will try and stick in place due to some thermal interface material that is holding it down.
-
-
-
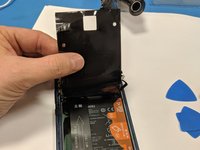
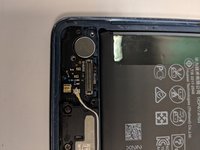
Battery is next. So we address the large ribbon cable traversing its expanse.
-
Just three screws, and all the same size as before!
-
(OK I admit, I skipped a lot of detail here. But suffice it to say, the little battery tabs labeled in Chinese were not very helpful. So I just jammed a card under it. I used minimal heat to make it happen.)
-
Yay! The battery is gone! It was still easier than most of the new Samsungs...
-
-
-
OK, still no signs of anything hiding, but in my experience, there is usually a thermal solution dedicated to the display. Time to go digging!
-
Another 30min minimum heat and careful prying exercise in patience here.
-
But your patience (and massively powerful heat gun) will be rewarded. I started at the ear speaker and slowly worked a chisel blade Exacto-knife into the gap. It was incredibly delicate work. Note how thin the bezel is. I'm shocked at how powerful the adhesive was on this one.
-
-
-
Here we have the cooling solution for the OLED display.
-
On the right is a small copper tape that has some EM shielding material involved.
-
On the left we have a large sheet of graphite again, and some smaller copper strips as well.
-
But on closer inspection, I am seeing what looks like something hidden below the graphite...
-
-
-
Look at that! With a little heat to carefully remove the flexible graphite, there is a thin (400micron) vapor chamber!
-
When looking at the location, it seems to be drawing heat from the hotter top side of the phone and drawing it down to the cooler bottom side of the device.
-
I will tear into the vapor chamber at a later date to update you on the internal structure.
-
-
-
There we have it! Final tally:
-
Vapor Chamber
-
Large piece of flexible graphite to spread out hot spots on the back of the device.
-
Large piece of flexible graphite to keep the OLED display in an isothermal state.
-
Several smaller pieces of copper foil to distribute heat, and provide some more grounding points for the device.
-
If you have any questions please leave me a comment! Thanks for checking this out!
-
Quick Edit. Added an image of the battery per request in the comments. Cheers!
-


20 Комментариев
This is a great teardown, Greg! Thanks for sharing!
Agreed, this is awesome!
Nice work. I guess you reassembled it—did it still work?
It does still power on! The ultimate test of a successful tear down!
Great guide. Wasn’t even sure what this was til I saw the phone. Amazing how much can fit into these already tiny devices.