Введение
The PlayStation 2 is the predecessor of the new PlayStation 3, and was first shown to the public in 1999. Throughtout the years the console was improved in many ways, recently a slim version of the first PS2 was introduced. The PlayStation 2 can stand on its side or lie flat to fit any space. The console was very powerful when it first came out. The "Emotion Engine", the heart of the console can handle millions of polygons per second, and can simulate weather, words, human behavior and emotions, so that games can react to players' actions in a more realistic way. Once it is installed into your home theater, you'll be treated to a reasonably sharp picture and high-quality sound. The PlayStation 2, like every other console, has a composite A/V cord in the box, which you use to connect the console to your TV. For surround-sound audio, there's a built-in optical digital audio jack. Beyond home-theater integration, you'll find two USB plugs and one IEEE 1394 (FireWire and iLink) port on the front, as well as a port on the back for plugging in the Online Adaptor.
Выберете то, что вам нужно
Видео обзор
-
-
On the front right side of the console we have the On/Off and the Eject button for the DVD player.
-
On the front left side we can see the two USB ports and the Firewire port. Two memory card slots, and the two controllers inputs.
-
-
-
Let's start with the teardown!
-
First of all we need to remove the Network Adaptor, which also gives you the choice to install a HDD.
-
The third picture shows where the hard disk would be placed.
-
-
-
This is the network adaptor we just removed, let's take a look at it before we move on to the console..
-
-
-
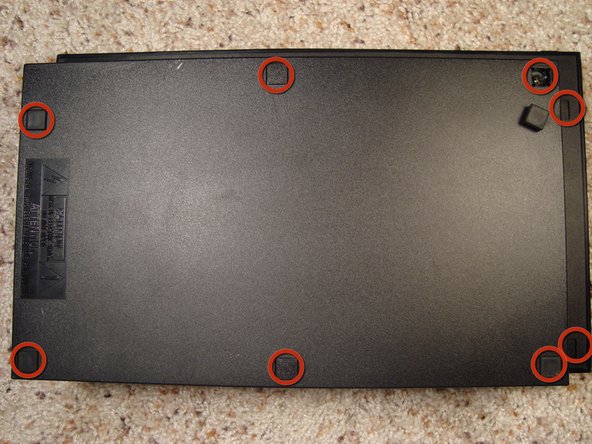
Turn the console upside down and with a flathead screw remove the rubber covers that hide the 8 screws.
-
On the back right of the console we can clearly see the warranty seal... the point of no return!
-
Once the seal and the screws are gone lift the upper part of the console and get ready to uncover the secrets of the PS2.
-
-
-
First of all let's remove the power supply by removing the four screws. In the blue box you can see the large fan, which is in front of the power supply to make sure the temperature is kept as low as possible, and to protect the "Emotion Engine".
-
Here's a closer look at the massive power supply.
-
-
-
Here is what is left when the power supply is gone.
-
Now we can easily remove the protective case for the optional hdd.
-
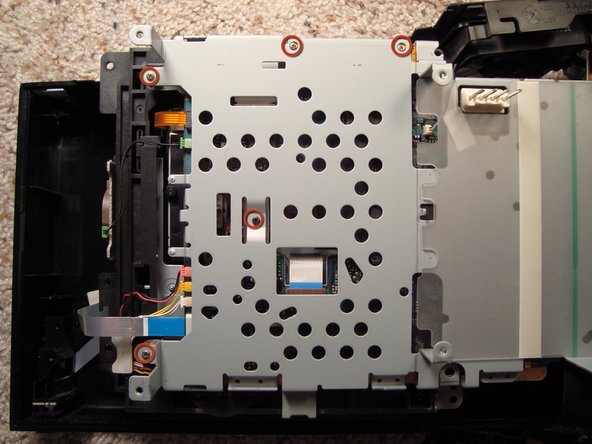
Done that we can unlock the optical drive from the metal frame.
-
-
-
-
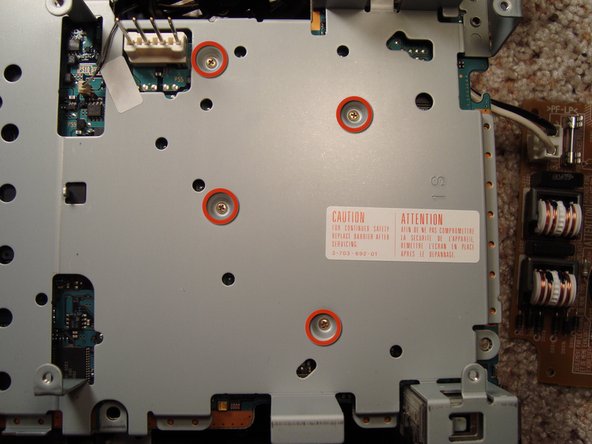
Next we need to remove the plastic layer that protects the power supply so we can access to the screws beneath it.
-
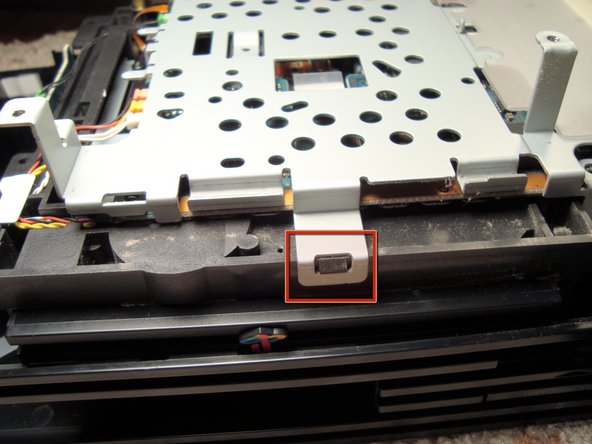
Once all the screws are gone we can lift the metal frame by using a flathead screw and some leverage to unlock all four sides from the plastic case of the optical drive.
-
-
-
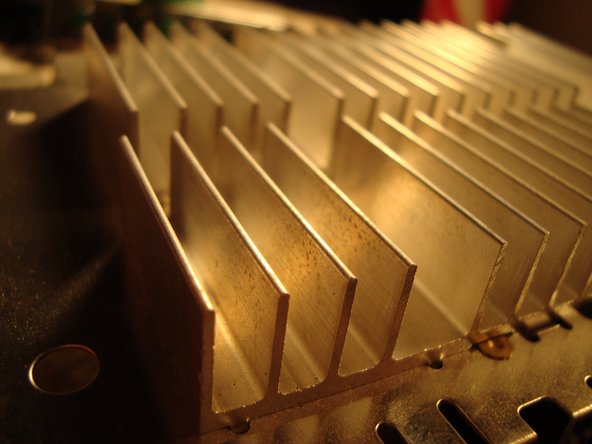
Before revealing the heart of our PS2 we need to remove the massive heat sink that prevents the "Emotion Engine" from overheating.
-
A closer view of the beautiful heat sink.
-
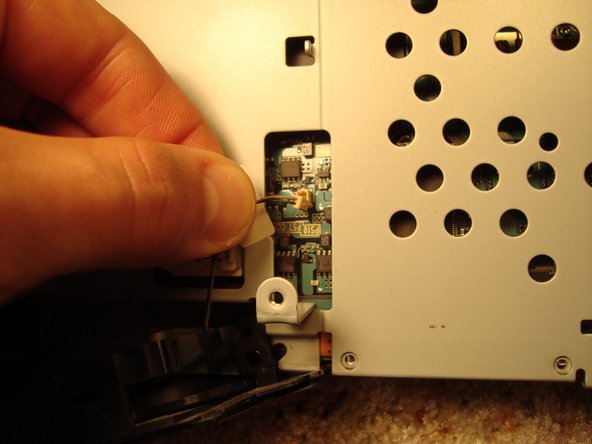
One last thing before removing the metal frame is unplugging the fan from the circuit board.
-
-
-
Before flipping the board and see where all the fun takes place we need to unplug a few connectors that transport data form the circuit board to the optical drive.
-
-
-
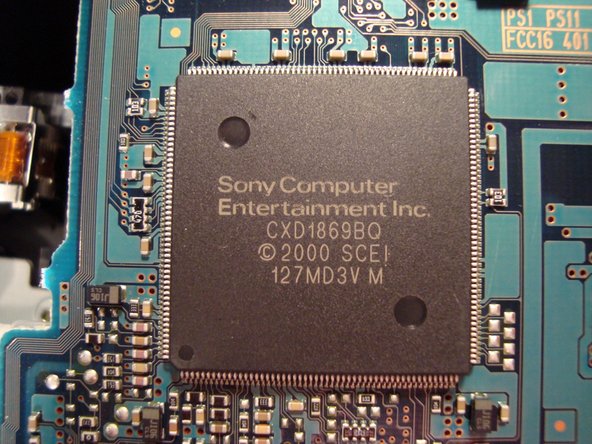
And here it is... the EE "Emotion Engine" Some specifics about the EE: CPU 128 Bit running at 300 MHz
-
RDRAM 32 MB
-
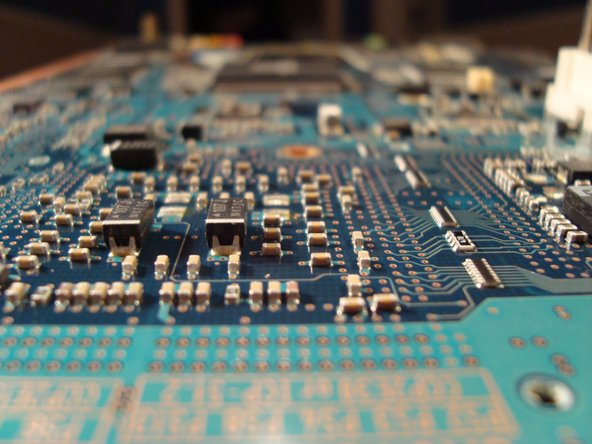
The GS "Graphics Synthesizer" with its clock frequency of 150 MHz, DRAM Bus Bandwidth 48 GB per second, DRAM Bus width 2560 bits and a Maximum Polygon Rate of 75 million polygons per second... pretty impressive
-
-
-
A look at one of the two RDRAM of the PS2..
-
..at the USB and Firewire ports..
-
...and more pictures.
-
-
-
On the side of the DVD player there's a little battery that helps the PS2 to keep up with date and time even when not plugged in... not bad..
-
There's a look at the bottom side of the optical drive.
-
-
-
Unfortunately our teardown is over, it was really fun, hope you enjoyed it too.
-