Hi @thatguy2189
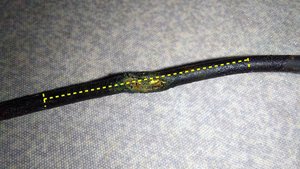
Best option is to cut the cable where it is broken and then carefully cut/peel the black insulation from the two cut ends for about 50mm so that you can see the wires.
Looking at images of the adapter it seems as though it is a two wire cable as there is only a standard 2 connector (inner pin and outer ring) DC power plug connected to the cable.
Once you have exposed sufficient length of wiring where the wiring insulation hasn't been affected, strip the insulation from the wires for about 10mm and then slide a length of suitably sized of heatshrink tubing back over the black insulation of one of the cut sections of cable past where the wires are exposed¹. This piece will be used to completely seal the joint at the end, so slide it well back on the cable to keep it out of the way when soldering the wires together etc.
Next slide another piece of suitably sized heatshrink tubing (smaller diameter than the piece covering the cable) over a wire past where the wire insulation (not cable insulation) begins again and then solder that wire to the corresponding wire in the other section of the cable.
Once soldered slide the heatshrink tubing on the wire back over the soldered joint and use a heat gun or the barrel of the soldering iron to shrink the tubing over the joint completely insulating it.
Then do the same with the other wire.
Once both wires are done, connect the charger to the power supply and use a DMM (digital multimeter) to make sure that there's 19V DC on the DC plug on the output of the charger.
If it tests OK then slide the heatshrink tubing¹ previously placed over the cable insulation to cover the entire joint and then shrink it to completely seal the joint in the cable.
Hopefully this makes some sense to you.
Был ли этот ответ полезен?
Проголосовали
Отменить
Счет
2
Отмена
Прокрутите эту тему, чтобы найти подходящее место для этого комментария. Затем нажмите "Прикрепить комментарий к этому сообщению", чтобы переместить его.