Введение
If the motor of your drill is not operating properly or not operating at all, this guide will show you how to replace the motor of your drill.
Выберете то, что вам нужно
-
-
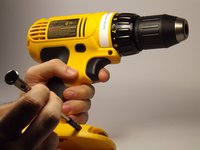
Compress the buttons on either side of the battery and lift the drill away from battery.
 Спросите у FixBot
-
-
-
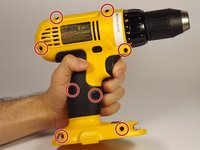
Remove the eight 16 mm, Torx Security #15 screws.
-
-
-
-
Lay the drill on its side and gently lift the top half off it.
-
-
-
Lift drill mechanism out of the shell.
-
Desolder the red and black wires from the motor.
-
Learn more about soldering here.
-


To reassemble your device, follow these instructions in reverse order.
Отменить: Я не выполнил это руководство.
3 человек успешно провели ремонт по этому руководству.
Команда

UMass Dartmouth, Team 4-2, Catania Spring 2016 Участник UMass Dartmouth, Team 4-2, Catania Spring 2016
UMASSD-CATANIA-S16S4G2
3 членов
Автор 13 руководств
3 Комментарии к руководству
Unplug the wires from the trigger switch....don't unsolder.
New motor comes with wires.
Thanks for the heads up on the wires
Is there a fix to replace brushes?