Введение
Use this guide to replace a faulty motherboard in your Dell Precision M4700.
The motherboard is a sheet of plastic that holds all the circuitry to connect the various components of a computer system. A failing motherboard will often cause the entire computer to fail. These symptoms include the computer shutting down randomly and the blue screen of death error.
Before using this guide, be sure to review the troubleshooting page . Often times, it is unnecessary to replace the entire motherboard.
Выберете то, что вам нужно
-
-
Slide the release latch to unlock the battery.
-
Flip and remove the battery from the computer.
-
-
-
Remove the two 3mm screws that secure the base cover to the computer with a Phillips #00 screwdriver.
-
Press the rubber tabs towards the rear of the computer to disengage the base cover.
-
Flip and remove the base cover from the computer.
-
-
-
Remove the 3mm screw that secures the optical drive to the computer with a Phillips #00 screwdriver.
-
Slide the optical drive out.
-
-
-
Pry up the keyboard trim starting from the top-inner edge with a plastic opening tool or spudger.
-
Pry up the bottom edge of the keyboard trim from the top-inner edge with a plastic opening tool or spudger.
-
-
-
Remove the four 3mm screws that secure the keyboard to the computer with a Phillips #00 screwdriver.
-
Starting from the bottom of the keyboard, separate the keyboard from the computer and flip the keyboard over.
-
Disconnect the keyboard-data cable from the system board by flipping up the locking tab of the ZIF connector and gently pulling out the cable.
-
Remove the keyboard.
-
-
-
Remove four 5mm screws that secure the hard drive to the computer with a Phillips #00 screwdriver.
-
Unscrew the 3mm Phillips #00 locking screw. Slide the release latch to unlock the hard drive.
-
Slide the hard drive out from the computer.
-
-
-
Remove the five 3mm Phillips #00 screws that secure the lower palm rest to the bottom of the laptop.
-
Remove the twelve 5mm Phillips #00 screws that secure the upper palm rest to the keyboard side of the laptop.
-
-
-
-
Disconnect the ribbon cables that connect the palmrest to the bottom of the device.
-
Pull on the tabs to disconnect the two wider connections.
-
-
-
Pry up between the palmrest and case with a plastic opening tool, starting on the left side.
-
Work around the side farthest from the screen prying the palmrest up.
-
-
-
Remove the two 5mm screws connecting the fan to the device with a Phillips #00 screwdriver.
-
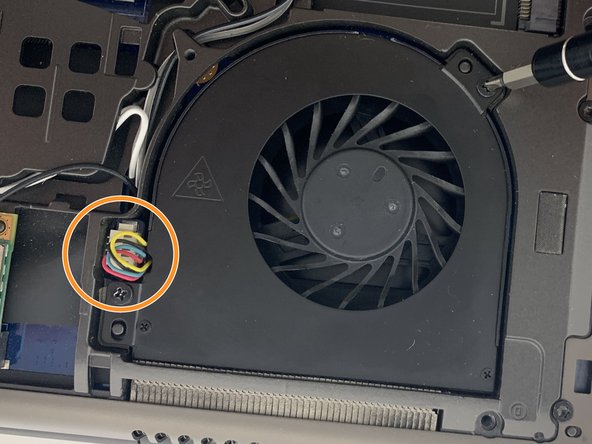
Disconnect the wires connecting the fan to the motherboard.
-
-
-
Unscrew the four captive screws with a Phillips #00 screwdriver.
-
Pull the CPU heatsink out. To remove it, grab the heatsink and pull it out and upward.
-
-
-
Unlock the CPU by using flathead screwdriver on the circular lock and turning.
-
Using two fingers, grab the CPU and lift it directly upwards from the motherboard gently.
-
-
-
Disconnect the antenna cables from the WLAN card.
-
Remove one 3mm screw from the WLAN card with a Phillips #00 screwdriver.
-
Pull the WLAN card out of its connection using two fingers on each side.
-
-
-
Use the same steps as used previously to remove the other fan.
-
Remove the two 5mm screws securing the fan to the device with a Phillips #00 screwdriver.
-
Disconnect the cables connecting the fan to the motherboard.
-
-
-
Unscrew the four heatsink captive screws with a Phillips #00 screwdriver.
-
Pull the heatsink out.
-
-
-
Remove the two 4mm screws connecting the GPU to the device with a Phillips #00 screwdriver.
-
Remove the GPU by pulling it out away from the screen side.
-
-
-
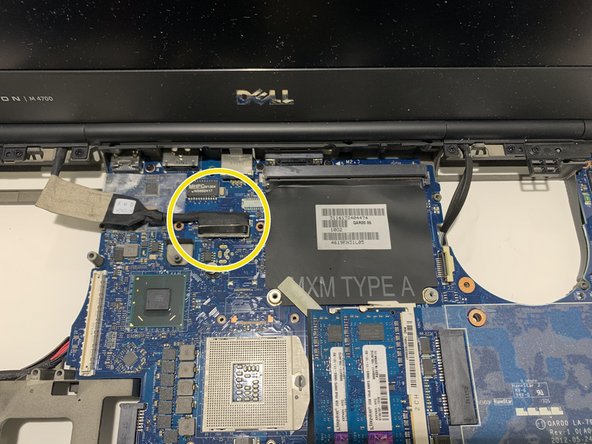
Remove the 5mm screw connecting the daughterboard to the circuit board with a Phillips #00 screwdriver.
-
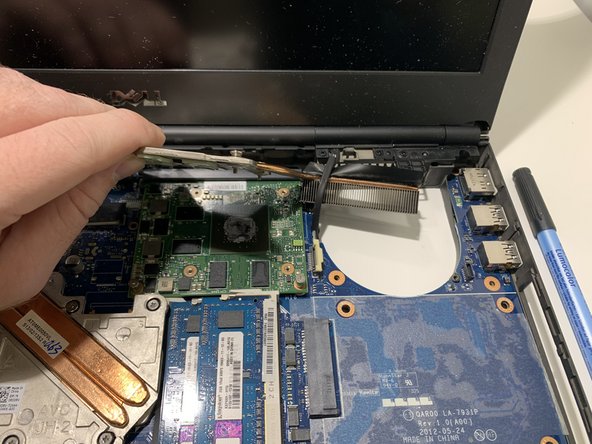
Disconnect the wide ribbon cable connecting it to the device.
-
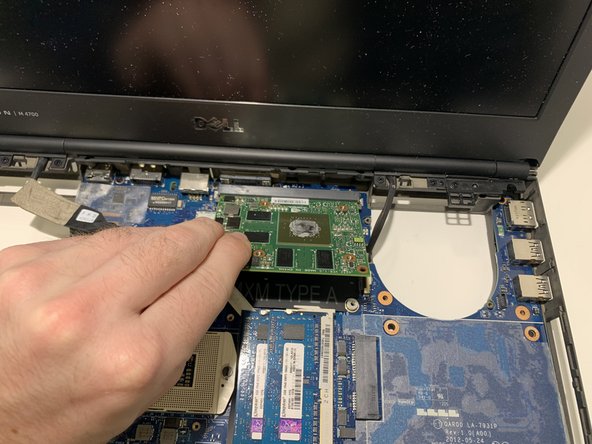
Remove the daughterboard by simply lifting it up and out of the device.
-
-
-
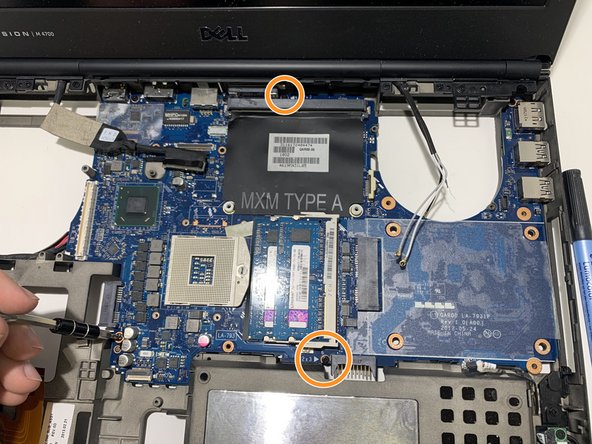
Remove four 5mm Phillips #00 screws connecting the motherboard to the frame of the device.
-
Remove two 3mm Phillips #00 screws connecting the motherboard to the frame of the device.
-
-
-
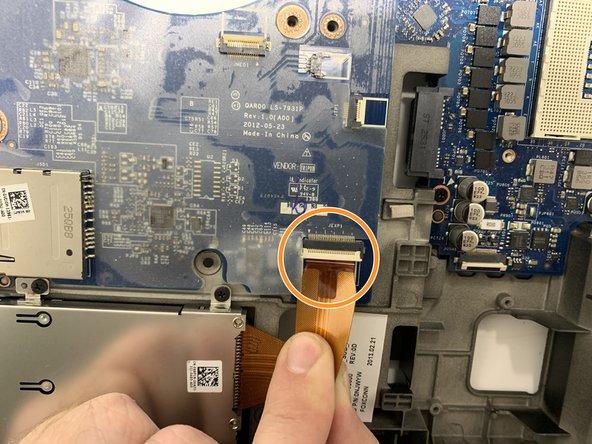
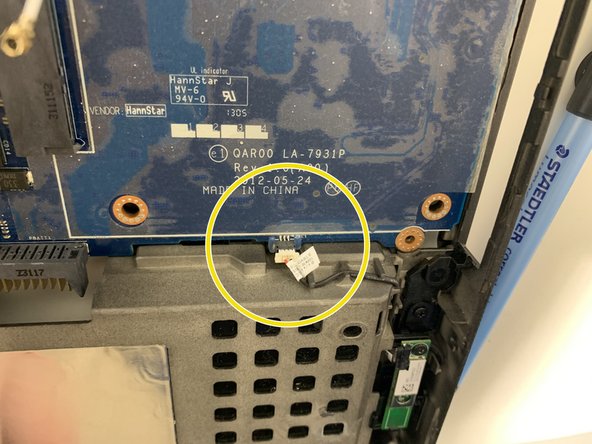
Disconnect the wire connecting the motherboard to the frame of the device.
-
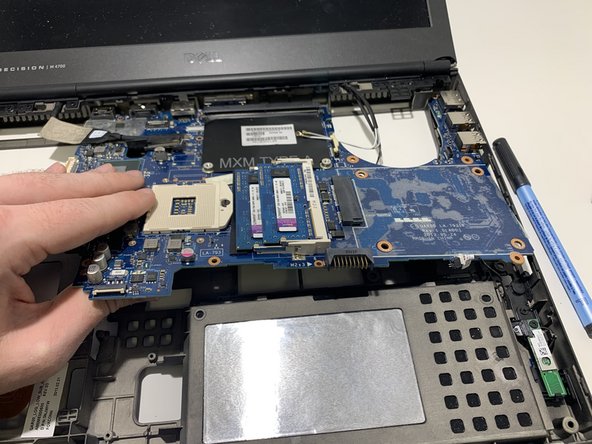
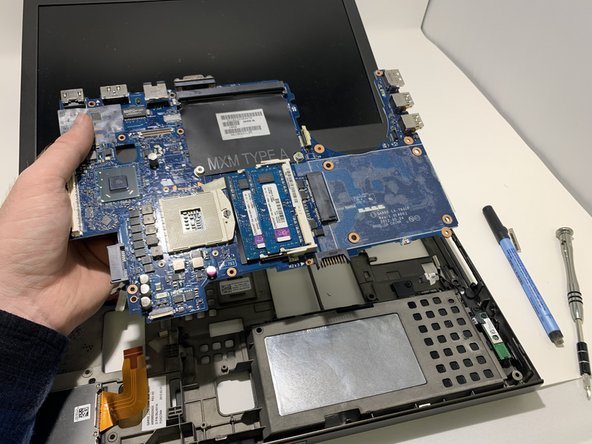
Remove the motherboard.
-


To reassemble your device, follow these instructions in reverse order.
To reassemble your device, follow these instructions in reverse order.
Отменить: Я не выполнил это руководство.
Еще один человек закончил это руководство.
Команда

University of Memphis, Team S4-G5, Kim Fall 2019 Участник University of Memphis, Team S4-G5, Kim Fall 2019
UM-KIM-F19S4G5
4 членов
Автор 3 руководств