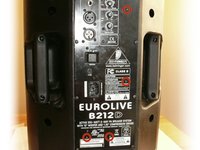
Перейти к основному содержанию

Disassembling Behringer Eurolive B212D Power & Control Panel

Выберете то, что вам нужно

  1. Disassembling Behringer Eurolive B212D Power & Control Panel, Removing the Behringer Eurolive B212D Electronics Box: шаг 1, изображение 1 из 1
    • CAUTION: Unplug your speaker from the power outlet.

    • Remove the 8 Phillips screws from the back of the speaker.

  2. Disassembling Behringer Eurolive B212D Power & Control Panel: шаг 2, изображение 1 из 1
    • Carefully remove the back panel, lifting out the metal electronics-box with it.

    • To avoid damaging your speaker, remove slowly, as there is still a wire attached from the electronics box to the speaker.

  3. Disassembling Behringer Eurolive B212D Power & Control Panel, Detach the Behringer Eurolive B212D Electronics Box: шаг 3, изображение 1 из 3 Disassembling Behringer Eurolive B212D Power & Control Panel, Detach the Behringer Eurolive B212D Electronics Box: шаг 3, изображение 2 из 3 Disassembling Behringer Eurolive B212D Power & Control Panel, Detach the Behringer Eurolive B212D Electronics Box: шаг 3, изображение 3 из 3
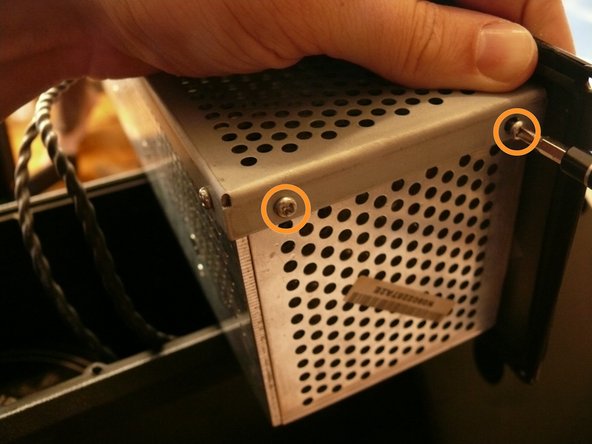
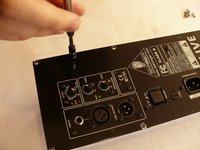
    • There are two silver, 6 mm-long machine screws with two 1/8" inner-diameter washers on the exterior of the metal electronics box; remove these first using a #2 philips screwdriver.

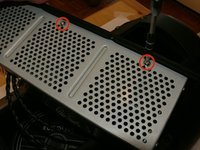
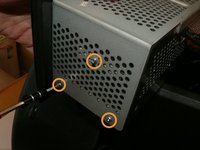
    • There are five of the same type of machine screw (silver, 6 mm-long) remaining around the metal electronics box's exterior; remove these as well.

    • You should have removed a total of 7 machine screws and 2 washers.

    • The reason for removing the two screws with the two washers first (or replacing them last when reassembling) is that their holes are actually slots. They are designed as slots to accommodate slop in the assembly, and if unscrewed out of order, you may have difficulty while removing - or possibly even damage - the other five screws.

  4. Disassembling Behringer Eurolive B212D Power & Control Panel: шаг 4, изображение 1 из 1
    • Remove the portion of the metal housing that you freed with the 7 screws in the previous step.

  5. Disassembling Behringer Eurolive B212D Power & Control Panel: шаг 5, изображение 1 из 3 Disassembling Behringer Eurolive B212D Power & Control Panel: шаг 5, изображение 2 из 3 Disassembling Behringer Eurolive B212D Power & Control Panel: шаг 5, изображение 3 из 3
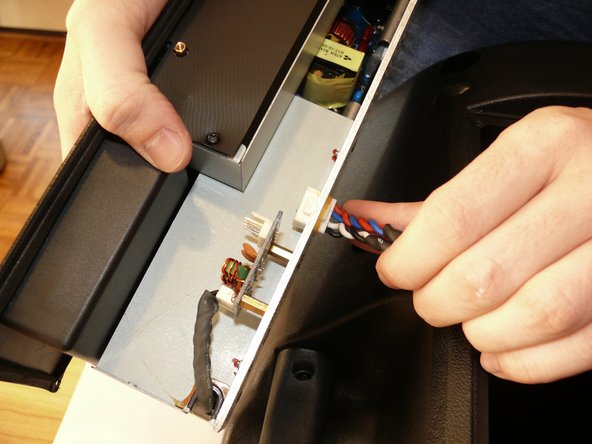
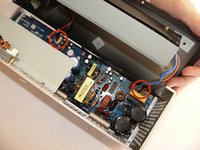
    • Inside the metal electronics box housing is a white clip attached to a small PCB; remove this.

    • The white clip in this image has been glued, indicating that the manufacturer may not expect the end user to remove this clip; it is difficult to proceed with the disassembling without doing so, however, because the rest of the speaker does not provide a sufficient surface on which to work.

    • Snake the clip head through the hole in the metal electronics box casing.

  6. Disassembling Behringer Eurolive B212D Power & Control Panel, Disassembling Behringer Eurolive B212D Power & Control Panel: шаг 6, изображение 1 из 2 Disassembling Behringer Eurolive B212D Power & Control Panel, Disassembling Behringer Eurolive B212D Power & Control Panel: шаг 6, изображение 2 из 2
    • Remove the 4, 7/32" long machine screws with a #2 phillips head screwdriver.

  7. Disassembling Behringer Eurolive B212D Power & Control Panel: шаг 7, изображение 1 из 2 Disassembling Behringer Eurolive B212D Power & Control Panel: шаг 7, изображение 2 из 2
    • Caution: The circuit board contains many capacitors that could cause serious injury if touched. If possible, use a capacitor discharge probe to safely rid the capacitors of dangerous charges.

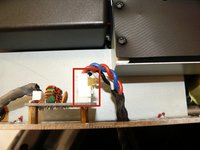
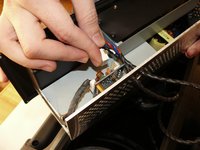
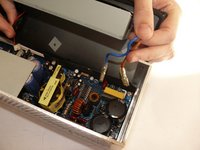
    • Rotate the back panel so you can view the interior; note the three wires attached.

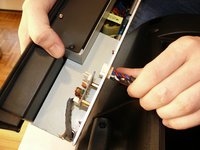
    • Remove the wires to you can fully remove the back panel.

Заключение

To reassemble your device, follow these instructions in reverse order.

5 участников успешно повторили данное руководство.

Troy W. Weber

Участник с: 03/29/12

1 431 Репутация

Автор 6 руководств

2 Комментариев

[|hello sir i am using behringer b215 d eurolive active speaker and power controler ic shot in one spesker and his ic code is this]-VIPer22A (4C6107) and please solve my this problems can you help me

ANWAR ALI WARSI - Ответить

If problem exist please contact stprofessionals@gmail.com

They're from Lahore they'll solve your problem. Email them get their contact and go to the store and have your all equipment fixed.

Syed Asim Ali Zaidi -

Добавить комментарий

Просмотр статистики:

За последние 24часов: 0

За последние 7 дней: 5

За последние 30 дней: 36

За всё время: 7,917