Перейти к основному содержанию

Disassembling Nintendo DSi Bottom case

Архивированное руководство
Это руководство сохранено для исторических целей. Используйте его обновлённую версию, чтобы выполнить ремонт.

Выберете то, что вам нужно

  1. Careful: steps 1-2 are sourced from a guide that's marked as in-progress.

    Disassembling Nintendo DSi Bottom case, Battery: шаг 1, изображение 1 из 1
    • Loosen the two screws on the battery panel. Then lift the panel up to remove it.

  2. Disassembling Nintendo DSi Bottom case: шаг 2, изображение 1 из 1
    • L Button.

    • Top of the battery pack.

    • To remove the battery pack, place your fingernail or a spudger at the top of the battery near the L button. Gently lift the battery out.

  3. Careful: steps 3-4 are sourced from a guide that's marked as in-progress.

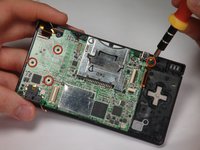
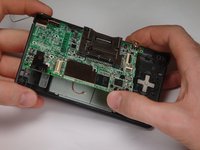
    Disassembling Nintendo DSi Bottom case, Motherboard: шаг 3, изображение 1 из 2 Disassembling Nintendo DSi Bottom case, Motherboard: шаг 3, изображение 2 из 2
    • Remove 4 Phillips screws from the board.

    • Lift the main board from the bottom end and flip it over to reveal the last connector.

    • Keep the main board fairly close to the case, making sure not to damage the last ribbon cable holding it in place.

  4. Disassembling Nintendo DSi Bottom case: шаг 4, изображение 1 из 1
    • Disconnect the ribbon cable by gently using a plastic opening tool to flip up the black connector latch. The cable should easily slide out from the connector.

    • The motherboard should now be free from the rest of the device.

  5. Disassembling Nintendo DSi Bottom case, Disassembling Nintendo DSi Bottom case: шаг 5, изображение 1 из 1
    • Remove the rubber front-panel button membranes from the device. Pay careful attention to where the buttons go, so you can replace them correctly.

    • A/B/X/Y button assembly

    • Select/Start button assembly

    • D-pad

    • Power button

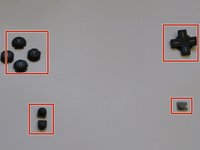
  6. Disassembling Nintendo DSi Bottom case: шаг 6, изображение 1 из 2 Disassembling Nintendo DSi Bottom case: шаг 6, изображение 2 из 2
    • Remove the plastic buttons and keep them in a safe place.

    • All of the buttons have "key" notches to prevent them from being inserted incorrectly (backwards or in the wrong place), but it can take a while to figure out where everything goes if they get shuffled around.

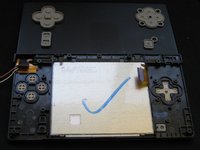
  7. Disassembling Nintendo DSi Bottom case: шаг 7, изображение 1 из 2 Disassembling Nintendo DSi Bottom case: шаг 7, изображение 2 из 2
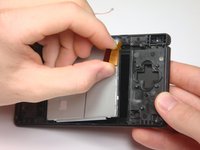
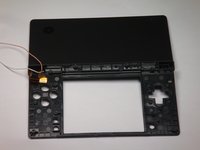
    • Flip the case open, and push the lower screen assembly out of the frame.

Заключение

To reassemble your device, follow these instructions in reverse order.

rjcamero

Участник с: 11/05/09

44 Репутация

Автор 3 руководств

Команда

Cal Poly, Team 6-1, Maness Fall 2009 Участник Cal Poly, Team 6-1, Maness Fall 2009

CPSU-MANESS-F09S6G1

5 членов

Автор 4 руководств

0 Комментариев

Добавить комментарий

Просмотр статистики:

За последние 24часов: 0

За последние 7 дней: 2

За последние 30 дней: 5

За всё время: 5,328