Эта версия возможно содержит некорректные исправления. Переключить на последнюю проверенную версию.
Выберете то, что вам нужно
-
Этот шаг не переведен. Помогите перевести
-
Take note of the two seams on the phone:
-
Screen seam: This seam separates the screen from the rest of the phone. This is where you should pry.
-
Frame seam: This is where the plastic frame meets the back cover. It is held in place by screws. Do not pry at this seam.
-
Before you begin prying, note the following areas on the screen:
-
Screen flex cable: Do not pry deeper than instructed, or you risk damaging this cable.
-
Adhesive perimeter: Prying beyond the narrow perimeter without angling the pick will damage the display panel.
-
-
Этот шаг не переведен. Помогите перевести
-
Heat an iOpener and apply it to the right edge of the display for a minute.
-
-
Этот шаг не переведен. Помогите перевести
-
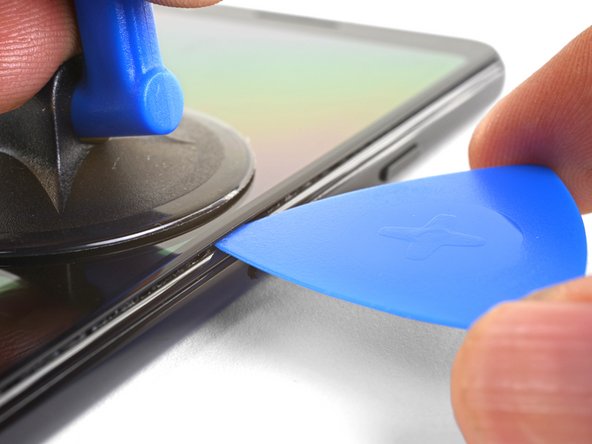
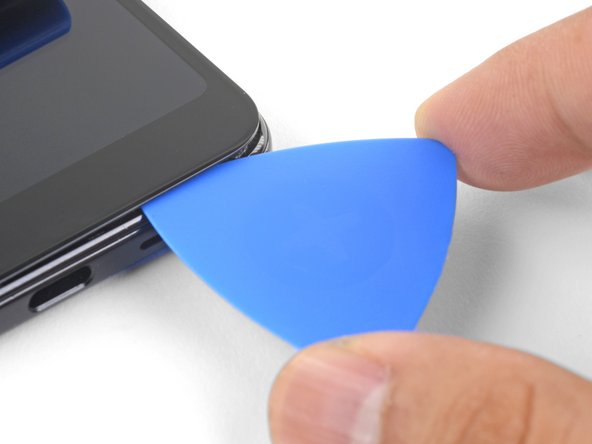
Place a suction cup near the right edge of the screen.
-
Pull on the suction cup with strong steady force.
-
Insert the pick into the gap, no more than 1 mm.
-
-
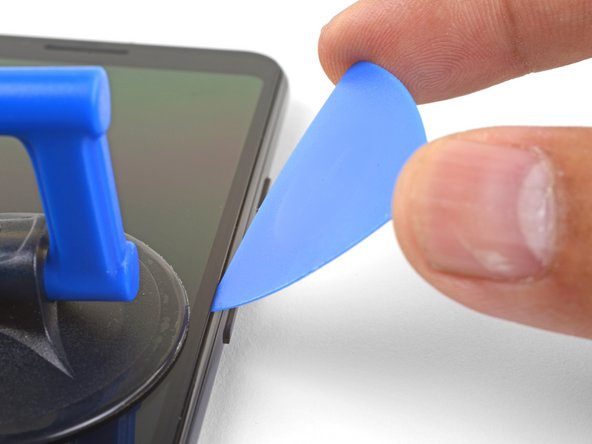
Этот шаг не переведен. Помогите перевести
-
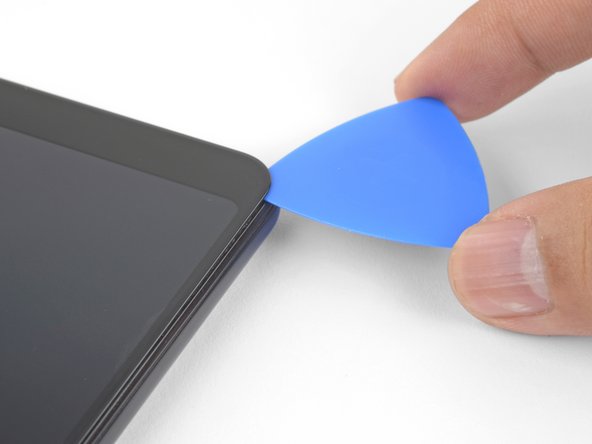
With the pick 1 mm in the gap, pivot the pick upwards to a steep angle.
-
At this angle, carefully push the pick into the gap about 1/4" (6 mm). The pick should slide in below the OLED panel.
-
-
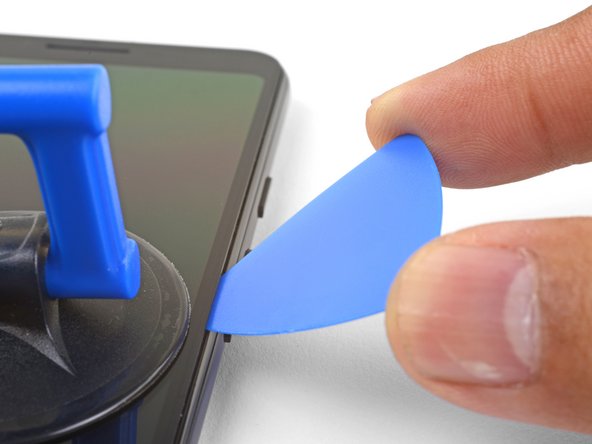
Этот шаг не переведен. Помогите перевести
-
Slide the pick along the right edge, slicing through the adhesive.
-
Leave a pick in place to prevent the adhesive from resealing.
-
-
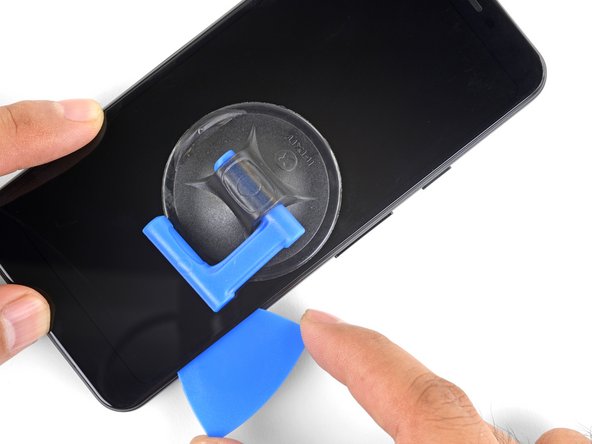
Этот шаг не переведен. Помогите перевести
-
Slide the pick around the bottom right corner to slice through the adhesive.
-
Continue slicing along the bottom edge of the phone and around the left corner.
-
-
Этот шаг не переведен. Помогите перевести
-
Slice through the left edge of the phone, making sure to properly angle the pick below the OLED panel and insert it in no more than 1/4" (6 mm).
-
To angle the pick below the OLED panel, insert the point of the pick no more than 1 mm in, angle the pick upwards, and then slowly push the pick in 1/4".
-
-
-
Этот шаг не переведен. Помогите перевести
-
Slice along the top edge while keeping the pick no more than 5/16" (8 mm) in.
-
-
Этот шаг не переведен. Помогите перевести
-
With all of the edges cut, carefully hinge open the right edge of the screen.
-
Use an opening pick to carefully cut through any remaining adhesive.
-
-
Этот шаг не переведен. Помогите перевести
-
With all of the adhesives cut, flip the attached screen glass side down and rest it on top of the phone. The screen flex cable should be loosely arched.
-
-
Этот шаг не переведен. Помогите перевести
-
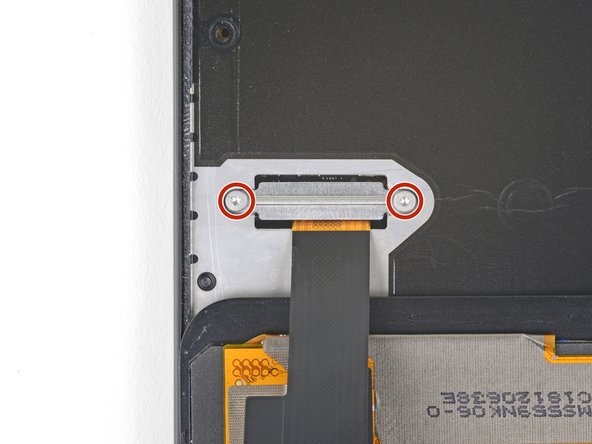
Carefully peel the black tape covering the screen connector bracket.
-
Remove the two 4.4 mm long T3 screws securing the screen connector bracket.
-
Remove the screen connector bracket.
-
-
Этот шаг не переведен. Помогите перевести
-
Use the point of a spudger to pry up and disconnect the screen flex cable.
-
-
Этот шаг не переведен. Помогите перевести
-
Remove the screen.
-
Carefully compare your replacement screen with your original part. You may need to transfer additional components (such as the speaker mesh) to the new part.
-
Follow this guide if you are using custom-cut adhesives.
-
If you are using double-sided tape such as Tesa tape, follow this guide.
-
-
Этот шаг не переведен. Помогите перевести
-
Remove the fourteen T3 screws of the following lengths securing the plastic midframe:
-
Twelve 4.3 mm silver T3 screws
-
Two 4.3 mm black T3 screws
-
-
Этот шаг не переведен. Помогите перевести
-
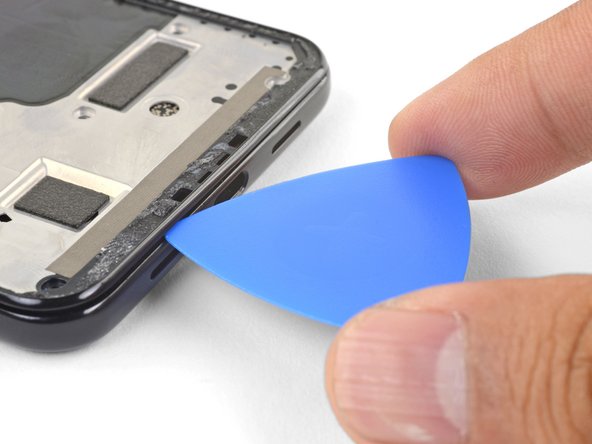
Insert an opening pick into frame seam at the bottom of the phone. This seam sits between the plastic midframe and the back cover.
-
Slide the pick along the seam to release the clips holding the plastic midframe.
-
-
Этот шаг не переведен. Помогите перевести
-
Slide the opening pick along the left and right edges of the phone to release the midframe clips.
-
Lift the bottom edge of the plastic midframe up but do not remove the midframe. The midframe is still tethered to the phone by the fragile proximity sensor cable at the top edge.
-
-
Этот шаг не переведен. Помогите перевести
-
Use the point of a spudger to carefully pry up and disconnect the proximity sensor connector from the motherboard.
-
Remove the plastic midframe.
-
-
Этот шаг не переведен. Помогите перевести
-
Align the top edge of the plastic midframe with the phone.
-
Use the point of a spudger to carefully align and push the proximity sensor connector onto the motherboard socket.
-
This takes a bit of patience and finesse. Once you have the connector in place, you can also use a finger to gently press the connector onto the socket.
-
Use the point of a spudger to carefully pry the proximity sensor out of its recess on the midframe. The sensor is lightly adhered to the midframe.
-
Remove the sensor from the midframe. Attach the sensor connector onto its motherboard socket.
-
Thread the sensor cable through the midframe and reposition the sensor in the recess. Press down with your finger to adhere the sensor back onto the midframe.
-
-
Этот шаг не переведен. Помогите перевести
-
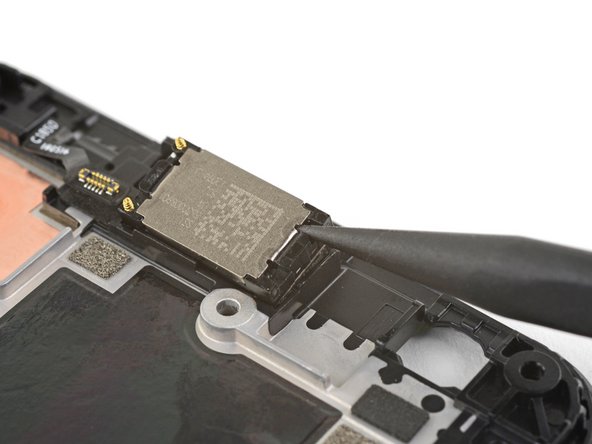
Insert the point of a spudger into one of the four small notches below the earpiece speaker's metal plate.
-
Pry up to release the earpiece module from its recess.
-


Отменить: Я не выполнил это руководство.
5 участников успешно повторили данное руководство.


5 Комментариев
Just to report back on this guide, my Pixel 3a XL actually has the gold contacts for the earphone on the opposite side than shown here. Looks to be the reason for it to not work in the first place. Unfortunately I damaged my screen during the repair by pressing too far into the bottom ribbon connector, splitting it, or damaging it in some way it will not function anymore. Just flickers.
Thanks for the guide!
Same problem in my case. I cracked the screen while trying to remove old adhesive one the edges.
Same issue on my 3aXL- was confused by this guide as a result, had to take my phone apart a few times for testing before I figured out the problem- I was about to order another replacement speaker.
Overall, great guide- a small note for 3a XL owners would be very helpful! Had i not followed the guide on that one step I’d be 45 minutes ahead haha
Thanks for the feedback! Yes, the earpiece contacts for the 3a XL is indeed on the left instead of the right. I’ll add a note in the intro to highlight that.
Hallo, kann mir vielleicht jemand sagen wie die Staub Abdeckung oben beim Display heißt ? Oder als Ersatzteil zu finden ist ?
Vielen Dank