Введение
Many replacement parts don’t come with custom-cut adhesive, but do come with a pre-cut adhesive card that has a variety of useful shapes cut into double-sided adhesive. This guide covers some of the most common device repair applications of the pre-cut adhesive card.
Follow the repair guide specific to your phone and part for replacement instructions. This guide only pertains to use of the pre-cut adhesive card included in some replacement kits.
Выберете то, что вам нужно
-
-
Инструмент, используемый на этом этапе:Tweezers$4.99
-
Begin by removing all the old adhesive, glass, and any other debris from all adhesion surfaces.
-
After removing most of the adhesive, scrape with the tip of a spudger to get small bits of adhesive out of tight spaces.
 Спросите у FixBot
-
-
-
Using a lint-free cloth (or coffee filter) with a bit of isopropyl alcohol, clean the adhesion surfaces. Use a Q-tip to clean smaller surfaces and corners.
-
For best results, swipe your cleaning implement in one direction, not back and forth.
-
Wait at least a minute to let the solvent evaporate after cleaning.
-
-
-
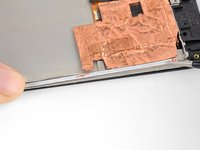
Use the narrow rectangular strips to secure narrow edges, like those on a display.
-
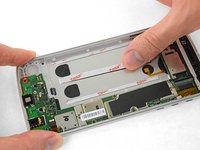
Use multiple long rectangular strips to adhere large components, like batteries.
-
-
-
-
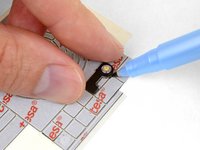
You can use the thin adhesive border of the card to secure small, rectangular components.
-
-
-
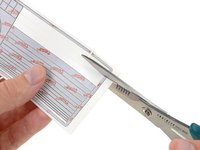
Use a small rectangle or an uncut part of the card to cut out odd shapes for small components.
-
Use an entire rectangle or two for small square or rectangular parts.
-
-
-
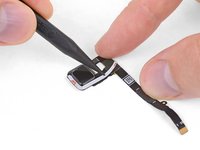
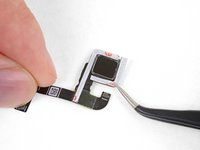
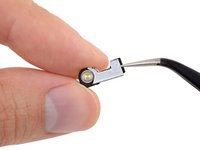
Use the arc-shaped cutouts to secure circular components, place adhesive around fragile components that should not be adhered (like an NFC coil) or can tear, or to secure rounded corners.
-
-
-
Before applying any adhesive, make sure your replacement part fits, and that all connectors will connect without putting too much stress on their cables. If it is safe to do so, power on your device and verify that everything functions correctly. If everything works, power off the device and continue.
-
With the device powered off, apply the correct adhesive shape for your repair.
-
Avoid applying adhesive over ribbon cables, or delicate surfaces like NFC or wireless charging coils.
-
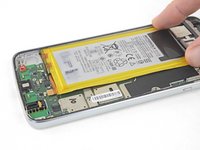
When applying adhesive strips, make sure to apply one end first, then use a finger or the flat end of a spudger to smooth the rest of the strip as you lay it down, squeezing out any air bubbles.
-
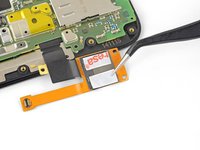
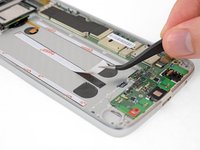
Use a pair of tweezers to peel the backing off the adhesive.
-
-
-
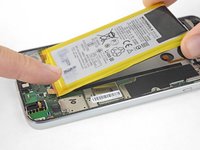
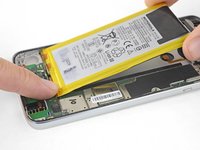
Install the new part, taking care to position it correctly.
-
For parts with inflexible cables (like some batteries), connect the cable before installing it, and leave it connected during installation, to make sure the part stays positioned correctly.
-
-
-
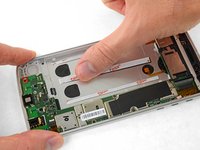
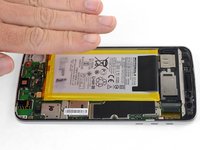
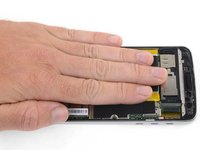
Apply even pressure over the whole adhesion surface for at least 30 seconds to strengthen the bond.
-
For maximum bond strength on external-facing components (like displays and covers), you can leave the adhesive under pressure overnight.
-
Leaving the phone under a stack of books is a good way to do this—just make sure the books apply even pressure to the entire bond. You may need some kind of spacer to allow the books to lay flat.
-
-


Follow the guide associated with your device and part to complete your repair.
Take your e-waste to an R2 or e-Stewards certified recycler.
Repair didn’t go as planned? Check out our Answers community for troubleshooting help.
Отменить: Я не выполнил это руководство.
140 человек успешно провели ремонт по этому руководству.

8 Комментарии к руководству
Ciao, per chiudere la cover posteriore, che larghezza di nastro adesivo consigli
First, the ifixit kit was excellent. The linked instruction were very thorough and easy to follow. I was a bit nervous about attempting the battery replacement on my Moto G6…“with it’s nonreplaceable battery”, but I pulled if off without a hitch thanks to the kit and directions from ifixit. Now my phone is charging and working better than it has in a long time. Highly recommend these guys.
Das sind gute Tipps, hoffe das ich auch als Laie dies hin bekomme. Werde es mal ausprobieren mit den Klebefolien. Wird bestimmt sehr kniffelig.
Lg Emma
Sehr hilfreich zu den Tipps mit Folien. Es ist für dicke Finger etwas schwer handzuhaben aber dennoch machbar.
Grüße
Sinan
The guide is generally good, but it lacks the note in the end that you need do more actions to be able to put together the phone:
1) Carefully peel off the fingerprint sensor from back cover, make sure sticky bits still there
2) Connect fingerprint sensor to the frame of the phone
3) Place the sensor in its place (you'll see a tab there)
4) Re-place the back of the phone - it should click in on all sides and the fingerprint sensor will adhere back to its place
Also, beware VERY LOW QUALITY LCD replacements on Amazon. Terrible, horrible quality.