Эта версия возможно содержит некорректные исправления. Переключить на последнюю проверенную версию.
Выберете то, что вам нужно
-
Этот шаг не переведен. Помогите перевести
-
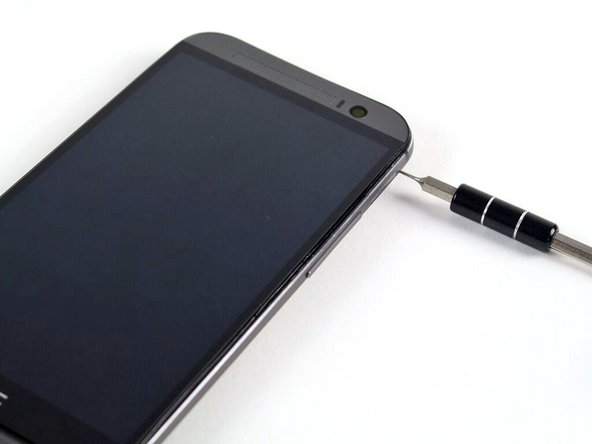
Insert a SIM card eject tool or a paperclip into the small hole in the SIM card tray, located on the upper left hand side of the phone.
-
Press to eject the tray.
-
-
Этот шаг не переведен. Помогите перевести
-
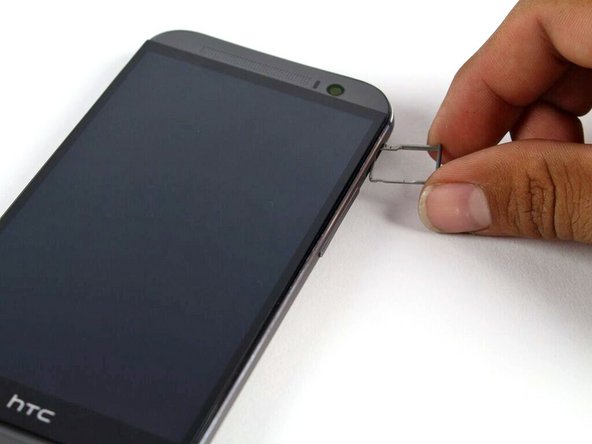
Insert a SIM card eject tool or a paperclip into the small hole in the microSD card tray, located on the upper right hand side of the phone.
-
Press to eject the tray.
-
-
Этот шаг не переведен. Помогите перевести
-
Remove the microSD card tray assembly from the HTC One M8.
-
-
Этот шаг не переведен. Помогите перевести
-
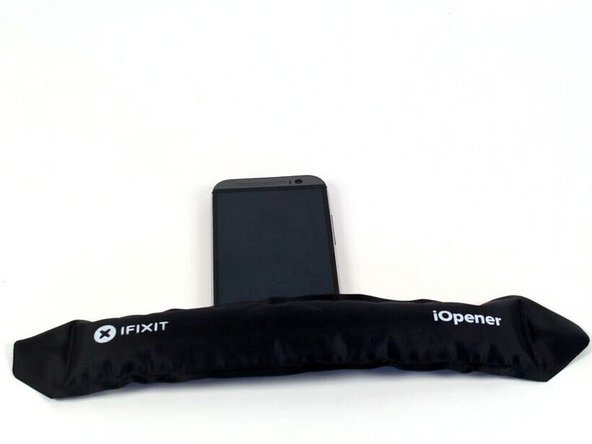
Use an iOpener or heat gun to loosen the adhesive on the upper and lower speaker grilles.
-
-
-
Этот шаг не переведен. Помогите перевести
-
Use a plastic opening tool to gently peel up the lower speaker grille.
-
-
Этот шаг не переведен. Помогите перевести
-
Use a plastic opening tool to gently peel up the upper speaker grille.
-
-
Этот шаг не переведен. Помогите перевести
-
Remove the two silver 3 mm Phillips #00 screws from the top.
-
Remove the four black 4 mm T5 Torx screws from the bottom.
-
-
Этот шаг не переведен. Помогите перевести
-
Work your way around the perimeter of the phone with a spudger and plastic opening picks to free the clips that secure the rear case to the display assembly.
-
-
Этот шаг не переведен. Помогите перевести
-
Remove the two silver 2 mm Phillips #00 screws securing the battery connector to the motherboard.
-
Use a plastic opening tool to gently pry up the battery connector.
-
-
Этот шаг не переведен. Помогите перевести
-
Use a spudger to disconnect the two (four) antenna cables.
-
Use the tip of a spudger to disconnect the seven ZIF connectors.
-
Use a pair of tweezers to gently pull the seven ribbon cables free of the connectors.
-
-
Этот шаг не переведен. Помогите перевести
-
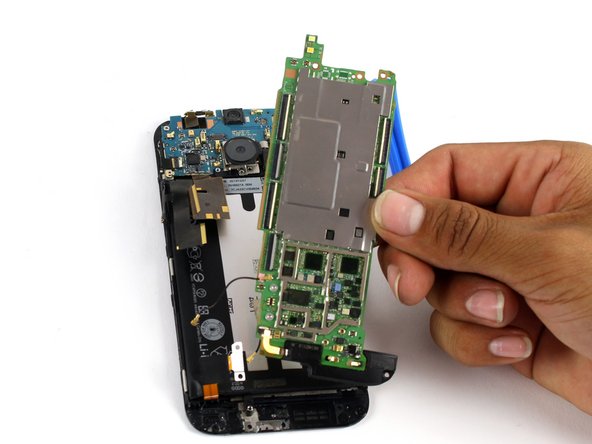
Use an iOpener or a heat gun to loosen up the adhesive securing the motherboard to the display assembly.
-
Use a plastic opening tool to gently pry the motherboard free of the display assembly.
-
-
Этот шаг не переведен. Помогите перевести
-
Gently bend the various ribbon cables out of the way of the battery.
-
Use an iOpener or heat gun to loosen up the adhesive securing the battery to the display assembly.
-
Use a plastic opening tool to gently pry up the battery from the display assembly.
-


Отменить: Я не выполнил это руководство.
125 участников успешно повторили данное руководство.
Команда

Cal Poly, Team 5-9, Maness Spring 2015 Участник Cal Poly, Team 5-9, Maness Spring 2015
CPSU-MANESS-S15S5G9
4 членов
Автор 18 руководств
33 Комментариев
thanks for the instructions. i dropped my m8 and the power button wasnt responding at all and volume down wasnt either . i dissassembled the phone ( maybe i shouldnt have used my swiss army blade, left dents in plastic) using this guide..and pushed all the connectors into firmly and it worked again . thanks a bunch
I did not replace the adhesive: there's enough left to keep everything secure
zoccola zoccola
Hi, if there is a lot of tape is it necessary to replace it with new tape and copper shielding, and where can you get it please ?