Перейти к основному содержанию

HTC Vive XR Elite Battery Cradle Power LED Replacement

Выберете то, что вам нужно

  1. HTC Vive XR Elite Battery Cradle Power LED Replacement, Prepare your Vive XR Elite for disassembly: шаг 1, изображение 1 из 1
    • Before starting this repair, discharge the batteries in your headset below 25%. A charged battery may leak dangerous chemicals or catch fire if damaged.

    • Playing Half Life: Alyx will do the trick!

    • The Vive XR Elite has a proximity sensor that puts the headset in standby mode to save battery when it isn't in use. To drain the battery faster you'll need to use the headset.

  2. HTC Vive XR Elite Battery Cradle Power LED Replacement, Disconnect the USB-C power cable: шаг 2, изображение 1 из 2 HTC Vive XR Elite Battery Cradle Power LED Replacement, Disconnect the USB-C power cable: шаг 2, изображение 2 из 2
    • Disconnect the USB-C power cable.

  3. HTC Vive XR Elite Battery Cradle Power LED Replacement, Disconnect the battery cradle: шаг 3, изображение 1 из 3 HTC Vive XR Elite Battery Cradle Power LED Replacement, Disconnect the battery cradle: шаг 3, изображение 2 из 3 HTC Vive XR Elite Battery Cradle Power LED Replacement, Disconnect the battery cradle: шаг 3, изображение 3 из 3
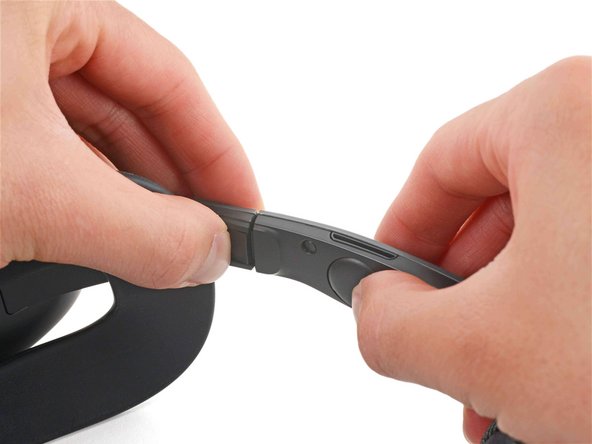
    • Press the release button on the right battery cradle temple slot.

    • Pull the battery cradle away from the right temple slot to disconnect it.

  4. HTC Vive XR Elite Battery Cradle Power LED Replacement: шаг 4, изображение 1 из 3 HTC Vive XR Elite Battery Cradle Power LED Replacement: шаг 4, изображение 2 из 3 HTC Vive XR Elite Battery Cradle Power LED Replacement: шаг 4, изображение 3 из 3
    • Repeat the previous step for the left temple slot.

  5. HTC Vive XR Elite Battery Cradle Power LED Replacement, Separate the headset and battery cradle: шаг 5, изображение 1 из 1
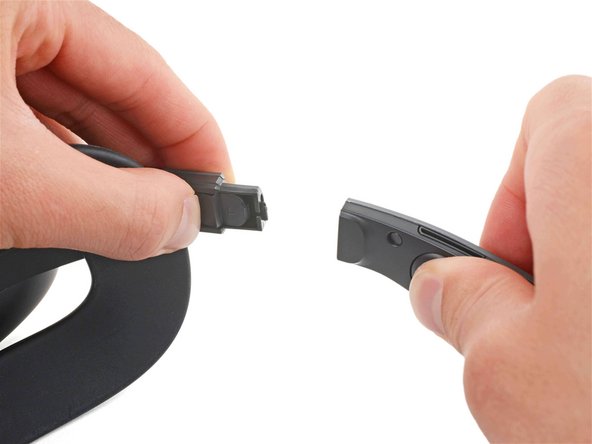
    • Separate the headset and battery cradle.

  6. HTC Vive XR Elite Battery Cradle Power LED Replacement, Insert an opening pick: шаг 6, изображение 1 из 2 HTC Vive XR Elite Battery Cradle Power LED Replacement, Insert an opening pick: шаг 6, изображение 2 из 2
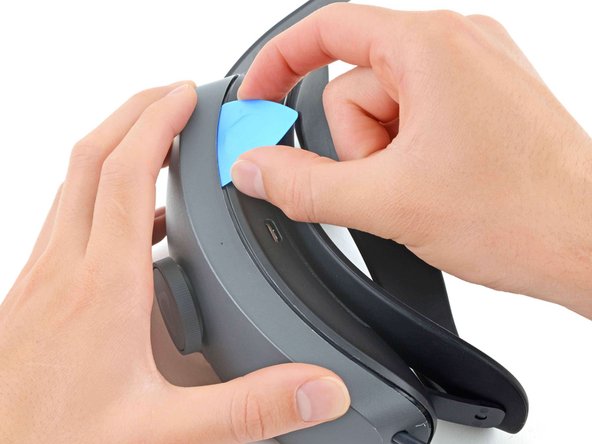
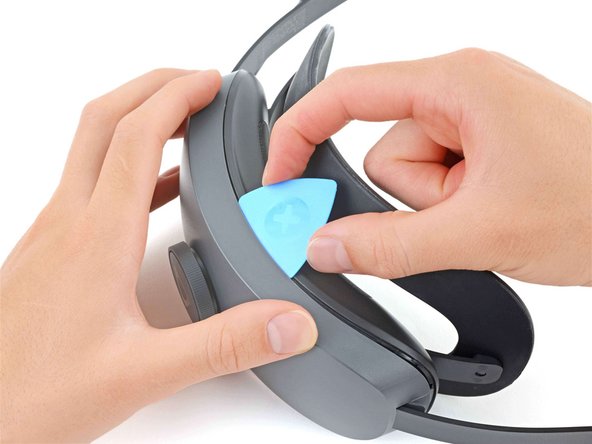
    • Insert a long edge of an opening pick in the gap between the two halves of the battery cradle, near the USB-C cable.

  7. HTC Vive XR Elite Battery Cradle Power LED Replacement, Release the top clips: шаг 7, изображение 1 из 3 HTC Vive XR Elite Battery Cradle Power LED Replacement, Release the top clips: шаг 7, изображение 2 из 3 HTC Vive XR Elite Battery Cradle Power LED Replacement, Release the top clips: шаг 7, изображение 3 из 3
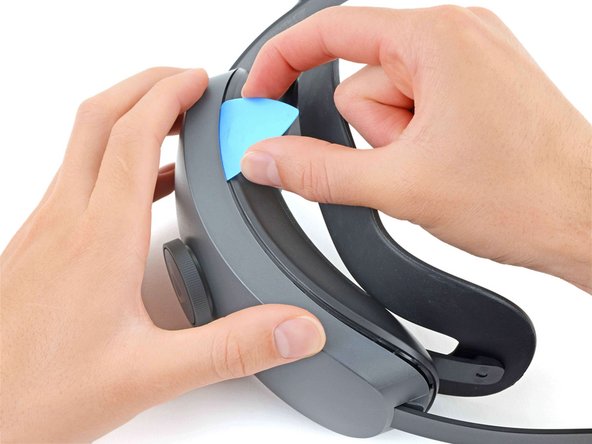
    • Slide the opening pick along the top edge of battery cradle to release its plastic clips.

  8. HTC Vive XR Elite Battery Cradle Power LED Replacement: шаг 8, изображение 1 из 2 HTC Vive XR Elite Battery Cradle Power LED Replacement: шаг 8, изображение 2 из 2
    • Flip the battery cradle over.

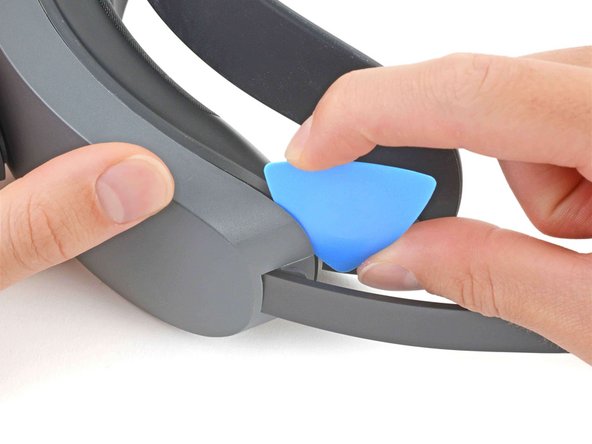
    • Insert the long edge of an opening pick in the gap between the two halves of the battery cradle.

  9. HTC Vive XR Elite Battery Cradle Power LED Replacement, Release the bottom clips: шаг 9, изображение 1 из 3 HTC Vive XR Elite Battery Cradle Power LED Replacement, Release the bottom clips: шаг 9, изображение 2 из 3 HTC Vive XR Elite Battery Cradle Power LED Replacement, Release the bottom clips: шаг 9, изображение 3 из 3
    • Slide the opening pick along the bottom edge of battery cradle to release its plastic clips.

  10. HTC Vive XR Elite Battery Cradle Power LED Replacement, Separate the battery cradle halves: шаг 10, изображение 1 из 2 HTC Vive XR Elite Battery Cradle Power LED Replacement, Separate the battery cradle halves: шаг 10, изображение 2 из 2
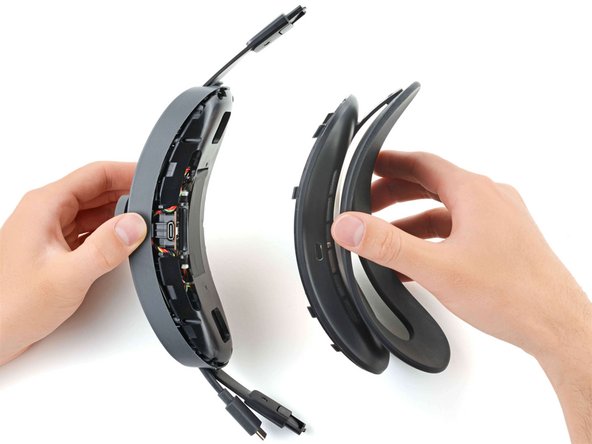
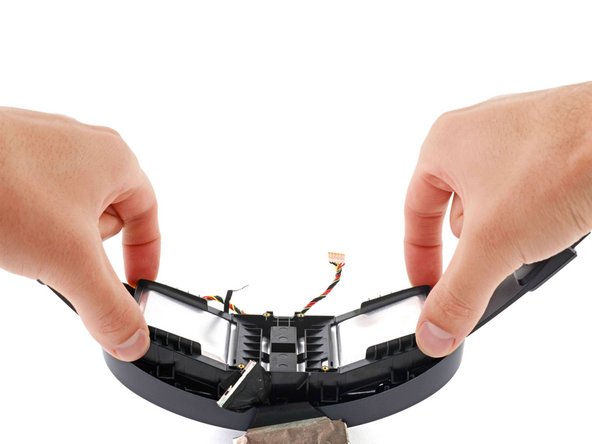
    • Pull apart the two halves of the battery cradle to completely separate them.

  11. HTC Vive XR Elite Battery Cradle Power LED Replacement, Peel back the graphite thermal tape: шаг 11, изображение 1 из 3 HTC Vive XR Elite Battery Cradle Power LED Replacement, Peel back the graphite thermal tape: шаг 11, изображение 2 из 3 HTC Vive XR Elite Battery Cradle Power LED Replacement, Peel back the graphite thermal tape: шаг 11, изображение 3 из 3
    Инструмент, используемый на этом этапе:
    Tweezers
    $4.99
    Купить
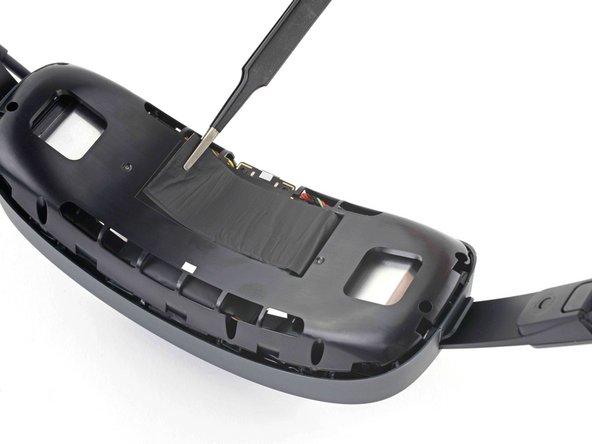
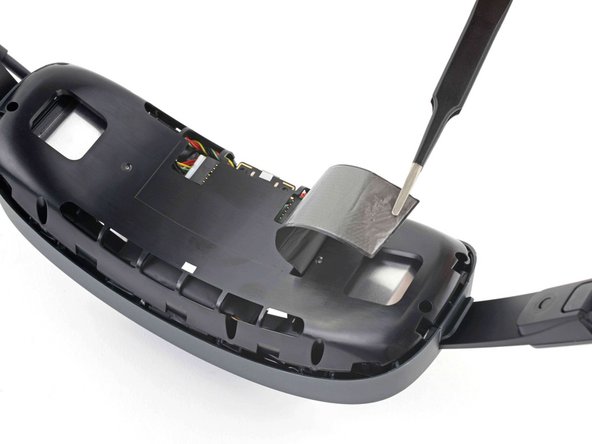
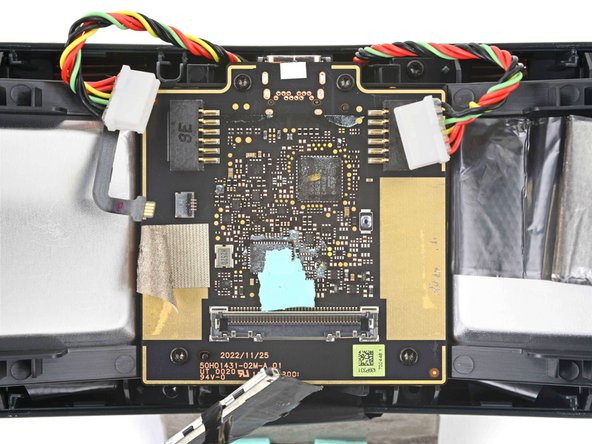
    • Use tweezers to peel back the graphite thermal tape covering the inner plastic frame.

    • If the tape tears a little, don't worry! During reassembly, stick it back in its original place as if it were still one piece

  12. HTC Vive XR Elite Battery Cradle Power LED Replacement, Unfasten the inner plastic frame: шаг 12, изображение 1 из 2 HTC Vive XR Elite Battery Cradle Power LED Replacement, Unfasten the inner plastic frame: шаг 12, изображение 2 из 2
    Инструмент, используемый на этом этапе:
    FixMat
    $36.95
    Купить
    • Use a T5 Torx screwdriver to remove the nine screws securing the inner plastic frame:

    • Five 11.8 mm-long screws

    • Three 5.6 mm-long screws

    • One 5.6 mm-long screw

    • This screw is covered by a piece of black plastic tape. Use tweezers to remove it before unscrewing.

    • Throughout this repair, keep track of each screw and make sure it goes back exactly where it came from.

  13. HTC Vive XR Elite Battery Cradle Power LED Replacement, Remove the inner plastic frame: шаг 13, изображение 1 из 2 HTC Vive XR Elite Battery Cradle Power LED Replacement, Remove the inner plastic frame: шаг 13, изображение 2 из 2
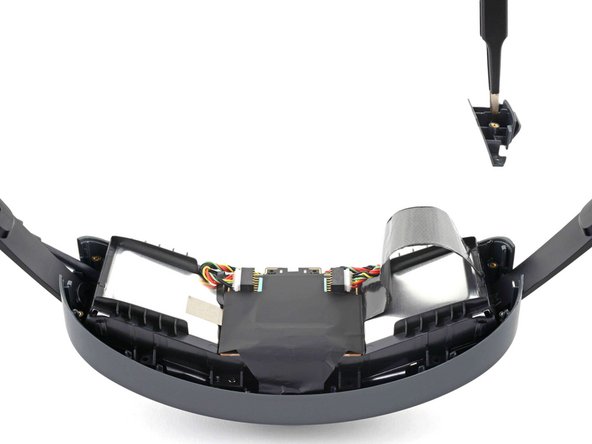
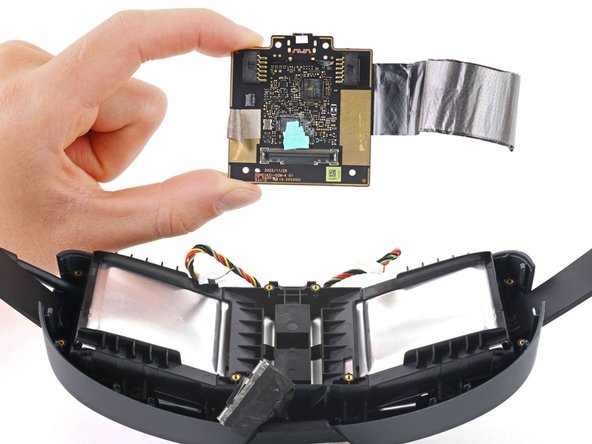
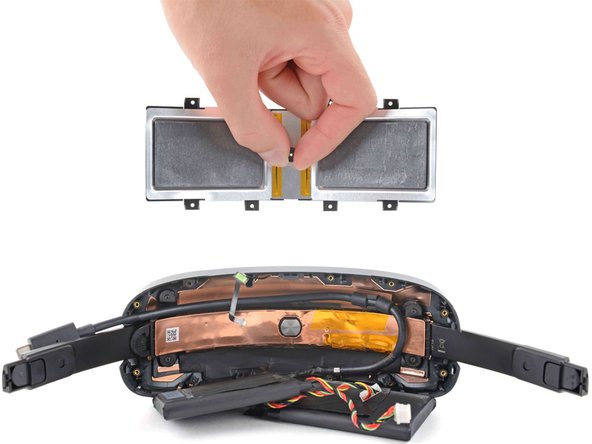
    • Remove the inner plastic frame, making sure to thread the graphite thermal tape through it.

  14. HTC Vive XR Elite Battery Cradle Power LED Replacement, Unfasten the headstrap clips: шаг 14, изображение 1 из 2 HTC Vive XR Elite Battery Cradle Power LED Replacement, Unfasten the headstrap clips: шаг 14, изображение 2 из 2
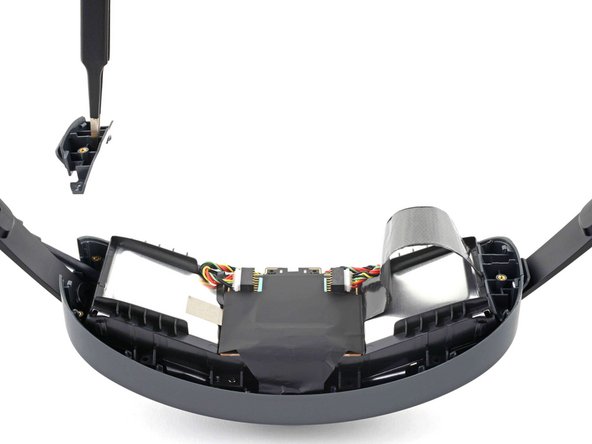
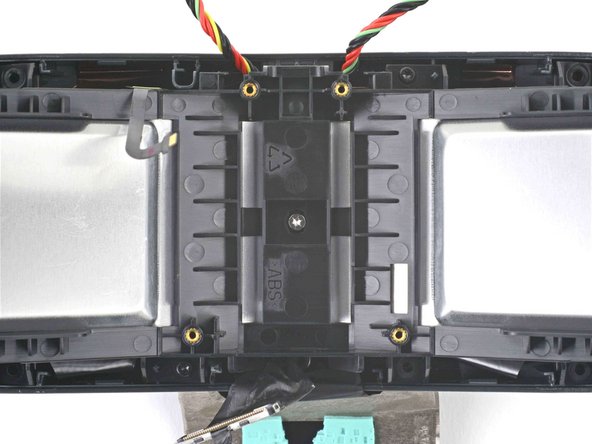
    • Use a T5 Torx screwdriver to remove the two 5.6 mm-long screws securing the headstrap clips.

  15. HTC Vive XR Elite Battery Cradle Power LED Replacement, Remove the headstrap clips: шаг 15, изображение 1 из 3 HTC Vive XR Elite Battery Cradle Power LED Replacement, Remove the headstrap clips: шаг 15, изображение 2 из 3 HTC Vive XR Elite Battery Cradle Power LED Replacement, Remove the headstrap clips: шаг 15, изображение 3 из 3
    Инструмент, используемый на этом этапе:
    Tweezers
    $4.99
    Купить
    • Use tweezers to remove the left and right headstrap clips.

  16. HTC Vive XR Elite Battery Cradle Power LED Replacement, Peel back the battery board thermal pad: шаг 16, изображение 1 из 3 HTC Vive XR Elite Battery Cradle Power LED Replacement, Peel back the battery board thermal pad: шаг 16, изображение 2 из 3 HTC Vive XR Elite Battery Cradle Power LED Replacement, Peel back the battery board thermal pad: шаг 16, изображение 3 из 3
    Инструмент, используемый на этом этапе:
    Tweezers
    $4.99
    Купить
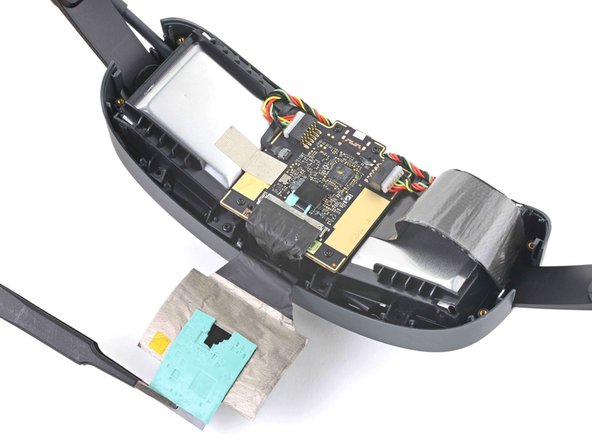
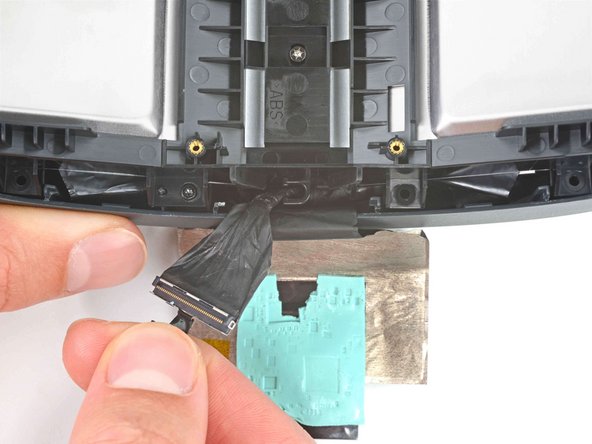
    • Use tweezers or your fingers to peel back the thermal pad covering the battery board.

    • Work slowly to avoid tearing the thermal pad.

  17. HTC Vive XR Elite Battery Cradle Power LED Replacement, Disconnect the batteries: шаг 17, изображение 1 из 3 HTC Vive XR Elite Battery Cradle Power LED Replacement, Disconnect the batteries: шаг 17, изображение 2 из 3 HTC Vive XR Elite Battery Cradle Power LED Replacement, Disconnect the batteries: шаг 17, изображение 3 из 3
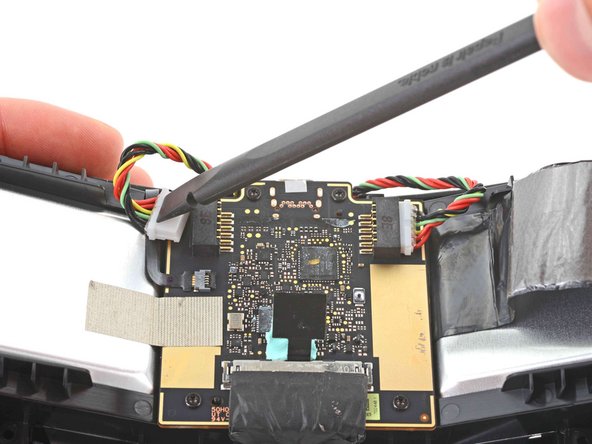
    • Use the flat end of a spudger to push the left and right battery cell connectors out of their respective sockets.

  18. HTC Vive XR Elite Battery Cradle Power LED Replacement, Disconnect the power LED: шаг 18, изображение 1 из 3 HTC Vive XR Elite Battery Cradle Power LED Replacement, Disconnect the power LED: шаг 18, изображение 2 из 3 HTC Vive XR Elite Battery Cradle Power LED Replacement, Disconnect the power LED: шаг 18, изображение 3 из 3
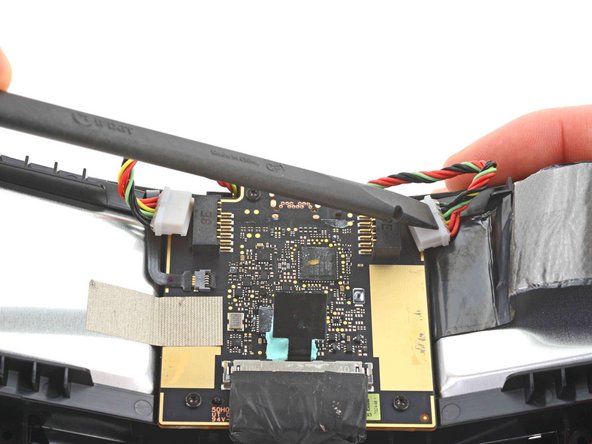
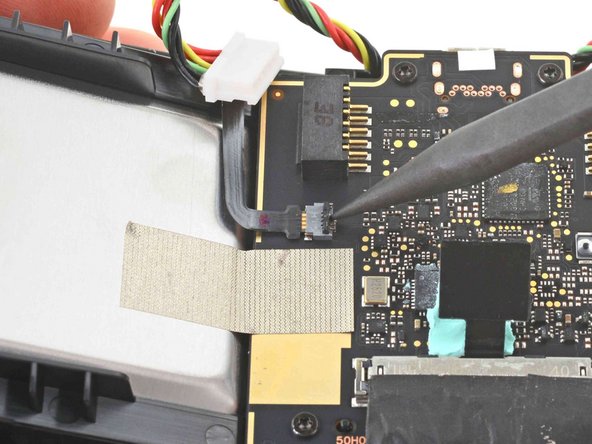
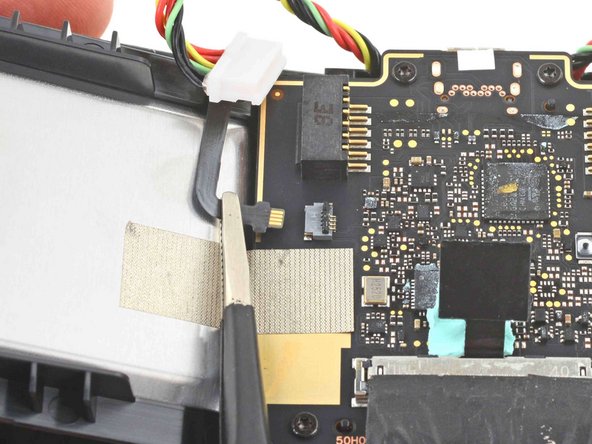
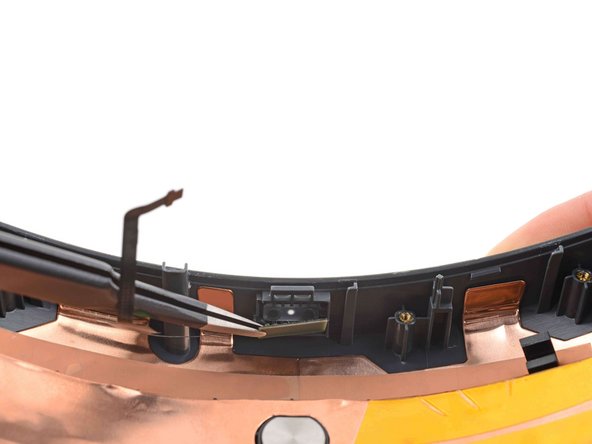
    • Use the point of a spudger to flip up the locking flap on the power LED ZIF connector.

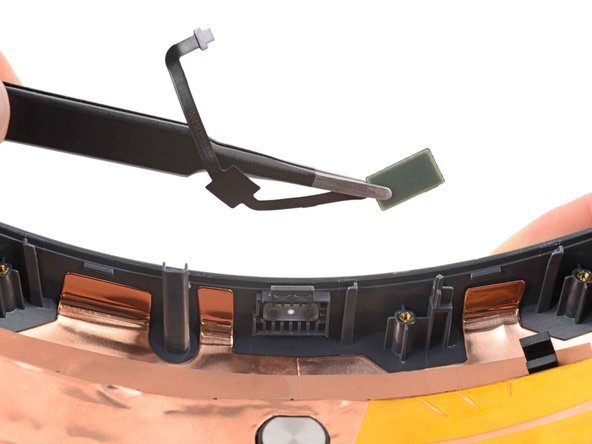
    • Use tweezers or your fingers to disconnect the power LED cable.

    • During reassembly, slide the cable into the connector and close the locking flap. If the cable is getting stuck, gently remove it and realign it before trying again.

  19. HTC Vive XR Elite Battery Cradle Power LED Replacement, Disconnect the USB-C power cable: шаг 19, изображение 1 из 2 HTC Vive XR Elite Battery Cradle Power LED Replacement, Disconnect the USB-C power cable: шаг 19, изображение 2 из 2
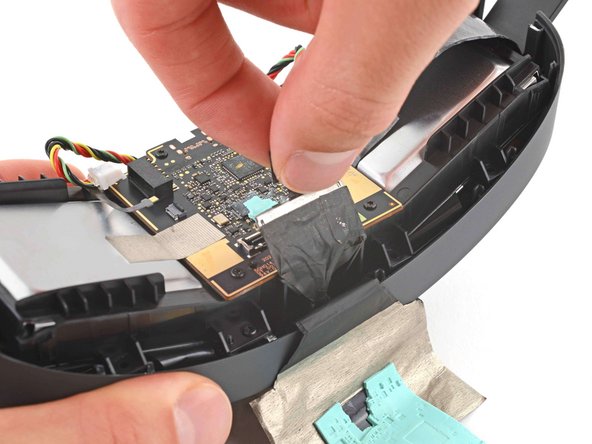
    • Pull the black tab straight up on the USB-C power cable to disconnect it.

    • During reassembly, align the cable directly over the connector and press straight down to reconnect it.

  20. HTC Vive XR Elite Battery Cradle Power LED Replacement, Peel back the conductive tape: шаг 20, изображение 1 из 2 HTC Vive XR Elite Battery Cradle Power LED Replacement, Peel back the conductive tape: шаг 20, изображение 2 из 2
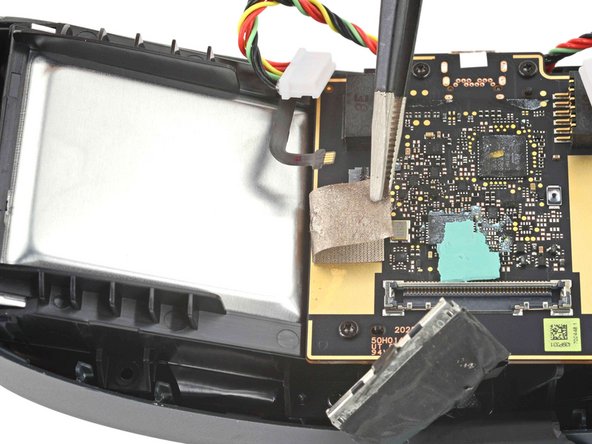
    • Use tweezers or your fingers to peel the conductive tape away from the front metal battery enclosure.

  21. HTC Vive XR Elite Battery Cradle Power LED Replacement, Unfasten the battery board: шаг 21, изображение 1 из 2 HTC Vive XR Elite Battery Cradle Power LED Replacement, Unfasten the battery board: шаг 21, изображение 2 из 2
    • Use a T5 Torx screwdriver to remove the four 4.1 mm-long screws securing the battery board.

  22. HTC Vive XR Elite Battery Cradle Power LED Replacement, Remove the battery board: шаг 22, изображение 1 из 2 HTC Vive XR Elite Battery Cradle Power LED Replacement, Remove the battery board: шаг 22, изображение 2 из 2
    • Remove the battery board.

  23. HTC Vive XR Elite Battery Cradle Power LED Replacement, Unfasten the front metal battery cover: шаг 23, изображение 1 из 2 HTC Vive XR Elite Battery Cradle Power LED Replacement, Unfasten the front metal battery cover: шаг 23, изображение 2 из 2
    • Use a T5 Torx screwdriver to remove the three screws securing the front metal battery enclosure:

    • Two 11.8 mm-long screws

    • One 4.8 mm-long screw

  24. HTC Vive XR Elite Battery Cradle Power LED Replacement, Unclip the USB-C power cable: шаг 24, изображение 1 из 2 HTC Vive XR Elite Battery Cradle Power LED Replacement, Unclip the USB-C power cable: шаг 24, изображение 2 из 2
    • Slide the USB-C power cable to the left to unclip it.

  25. HTC Vive XR Elite Battery Cradle Power LED Replacement, Remove the front metal battery enclosure: шаг 25, изображение 1 из 2 HTC Vive XR Elite Battery Cradle Power LED Replacement, Remove the front metal battery enclosure: шаг 25, изображение 2 из 2
    • Remove the front metal battery enclosure.

  26. HTC Vive XR Elite Battery Cradle Power LED Replacement, Reposition the battery cradle: шаг 26, изображение 1 из 1
    • Stand the battery cradle upright so the battery cells can fold flat on your work surface.

  27. HTC Vive XR Elite Battery Cradle Power LED Replacement, Remove the rear metal battery enclosure: шаг 27, изображение 1 из 2 HTC Vive XR Elite Battery Cradle Power LED Replacement, Remove the rear metal battery enclosure: шаг 27, изображение 2 из 2
    • Remove the rear metal battery enclosure.

  28. HTC Vive XR Elite Battery Cradle Power LED Replacement, Remove the power LED: шаг 28, изображение 1 из 3 HTC Vive XR Elite Battery Cradle Power LED Replacement, Remove the power LED: шаг 28, изображение 2 из 3 HTC Vive XR Elite Battery Cradle Power LED Replacement, Remove the power LED: шаг 28, изображение 3 из 3
    Инструмент, используемый на этом этапе:
    Tweezers
    $4.99
    Купить
    • Use tweezers to pull out and remove the power LED.

Заключение

Compare your new replacement part to the original part—you may need to transfer remaining components or remove adhesive backings from the new part before installing.

To reassemble your device, follow these instructions in reverse order.

Take your e-waste to an R2 or e-Stewards certified recycler.

Repair didn’t go as planned? Try some basic troubleshooting, or ask our Answers Community for help.

Chayton Ritter

Участник с: 08/21/20

18 210 Репутация

Автор 100 руководств

Команда

Guide Team Участник Guide Team

Staff

6 членов

Автор 7 725 руководств

0 Комментариев

Добавить комментарий

Просмотр статистики:

За последние 24часов: 0

За последние 7 дней: 1

За последние 30 дней: 1

За всё время: 65