Перейти к основному содержанию

How to Use the FixHub Web Console

  1. How to Use the FixHub Web Console, Plug in your iron: шаг 1, изображение 1 из 1
    • To use the FixHub Web Console, you need a browser with Web Serial enabled. We recommend Brave, Chrome, Edge, or Opera as they include this functionality enabled by default.

    • Firefox and Safari don't support Web Serial at this time.

    • Plug the cable included with your iron or any USB cable that supports data transfer into your computer.

    • Navigate to iFixit.com/FixHub/console

  2. How to Use the FixHub Web Console, Connect your iron: шаг 2, изображение 1 из 3 How to Use the FixHub Web Console, Connect your iron: шаг 2, изображение 2 из 3 How to Use the FixHub Web Console, Connect your iron: шаг 2, изображение 3 из 3
    • Click Connect my device.

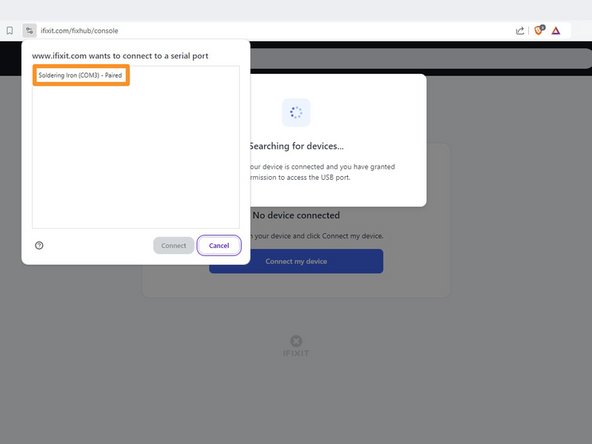
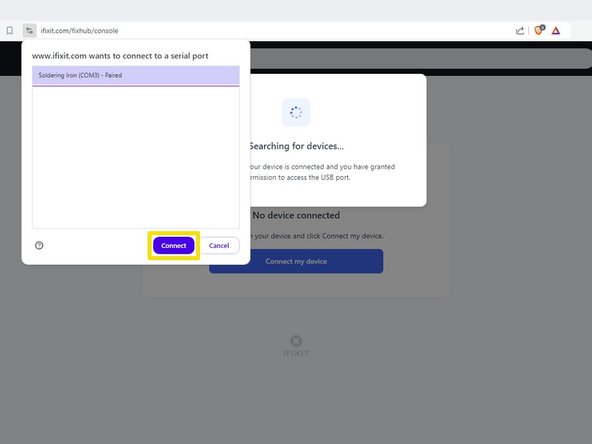
    • Select your Smart Soldering Iron from the pop-up window asking you to connect a serial port.

    • Click Connect.

  3. How to Use the FixHub Web Console, FixHub Web Console layout: шаг 3, изображение 1 из 1
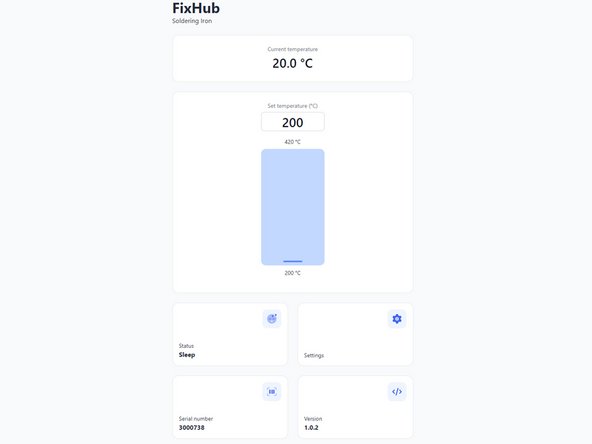
    • Once the FixHub Web Console opens, you'll see temperature settings, current status, and other information:

    • Current temperature shows the tip temperature in real time.

    • Set temperature allows you to change the iron's temperature with a slider.

    • Status reflects the current status of the iron.

    • Settings allows you to change iron settings such as idle temperature and sleep timer.

    • Serial number shows the serial number of the connected iron.

    • Version shows the firmware version of the connected iron.

  4. How to Use the FixHub Web Console, Firmware update: шаг 4, изображение 1 из 3 How to Use the FixHub Web Console, Firmware update: шаг 4, изображение 2 из 3 How to Use the FixHub Web Console, Firmware update: шаг 4, изображение 3 из 3
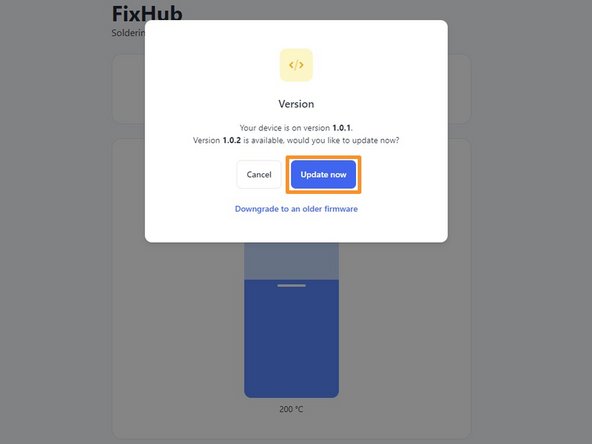
    • Before using the FixHub Web Console, ensure your firmware is up to date.

    • Select the Version box.

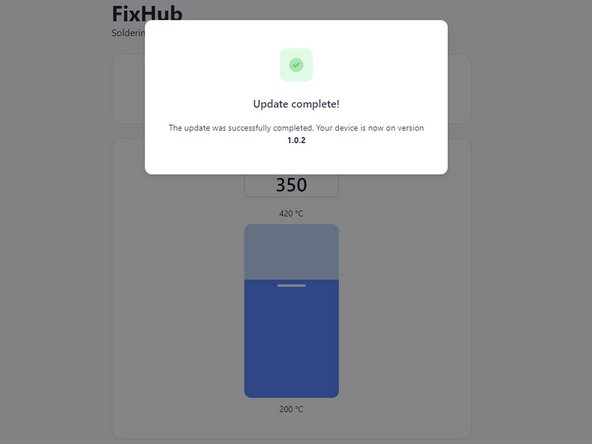
    • Click Update now and wait for the firmware update to complete. Don't disconnect your iron or close the window during the firmware update.

    • If something goes wrong, you can downgrade your firmware by repeating these steps and clicking Downgrade to an older firmware.

  5. How to Use the FixHub Web Console, Adjust the set temperature: шаг 5, изображение 1 из 3 How to Use the FixHub Web Console, Adjust the set temperature: шаг 5, изображение 2 из 3 How to Use the FixHub Web Console, Adjust the set temperature: шаг 5, изображение 3 из 3
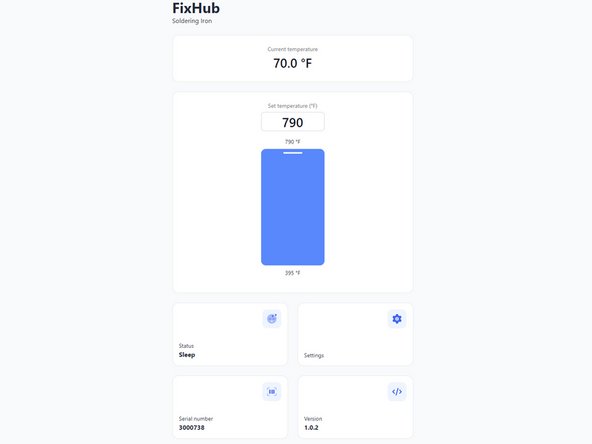
    • Drag the Set temperature slider to your desired temperature from 200 to 420 °C (395 to 790 °F).

  6. How to Use the FixHub Web Console, Change the temperature scale: шаг 6, изображение 1 из 2 How to Use the FixHub Web Console, Change the temperature scale: шаг 6, изображение 2 из 2
    • You can reset all settings back to default at any time.

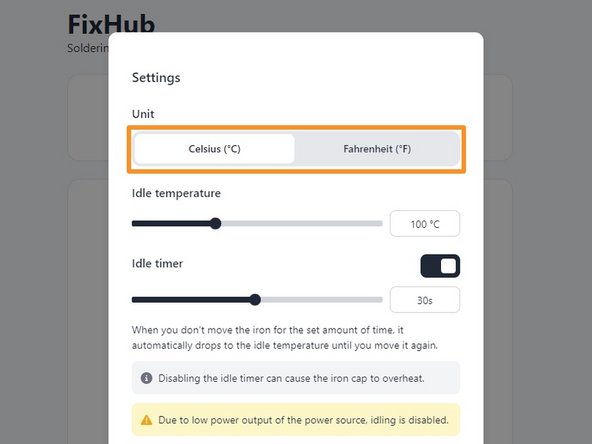
    • Click the Settings box.

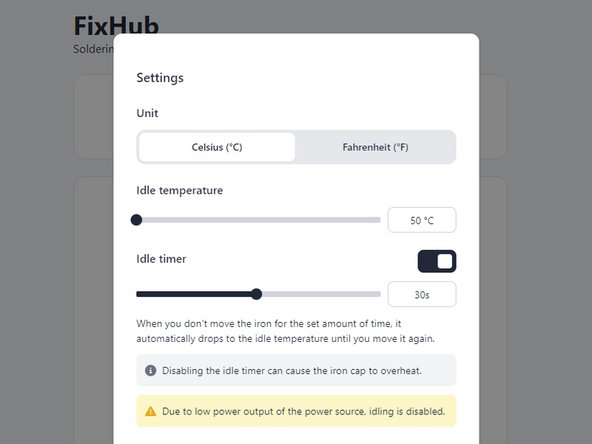
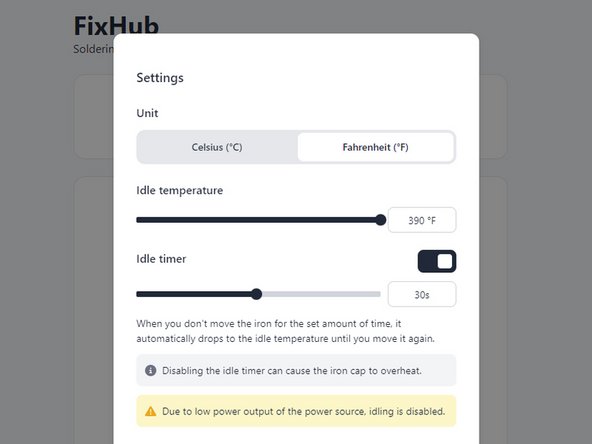
    • At the top of the Settings window, select your desired unit for temperature under the Unit tab.

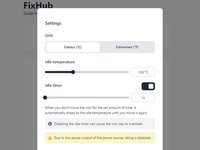
  7. How to Use the FixHub Web Console, Adjust the idle temperature: шаг 7, изображение 1 из 3 How to Use the FixHub Web Console, Adjust the idle temperature: шаг 7, изображение 2 из 3 How to Use the FixHub Web Console, Adjust the idle temperature: шаг 7, изображение 3 из 3
    • A lower idle temperature will extend tip life, while a higher one will resume working temperature more quickly.

    • Drag the Idle temperature slider to your desired temperature from 50 to 200 °C (125 to 390 °F).

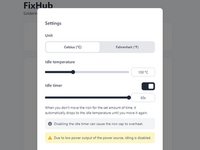
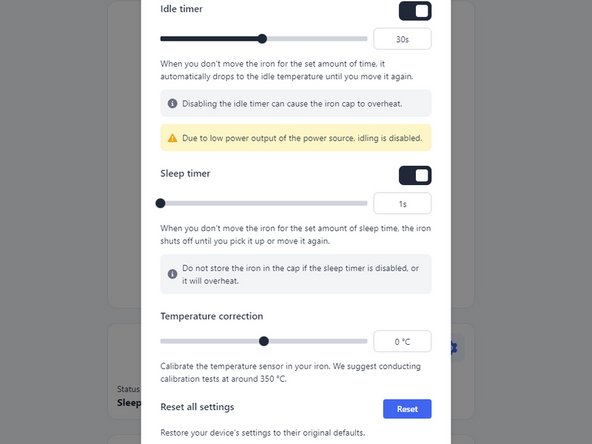
  8. How to Use the FixHub Web Console, Adjust the idle timer: шаг 8, изображение 1 из 3 How to Use the FixHub Web Console, Adjust the idle timer: шаг 8, изображение 2 из 3 How to Use the FixHub Web Console, Adjust the idle timer: шаг 8, изображение 3 из 3
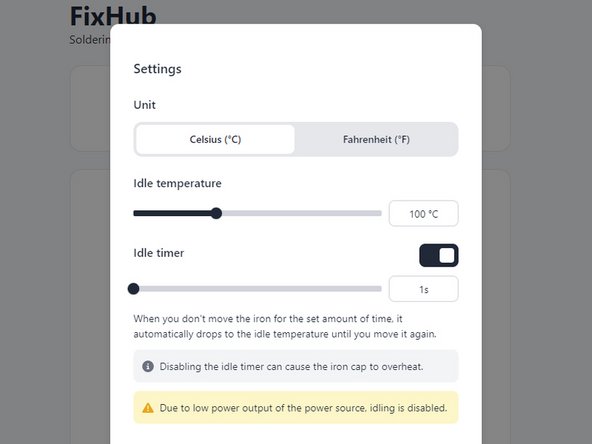
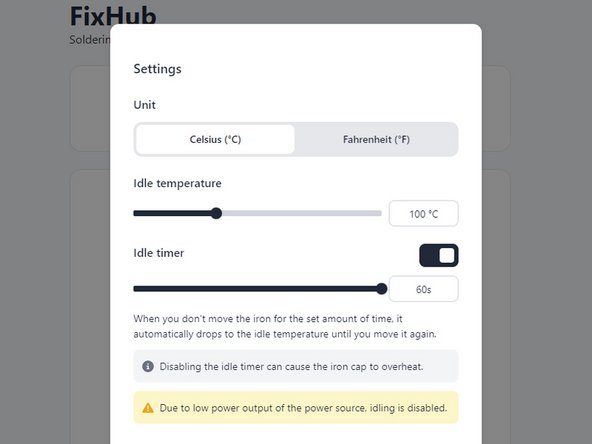
    • The idle timer can be disabled, but it's highly recommended to leave it enabled to prevent the iron cap from overheating and to extend tip life.

    • The idle timer setting adjusts how long the iron must be stationary before entering Idle Mode.

    • Drag the Idle timer slider to your desired time from 1s to 60s.

  9. How to Use the FixHub Web Console, Adjust the sleep timer: шаг 9, изображение 1 из 2 How to Use the FixHub Web Console, Adjust the sleep timer: шаг 9, изображение 2 из 2
    • The sleep timer can be disabled, but doing so will cause the iron cap to overheat and the tip to degrade rapidly.

    • Drag the Sleep timer slider to your desired time from 1s to 60s.

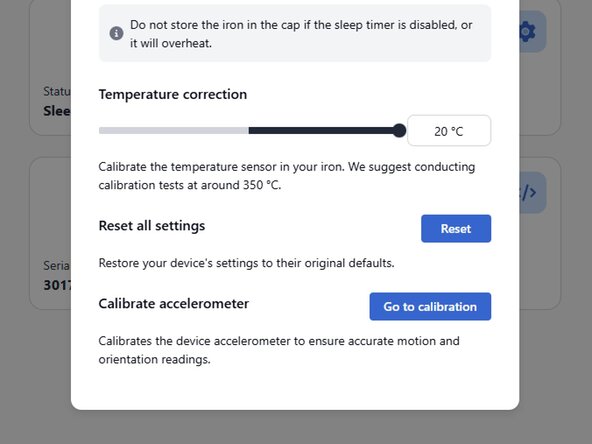
  10. How to Use the FixHub Web Console, Offset temperature based on external calibration: шаг 10, изображение 1 из 3 How to Use the FixHub Web Console, Offset temperature based on external calibration: шаг 10, изображение 2 из 3 How to Use the FixHub Web Console, Offset temperature based on external calibration: шаг 10, изображение 3 из 3
    • This setting lets you offset the temperature settings of your iron tips based on an external temperature sensor.

    • Drag the Temperature correction slider to the desired amount from -20 to +20 °C (-36 to 36 °F).

Заключение

That's it! You're ready to configure your Smart Soldering Iron to your individual preferences.

Still struggling? Try some basic troubleshooting, or ask our Answers community for help.

Nick Schultz

Участник с: 03/24/24

19 304 Репутация

Автор 113 руководств

Команду

iFixit Участник iFixit

Staff

118 членов

Автор 19 605 руководств

0 Комментариев

Добавить комментарий

Статистика просмотров:

За последние 24 час(ов): 4

За последние 7 дней: 21

За последние 30 дней: 94

За всё время: 990