Введение
Is a broken jewelry clasp preventing you from wearing your favorite pieces? It is common for clasps to break, but that shouldn't be why you never wear your jewelry again. There's a quick and simple way to replace them.
Выберете то, что вам нужно
-
-
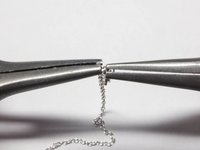
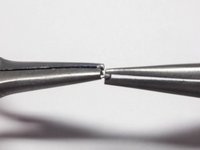
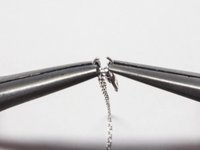
Locate the jump ring, which is the link between the clasp and the chain.
-
On the jump ring, locate the slit.
-
-
-
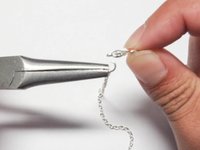
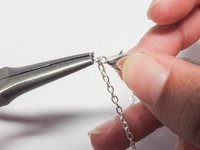
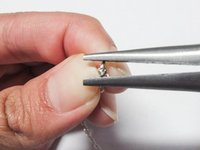
Use one pair of flat nose pliers to gently grip the jump ring on one side of the slit.
-
Use the other pair of flat nose pliers to grip the jump ring on the opposite side of the slit.
-
-
-
-
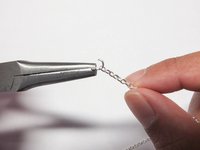
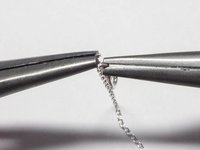
To create a gap large enough to remove the clasp, twist one hand away from you while simultaneously twisting the other hand towards you.
-
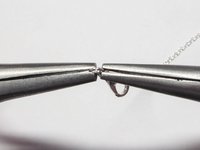
Stop twisting once the gap is large enough for the clasp to be removed, and remove the old clasp.
-
-
-
If a new jump ring is needed, first remove the chain from the old jump ring.
-
Then, grab a new jump ring, locate its slit, and twist it open using the two pliers once again.
-
-
-
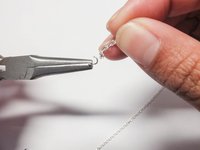
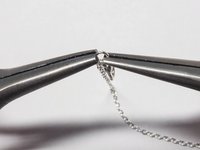
Slide the chain and the clasp onto the new jump ring.
-
To close the jump ring, use one pair of flat nose pliers to grab either side of the slit.
-
Begin twisting the ends of the jump ring toward each other until they meet once again.
-
-
-
If the gap remains, twist the jump ring so that the two ends are not aligned.
-
Keeping one pair of pliers gripped on the jump ring, use the other pair to gently squeeze the rim of the ring bringing the ends closer together.
-
Once this is done, return the nose pliers to their original position on either side of the slit and twist until the two ends meet.
-


Enjoy your newly wearable piece of jewelry! If another clasp breaks, you know exactly how to replace it.
Отменить: Я не выполнил это руководство.
4 человек успешно провели ремонт по этому руководству.
Команда

Cal Poly, Team 30-6, Green Spring 2015 Участник Cal Poly, Team 30-6, Green Spring 2015
CPSU-GREEN-S15S30G6
2 членов
Автор 4 руководств