Перейти к основному содержанию

Kano Computer Kit Complete Power Button Replacement

  1. Kano Computer Kit Complete Power Button Replacement, Power Button: шаг 1, изображение 1 из 2 Kano Computer Kit Complete Power Button Replacement, Power Button: шаг 1, изображение 2 из 2
    • Take off the clear backing of the computer and set it aside.

    • The power button is situated on the red and black rectangular component atop the Raspberry Pi in the top left corner of the case.

  2. Kano Computer Kit Complete Power Button Replacement: шаг 2, изображение 1 из 2 Kano Computer Kit Complete Power Button Replacement: шаг 2, изображение 2 из 2
    • Unplug the red cord from the power module.

  3. Kano Computer Kit Complete Power Button Replacement: шаг 3, изображение 1 из 1
    • Carefully lift the red power button off the Raspberry Pi.

    • The button will require some force to disconnect.

    • Reference our Raspberry Pi Replacement Guide Step 9 to see what it would look like.

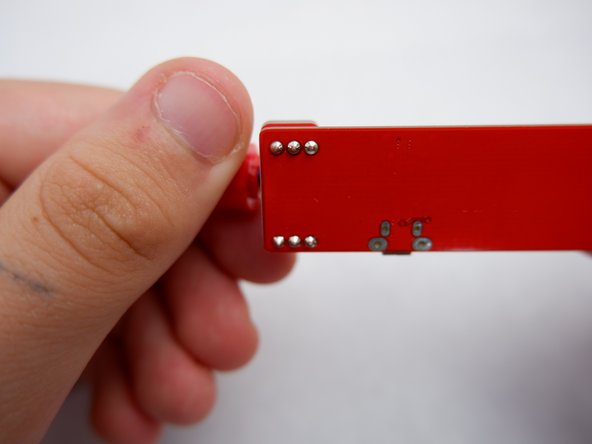
  4. Kano Computer Kit Complete Power Button Replacement: шаг 4, изображение 1 из 2 Kano Computer Kit Complete Power Button Replacement: шаг 4, изображение 2 из 2
    • Gently wiggle the button to get rid of excess glue.

Заключение

To reassemble your device, place the power button back on the Raspberry Pi.

Julia Sherrill

Участник с: 09/20/19

735 Репутация

Автор 5 руководств

Команда

0 Комментариев

Добавить комментарий

Просмотр статистики:

За последние 24часов: 0

За последние 7 дней: 3

За последние 30 дней: 14

За всё время: 981