Перейти к основному содержанию

Lenovo ThinkPad P50s Keyboard Replacement

Выберете то, что вам нужно

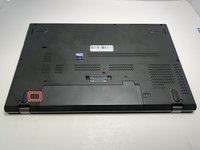
  1. Lenovo ThinkPad P50s Keyboard Replacement, Battery: шаг 1, изображение 1 из 2 Lenovo ThinkPad P50s Keyboard Replacement, Battery: шаг 1, изображение 2 из 2
    • Flip the device over so the bottom is facing you.

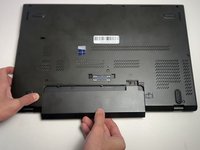
  2. Lenovo ThinkPad P50s Keyboard Replacement: шаг 2, изображение 1 из 2 Lenovo ThinkPad P50s Keyboard Replacement: шаг 2, изображение 2 из 2
    • Use your thumb to slide the right lock switch button outward.

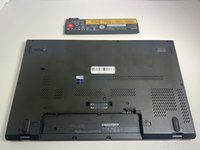
  3. Lenovo ThinkPad P50s Keyboard Replacement: шаг 3, изображение 1 из 3 Lenovo ThinkPad P50s Keyboard Replacement: шаг 3, изображение 2 из 3 Lenovo ThinkPad P50s Keyboard Replacement: шаг 3, изображение 3 из 3
    • With your thumb slide the left lock switch button outward while sliding the battery out with your other hand.

    • When replacing the battery, make sure that the connectors are aligned properly.

    • You may hear a click when the battery is fully seated and the lock engages.

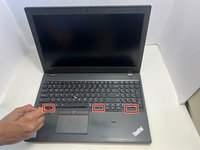
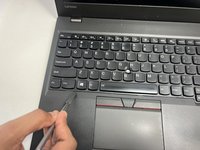
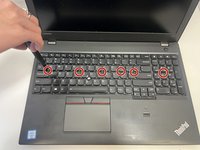
  4. Lenovo ThinkPad P50s Keyboard Replacement, Keyboard: шаг 4, изображение 1 из 2 Lenovo ThinkPad P50s Keyboard Replacement, Keyboard: шаг 4, изображение 2 из 2
    • Use a spudger to push on the indents in the keyboard approximately 2.5 mm forward to reveal the 1.7 mm screws.

    • While the images show a metal spudger, you should avoid using one as it could damage the electronics of the device.

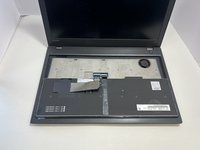
  5. Lenovo ThinkPad P50s Keyboard Replacement: шаг 5, изображение 1 из 2 Lenovo ThinkPad P50s Keyboard Replacement: шаг 5, изображение 2 из 2
    • Use a Phillips #00 screwdriver to remove the six 2.5 mm screws on the keyboard

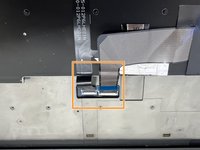
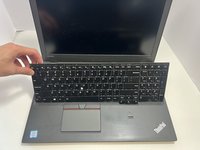
    • Flip the keyboard forward to lie flat on the keys, exposing the two ribbons.

    • Be careful not to rip the ribbons when you flip the keyboard over.

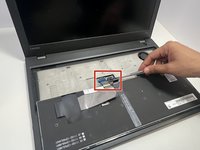
  6. Lenovo ThinkPad P50s Keyboard Replacement: шаг 6, изображение 1 из 3 Lenovo ThinkPad P50s Keyboard Replacement: шаг 6, изображение 2 из 3 Lenovo ThinkPad P50s Keyboard Replacement: шаг 6, изображение 3 из 3
    • Use a spudger or a clean fingernail to flip up the locking flap—this is the unlocked position.

    • Use the widest tool possible to avoid damaging the delicate hinge pins.

    • Use tweezers or your fingers to gently pull the cables out of their sockets.

    • If the cable has a pull tab, use it to grip the cable. You may damage the cable by gripping it directly.

    • To reconnect, make sure the locking flap is flipped up and gently reinsert the cable. Then, flip the locking flap down to secure the cable. The cable should slide into the socket with little to no force. If you're having trouble, remove it, check that the flap is fully unlocked, and try again.

    • Remove the keyboard from the laptop.

Заключение

To reassemble your device, follow these instructions in reverse order. Take your e-waste to an R2 or e-Stewards certified recycler.

Don Pangottil

Участник с: 09/09/24

197 Репутация

1 руководство автора

Команду

Austin Community College, Team 8-3, Watkins Fall 2024 Участник Austin Community College, Team 8-3, Watkins Fall 2024

AUSTINCC-WATKINS-F24S8G3

4 членов

Автор 7 руководств

0 Комментариев

Добавить комментарий

Статистика просмотров:

За последние 24 час(ов): 2

За последние 7 дней: 9

За последние 30 дней: 20

За всё время: 64